
How to Check Your Laptop's Graphics Card
A graphics card, also known as a VGA card or graphic card, is one of the most important components of a laptop. It plays a crucial role for users who frequently play games, edit videos, or work with graphics-intensive applications.
Therefore, knowing the type of graphics card in your laptop is essential to ensure compatibility with the software or games you plan to use. You wouldn’t want to buy a game or software only to find out that your laptop can't run it due to an inadequate graphics card.
In this article, Carisinyal will share some simple ways to check which graphics card your laptop is using.
1. Through Device Manager
Device Manager is a built-in Windows feature that allows you to view all the hardware installed on your laptop, including the graphics card. Here’s how you can access Device Manager to check your graphics card:
- Right-click on the Start button or press Windows + X on your keyboard.
- Select Device Manager from the menu.
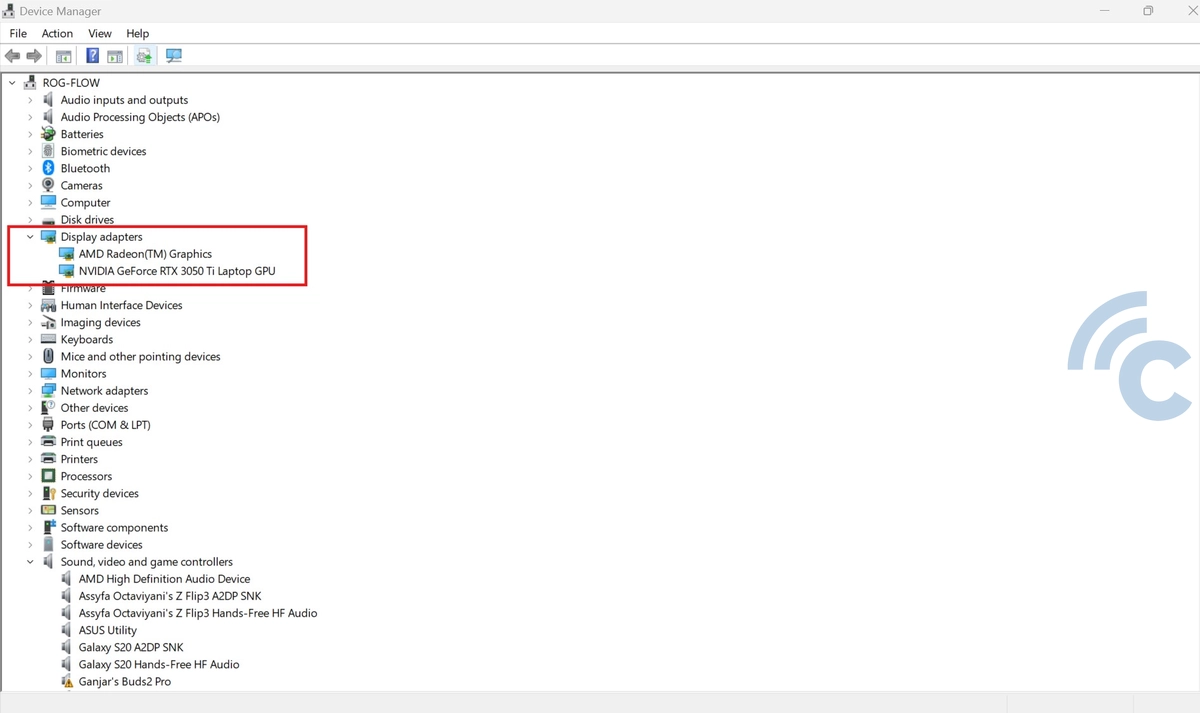
- Double-click on Display Adapters to expand the list.
Under Display Adapters, you will see the name of your installed graphics card, such as Intel HD Graphics, NVIDIA GeForce, or AMD Radeon. If your laptop has dual graphics cards, both names will be displayed here.
Besides this method, you can also access Device Manager through the Settings menu. First, open Settings on your laptop. Select the System tab, and click on Device Manager to open it.
2. Through System Settings
The System Settings in Windows also provide detailed information about the hardware used, including the graphics card. This method is simple and does not require any additional applications. Here’s how to check it:
- Click Start and select Settings.
- Go to the System tab.
- Select Display.
- Scroll down and click Advanced Display.
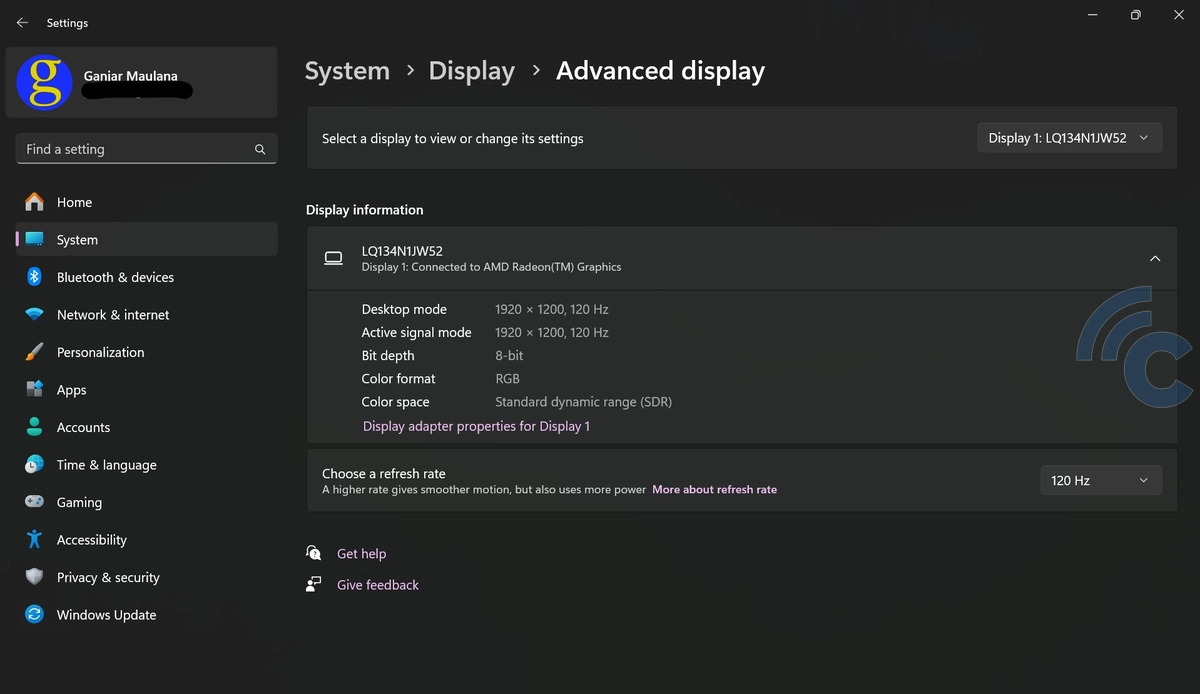
In the Display Information section, you will find details about the graphics card currently in use, including the screen resolution and refresh rate.
3. Using DirectX Diagnostic Tool (dxdiag)
The DirectX Diagnostic Tool (dxdiag) is a built-in Windows feature that provides detailed information about your hardware and software related to graphics and sound. Here’s how you can check your graphics card using dxdiag:
- Press Windows + R to open the Run dialog box.
- Type dxdiag and press Enter.
- Once the DirectX Diagnostic Tool window opens, click the Display tab.
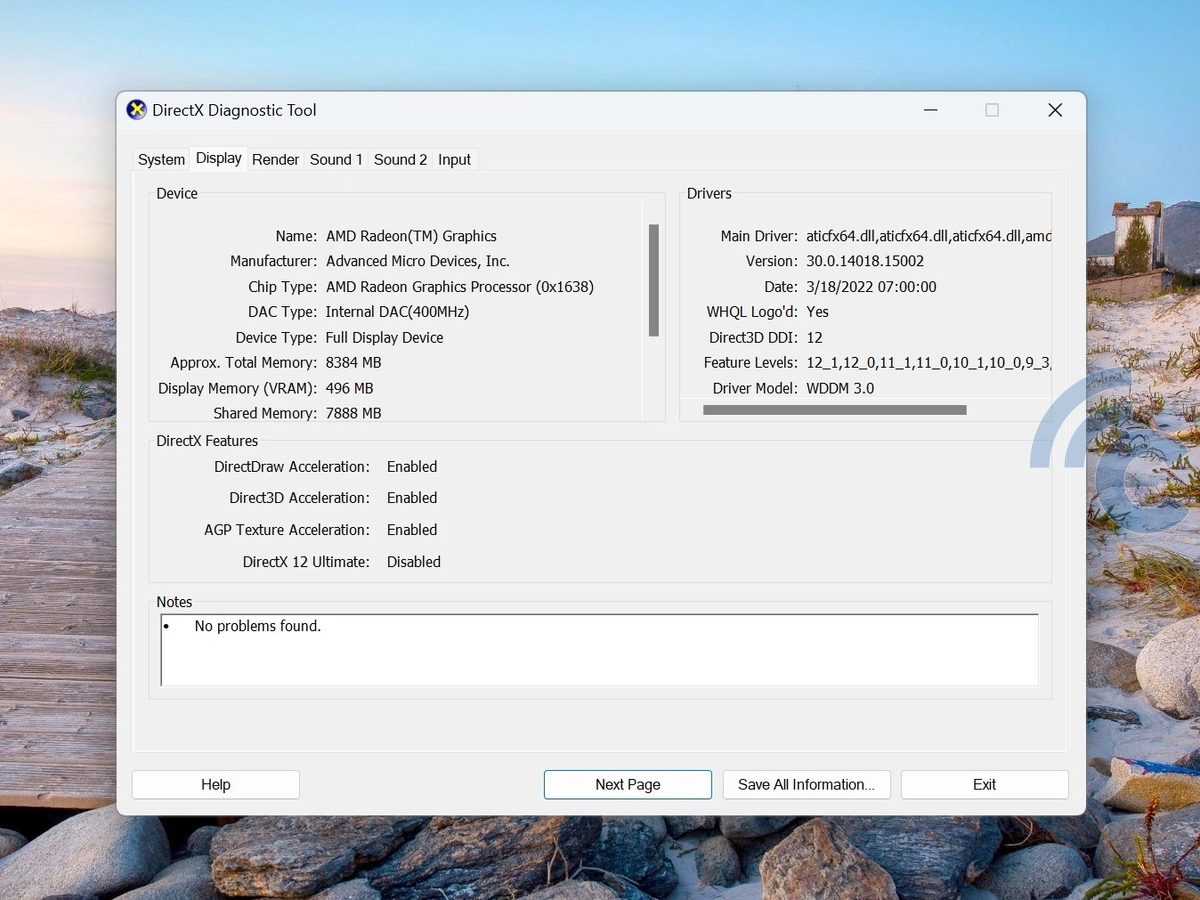
In the Display tab, you’ll find detailed information about your graphics card, including its name, manufacturer, chip type, memory, driver version, and device status.
If your laptop has more than one graphics card, you can check the Render tab to view details about the additional GPU.
Additionally, if your laptop has both an integrated (internal) graphics card and a dedicated (external) graphics card, information for both will be displayed in these tabs. This allows you to see which GPU is currently being used and its specifications.
4. Checking Laptop's Specification Documents
Another commonly overlooked method is checking your laptop’s specification document. This document is usually available on the official website of the laptop manufacturer or in the user manual that comes with the device.
Additionally, the laptop box often lists key specifications, including the graphics card. However, this method won’t be useful if you no longer have the box.
Those are the four easy ways to check the graphics card on your laptop. Hopefully, this tutorial helps and provides a practical solution for you!