
How to Convert WEBP Images to JPG
When downloading images from Google or other websites, you may notice that the files are often in WEBP format. However, the most commonly used image formats are JPG and PNG.
WEBP is an image format developed by Google in 2010. It was designed to help websites load faster by providing high-quality images with smaller file sizes.
This is achieved through advanced compression technology that reduces file sizes by up to 26% compared to the original, without significantly compromising image quality. In fact, WEBP can shrink image sizes by approximately 25% to 34%.
Despite its advantages, the WEBP format may still be unfamiliar to many users. One of its drawbacks is limited compatibility, not all devices and applications support this format, which can make it difficult to open or edit WEBP images.
As a result, many people prefer to convert WEBP files to the more widely supported JPG format for greater flexibility. In this article, the Carisinyal team will walk you through several easy methods to convert WEBP images to JPG.
1. Use Paint App (Windows)
The easiest way to convert a WEBP image to JPG on a Windows laptop is by using the built-in Paint application. Since Paint comes pre-installed, there's no need to download or install anything. Just follow these simple steps:
- Right-click on the WEBP image you want to convert.
- Choose “Open with” and select “Paint”.
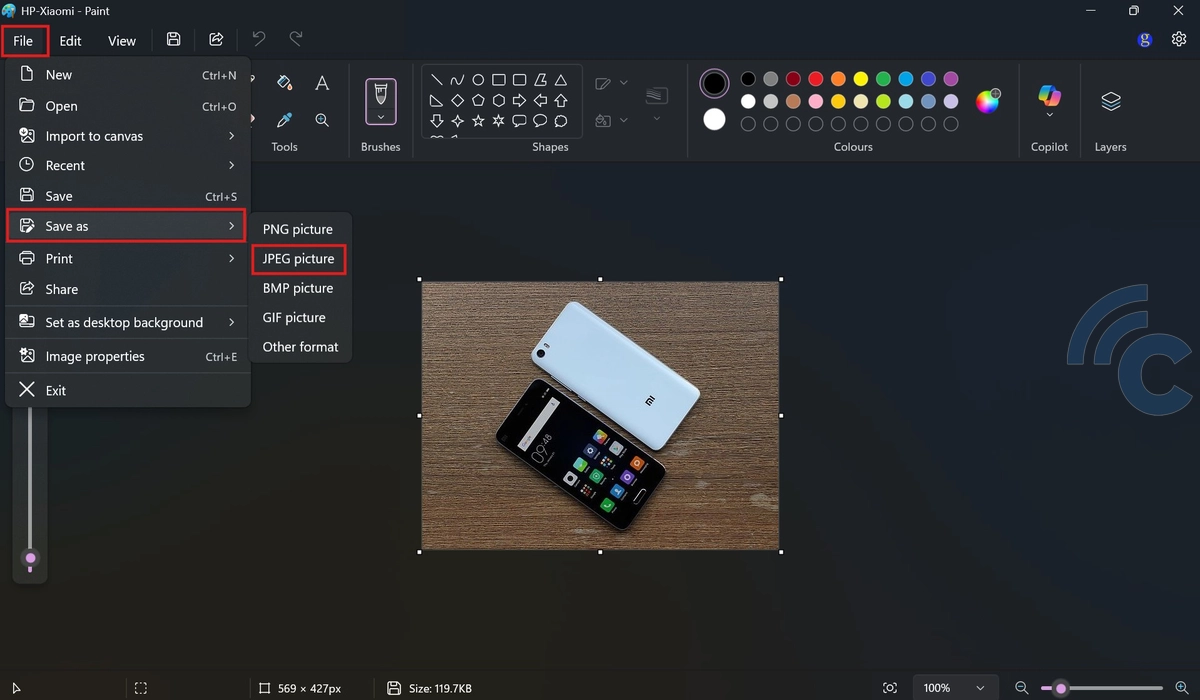
- Once the image opens in Paint, click the “File” menu in the top-left corner.
- Select “Save as” from the dropdown menu.
- Choose “JPEG picture (.jpg, .jpeg)” as the file format.
- Choose the storage location, enter a file name, and click “Save”.
Your image is now successfully converted to JPG format.
2. Use Image Converter App (Android)

If you often deal with WebP images on your phone, installing a special conversion app can also be very helpful. These apps usually have simple features and are easy to use, even for beginners.
There are many apps to choose from in the Play Store, one of which is Image Converter. Here's how to convert images using this app:
- Install the Image Converter app from the Google Play Store.
- Open the app and select the Single Image option if you want to convert one image or Multiple Images if you want to convert several images at once.
- Select the location where you saved your WebP images.
- Select the images you want to convert.
- Set the output format to JPG.
- Finally, tap the Checkmark button to start the conversion process.
Once the process is complete, the converted images will be automatically saved to your phone’s gallery. Don’t forget to check the files to ensure the conversion was successful.
3. Use Online Services
If you prefer not to use a built-in app or install a third-party application, using an online conversion site is a convenient alternative. All you need is a browser to convert WEBP files to JPG format.
There are many online tools available for this purpose, and one reliable option is Ezgif.com. Here’s how to convert WEBP files to JPG using the site:
- Prepare the WEBP image you want to convert.
- Open your browser on a PC or smartphone and go to Ezgif.com.
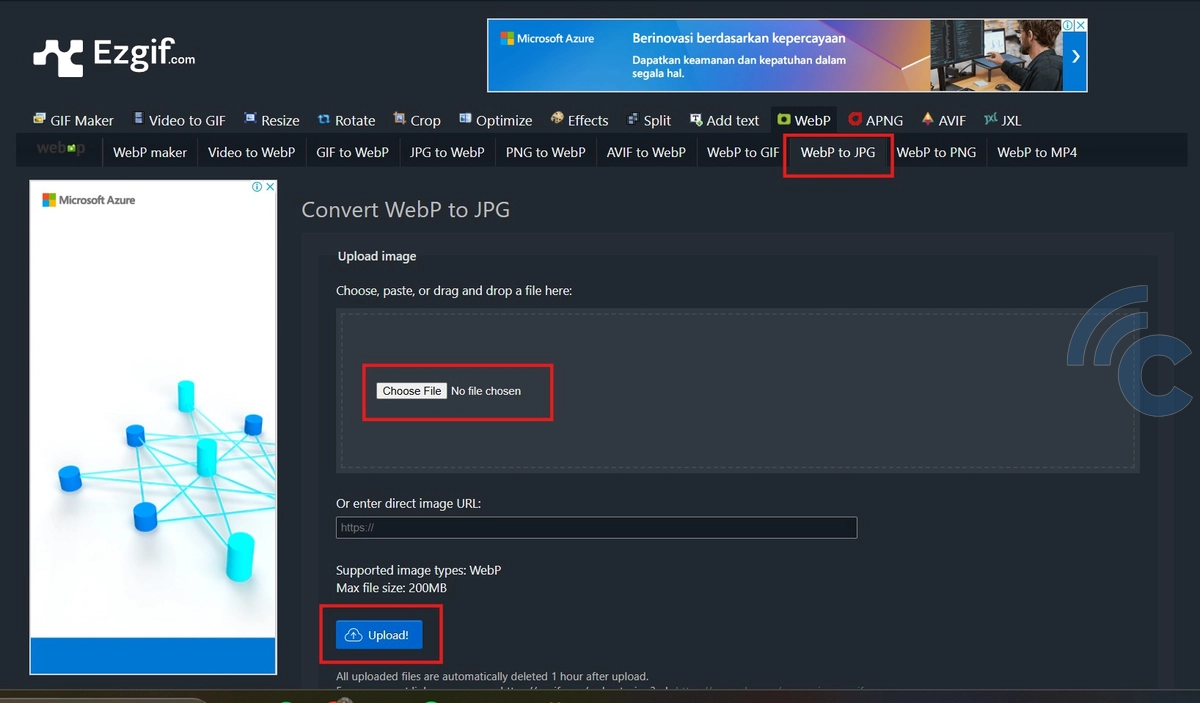
- From the menu at the top, select WebP to JPG.
- Click “Choose File” to upload the WEBP image.
- After selecting the file, click the “Upload” button.
- Once the image is uploaded, click “Convert to JPG”.
- When the conversion is complete, you can save the image by clicking the floppy disk icon or by right-clicking on the image and selecting “Save image as…”.
Note: The maximum file size for uploads on Ezgif.com may be limited, so make sure your file meets the site’s requirements.
Those are some practical methods you can try to convert WEBP images to JPG. By following the steps above, you can easily perform the conversion using either a laptop or a mobile phone.
This process is especially useful when you need to use images on platforms or applications that don’t support the WEBP format. There’s no need for heavy or expensive software, just use built-in tools or free online services that are readily accessible anytime.
Hopefully, this tutorial was helpful!