
10 Ways to Fix Striped Print Results
Nowadays, printers have become essential devices that facilitate the printing of documents and photos. As printers get more sophisticated and have more functions, you can do several jobs using them, such as copying, scanning, and printing color images.
Nonetheless, using a printer frequently comes with its own set of challenges. And one of the most common issues that we often encounter is the presence of lines on the printout.
Obviously, this issue is quite annoying and frustrating. Fortunately, Carisinyal provides ten reliable solutions to overcome the issue of striped printouts. Continue reading this article to get a complete information on this issue.
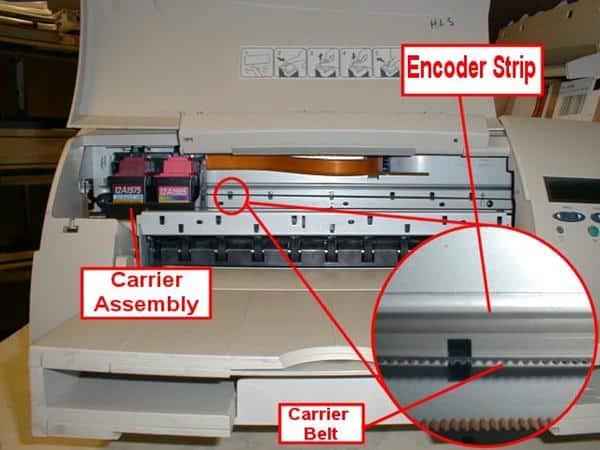
1. Check and Clean the Encoder
On the back of the cartridge there is a long mica-like object, known as the Encoder. This particular object serves as a sensor. Therefore, this Encoder has a significant impact on your printed output, particularly if it is dirty.
Therefore, it's important to inspect the Encoder on your printer. If you notice that it's becoming dirty, be sure to clean it. Cleaning the Encoder is a simple process: just gently wipe it using a tissue to remove any accumulated dust.
Once you've cleaned the Encoder, try to print once more and observe the difference in output quality compared to when it was dirty. Apart from wiping the Encoder with a tissue, you can also remove it and submerge it in lukewarm water. After allowing the Encoder to dry thoroughly, reattach it to its original position.
2. Check and Clean the Cartridge
Examining the printer's cartridge is a further option for dealing with streaky prints. It is well known that this printer's ink storage has a significant impact on the print result. Check the cartridge to see whether the printer ink is clumpy or not.
If the ink in the cartridge is clumpy, then the results of printing will be streaky. Try removing the cartridge and soaking the cartridge head in warm water to resolve this issue. Remember, you only need to soak the head, not the entire cartridge. After soaking, you can then reinstall it, but wait until the head is dry.
3. Clean the Ink Inside the Cartridge
Another way to eliminate streaky prints is by emptying the printer cartridge. To accomplish this, you can suck out all the ink in the cartridge using the injection that is commonly used to fill ink. Once the cartridge is empty, you can then fill the Cartridge with fresh ink.
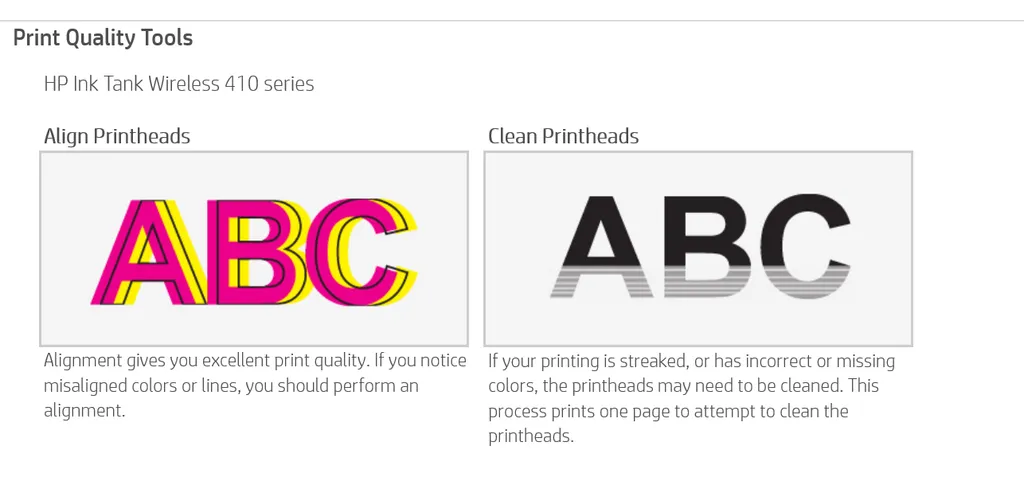
4. Perform Head Cleaning
In general, printers usually have been equipped with functions that assist in resolving printing issues. One of effective method to solve the problem of streaky prints is by doing the Head Cleaning.
Below are the steps to follow:
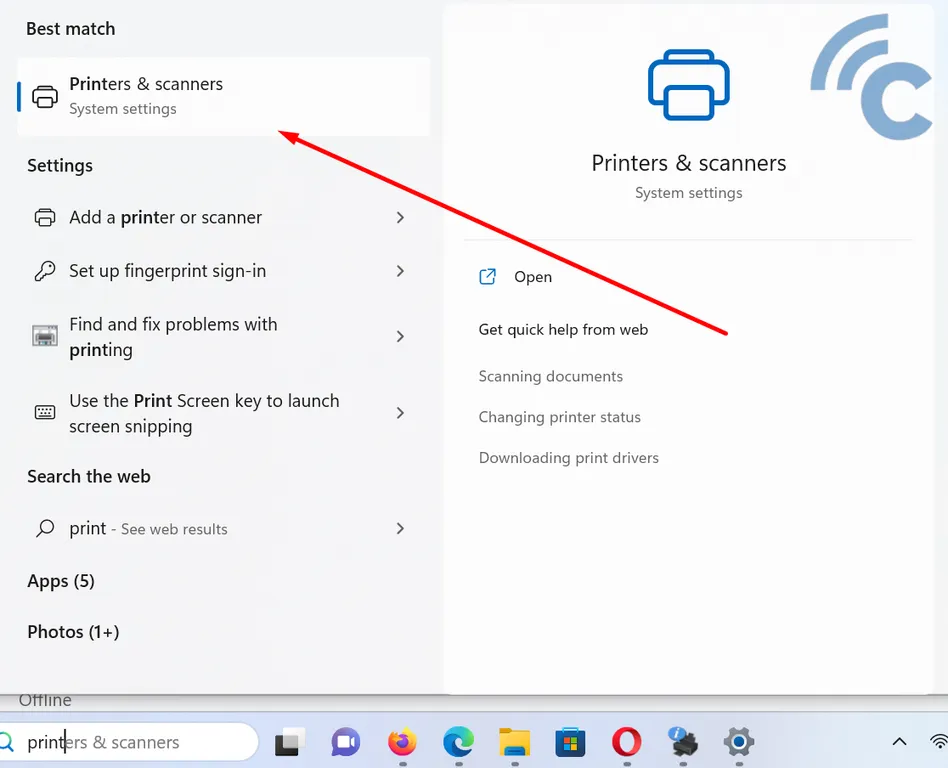
- Users of Windows 10 and 11 can utilize the "Search" feature with keyword "Printers"
- Later, the option "Printers & scanners" will appear.
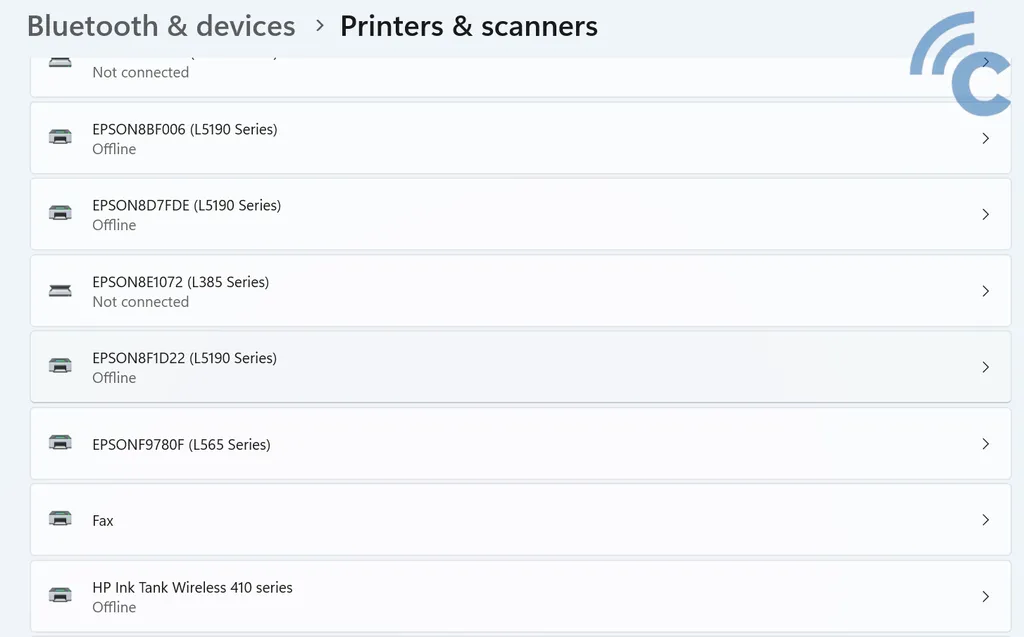
- If your laptop or Desktop PC has been connected to multiple printers, various printer options will appear. Select the printer you wish to repair from the list.
- Next, select the "Hardware Properties" option.
- Select the "Maintenance" option.
- Proceed to operate the Head Cleaning feature by selecting "Cleaning / Deep Cleaning".
- Automatically, your PC will clean the head of the printer cartridge and at the same time, improve the ink flow.
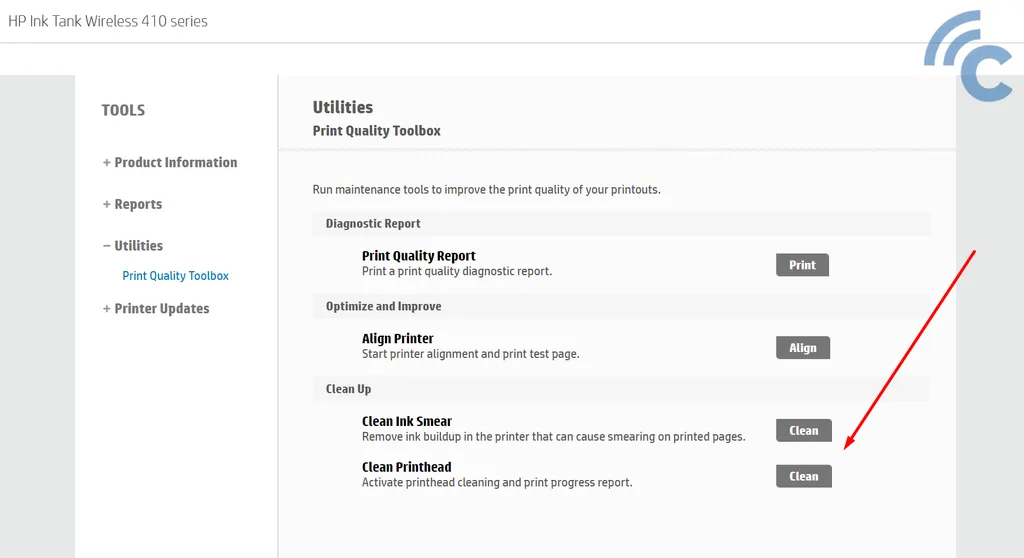
For some printer types, the maintenance option may not appear. Usually it happens as the printer brand has a special application for settings and maintenance. For example, HP brand uses the "HP Smart" application for printer settings, including cleaning and other settings.
Therefore, try to install the printer application based on the brand used on your Windows PC.
5. Using the Color Cartridge Option When Printing
Did you perform Head Cleaning but the print result still has lines? If so, you can try changing the setting to Color Cartridge. Follow these steps:
- You need to open Microsoft Office or another word processing application and immediately press CTRL + P.
- Click on the "Properties" menu and continue by selecting the "Maintenance" menu.
- Choose the Ink Cartridge Settings feature and immediately select "Color Only". Finally, you only need to click "OK".
- When finished, feel free to reprint.
If the menu does not appear, it may be because the printer brand uses a specialized application to handle other settings as described in point 4.
6. Improve Print Quality
Did you know that improving print quality is one of the most effective solutions for dealing with streaky prints? Some people have tried this way and it turns out that the print results are better without any lines.
Therefore, Carisinyal would like to suggest you to improve the print quality with the following steps.
- Open Microsoft Office or other word processing applications and immediately press CTRL + P.
- Select "Printer Properties".
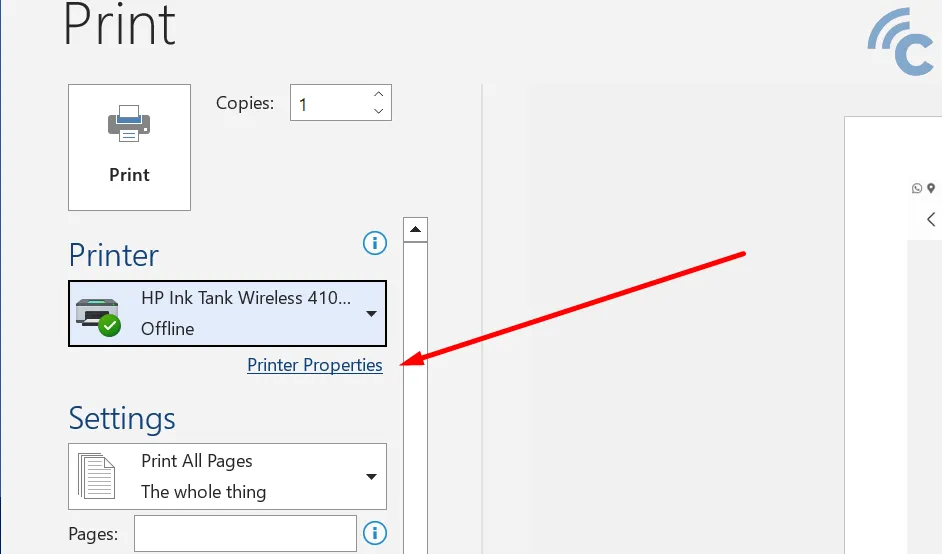
- Select the "Paper/Quality" tab
- In the "Print Quality" section, change it to "Best".
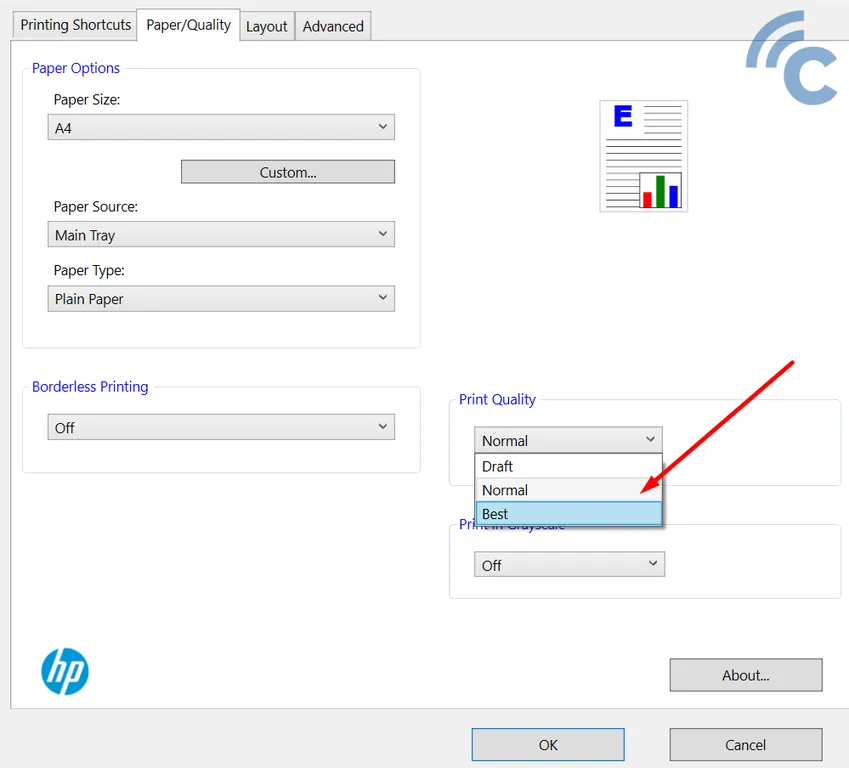
- Then do the printing. Wait and see the result, the lines on the printout might disappear.
Things to note while executing this step, there are several disadvantages to this method. Firstly, the print time is longer. Secondly, it consumes a considerable amount of ink, which may lead to ink wastage.
7. Change Cartridge
In case the previous methods didn't work, the issue could lie in a damaged cartridge within your printer. Therefore, we recommend you to replace the cartridge for improved print results and to prevent the occurrence of streaky prints.
In addition, replacing the cartridge also makes the printer last longer. The reason is, a damaged cartridge has the potential to damage all parts of the printer. Instead of waiting for the printer to break down and eventually become unusable, it's better to just replace the cartridge.
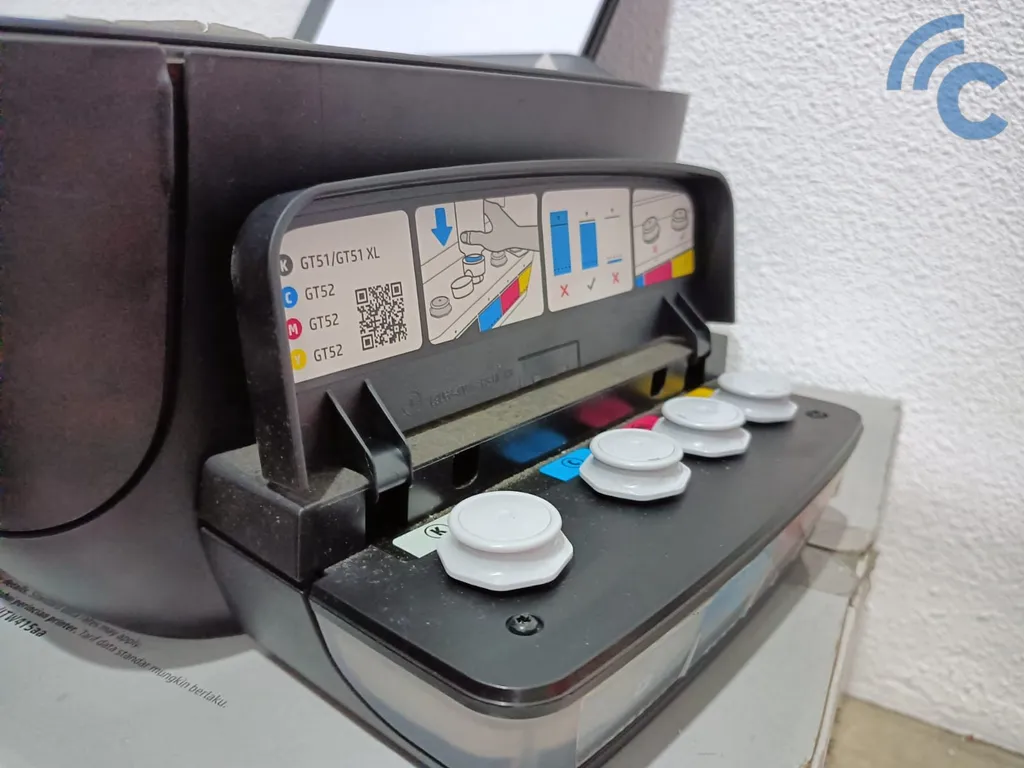
8. Check the Infusion Bottle

Especially for printer owners who use infusion printers, you can check the ink infusion bottle on the cartridge as one of the solutions to overcome streaky prints. It could be that the infusion bottle is not flowing properly into the cartridge, causing unsatisfactory print results.
Therefore, carefully check the flow of ink liquid through the infusion bottle by unplugging the end of the infusion hose. Then, continue by suctioning the hose using a modified injection until the ink reaches the end of the hose. If so, immediately insert the hose again into the Cartridge hole.
9. Utilize the Printer Warranty
If you have recently purchased a printer and the print quality does not meet your expectations, make sure to utilize your printer warranty. Consult with the store where you bought the printer to address the issue and seek their assistance.
Alternatively, you can directly submit a warranty claim with the brand's service center. For instance, if you own an EPSON printer, visit EPSON's customer service. This approach applies to other printer brands as well, such as HP, Canon, or Brother.
By doing so, the store or printer manufacturer can promptly identify and address any issues with your printer. You can rest assured that your printer will be in good hands, as it will be properly managed under the official warranty.
10. Take it to the Expert
However, if your printer's warranty has expired and you don't want to try to fix it by yourself, it's better to consult professionals. In other words, take your printer to a specialized service center, so you don't have to worry about causing further damage.
Instead of trying to fix it on your own without clear instructions, which could result in more harm, it's preferable to seek assistance from a dedicated printer service provider.
These are some ways to deal with streaky prints. You can try these ten methods at home on your own. However, if you're unsure or hesitant, it's best to take your printer directly to a specialized service center. If you've had a similar experience, feel free to share it in the comments section!