
How to Set F4 Paper Size in Microsoft Word and Excel
F4 paper, also known as Folio, is a common choice for administrative and office tasks. It’s slightly longer than A4, measuring around 210 mm x 330 mm (8.27 inches x 13 inches). However, the exact size can differ slightly depending on the country or paper manufacturer.
F4 is often preferred for documents that need more room, like tables, charts, or lengthy text. If you’re wondering how to set the F4 paper size in Microsoft Word and Excel, here’s a simple guide.
Setting F4 Paper Size in Microsoft Word
By default, Microsoft Word doesn’t include F4 in its standard paper size options, as it typically focuses on sizes like A4, A3, Letter, and Legal. But don’t worry—you can manually set it up with these steps:
- Open Microsoft Word and the document you want to adjust.
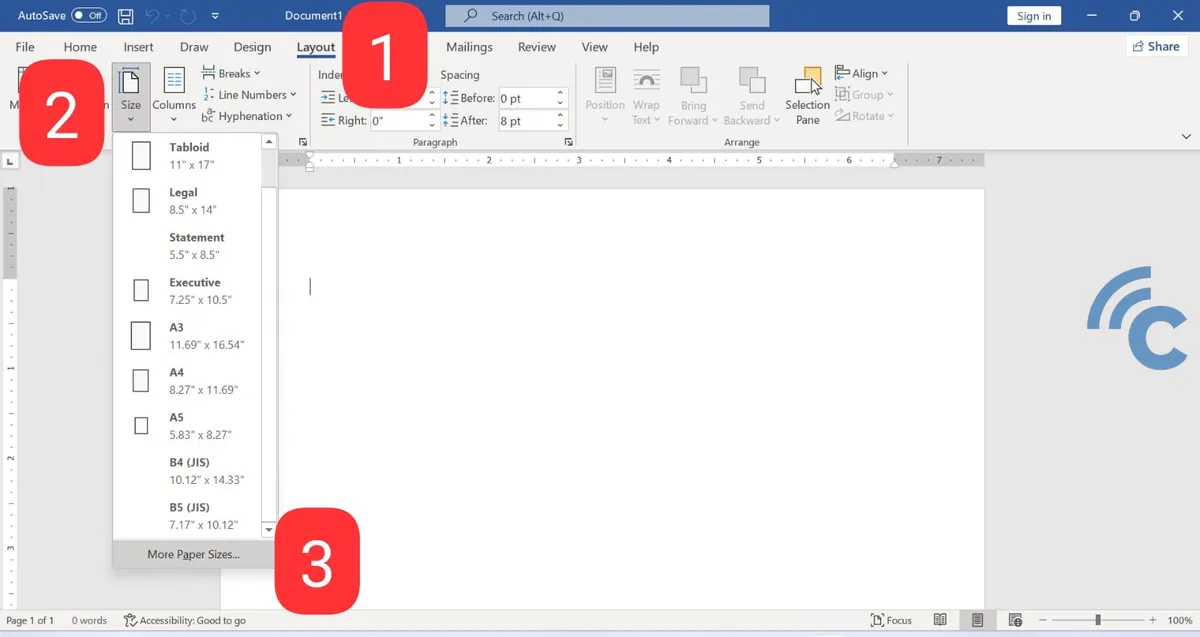
- Go to the “Layout” tab.
- Click “Size” to open the dropdown menu. If F4 isn’t listed, choose “More Paper Sizes” at the bottom.
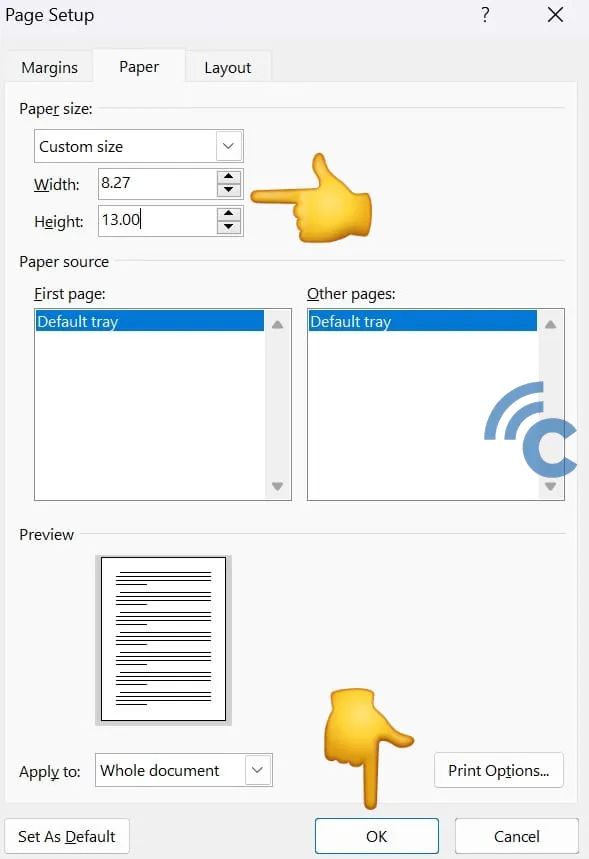
- In the “Page Setup” window, switch to the “Paper” tab.
- Under “Paper size”, select “Custom Size”.
- Enter 8.27 inches (or 210 mm) for width and 13.00 inches (or 330 mm) for height.
- Click “OK” to apply.
Once done, your document will be set to the F4 paper size, and you can continue working on it as needed.
How to Set F4 Paper Size in Excel
Setting the F4 paper size in Microsoft Excel is possible, but it takes a slightly different approach since this option isn’t available directly in the application. Follow these simple steps
1. Open Printers & Scanners Settings
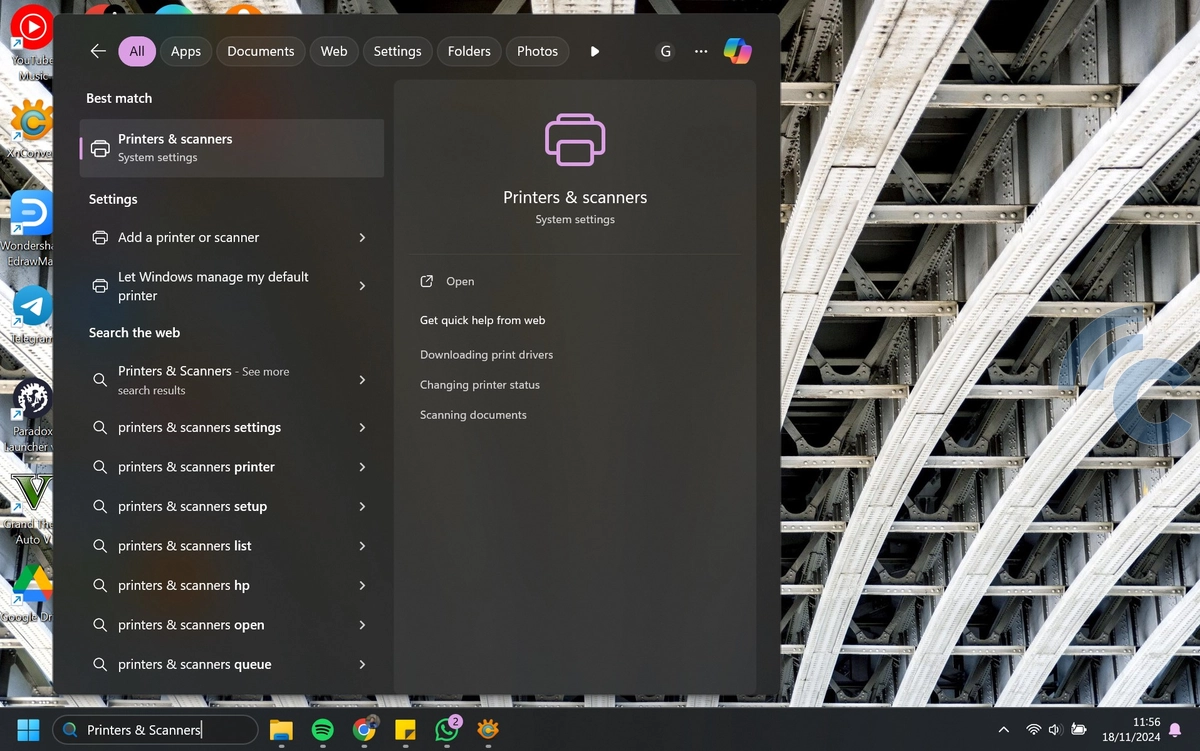
Start by opening the Printers & Scanners settings on your computer. You can do this by typing “Printers & Scanners” into the search bar and selecting it from the search results.
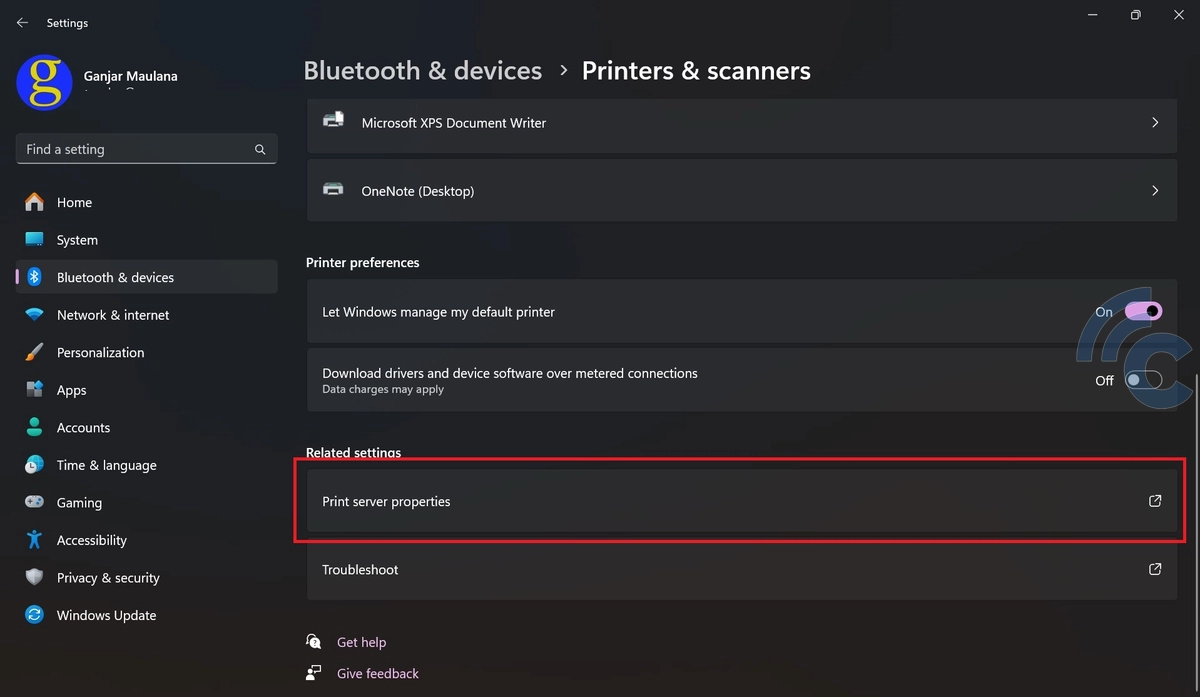
Once the settings page opens, you’ll see a list of connected printers and scanners. Scroll down to the bottom and click on Print Server Properties.
2. Add the F4 Paper Size
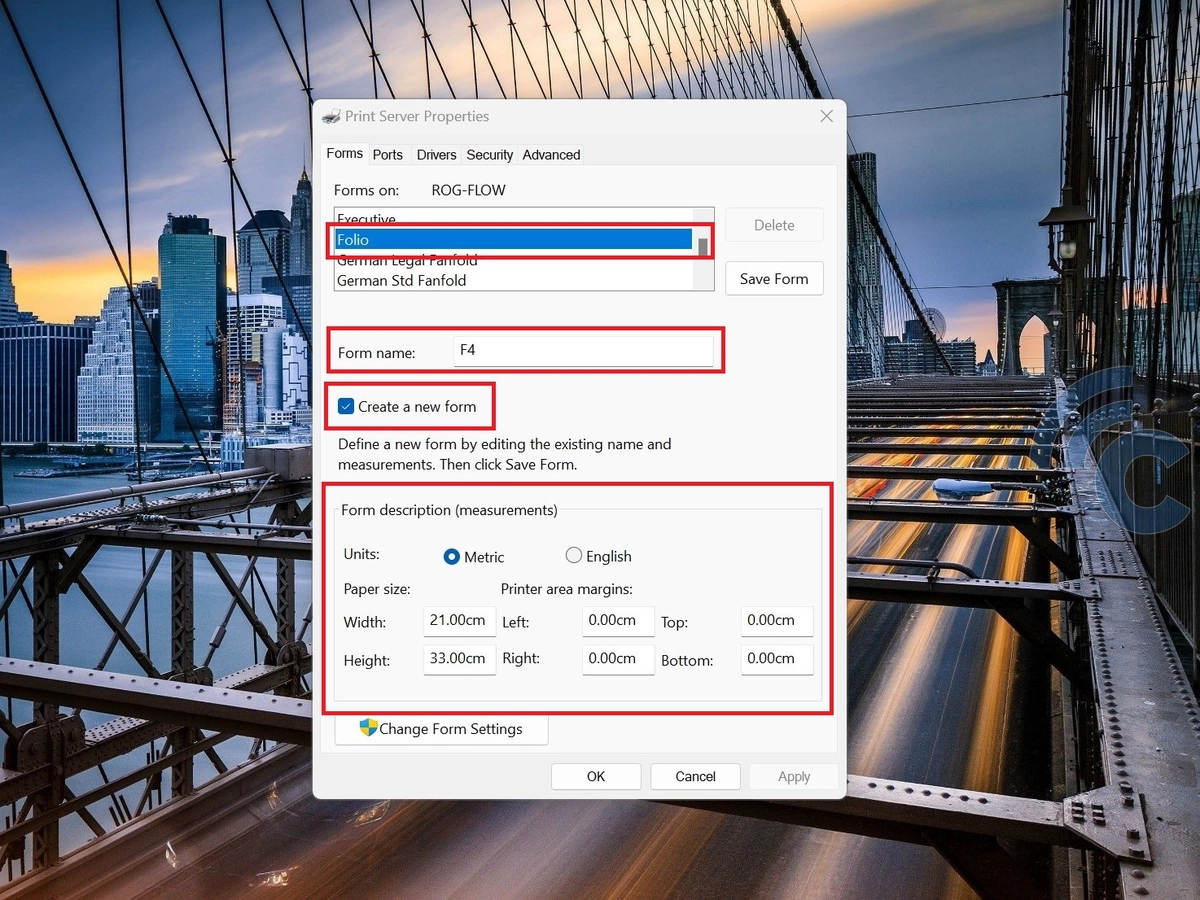
In the Print Server Properties dialog box, you’ll create a new paper size that can be used in Excel and other applications. Here’s how:
- Under the Forms section, scroll through the list and select Folio.
- Check the box for Create a new form.
- In the Form name field, rename Folio to F4.
- In the Form description section, choose Metric units.
- Adjust the dimensions; set Width to 21.00 cm, and Height to 33.00 cm.
- Click Save Form, then click OK to finish.
3. Adjust Printer Settings in Excel


Open Microsoft Excel and either create a new document or open an existing one. Once your document is ready, press Ctrl + P to access the printer settings.
On the printer settings page, select Microsoft XPS Document Writer as your printer. Then, click on the Paper Size dropdown and choose F4. At this point, your Excel worksheet will be set to the F4 paper size.
If you change the printer, the F4 paper size will remain applied, even if the paper size is displayed as Custom Page Size. Just make sure you don’t switch to another paper size when changing the printer.
By following these steps, your Excel sheet will be properly adjusted for F4 paper size. This is especially helpful for printing data or graphs, ensuring everything fits neatly on F4 paper.
For both Word and Excel, always double-check your printer settings before printing. Make sure your printer supports F4 paper and is configured correctly to avoid any issues with your printout.