
3 Easy Ways to Shut Down PC Automatically
If you own a computer, you may often forget to turn it off. This is because shutting down a computer requires several steps before it completely powers down.
This is especially common when you're in a hurry or using your computer late at night. Forgetting to turn it off not only increases your electricity bill but, over time, can also lead to potential damage to its components.
If you often feel too lazy to shut down your computer manually, don't worry! In this article, Carisinyal will share some easy ways to schedule an automatic shutdown at a preset time.
1. Using Task Scheduler
The first method involves using an application called Task Scheduler. Task Scheduler is a built-in Windows tool that allows you to automate specific tasks, including shutting down your computer at a scheduled time.
With Task Scheduler, you can set your computer to shut down automatically, even on a daily basis. Here’s how to do it:
1. Open Task Scheduler
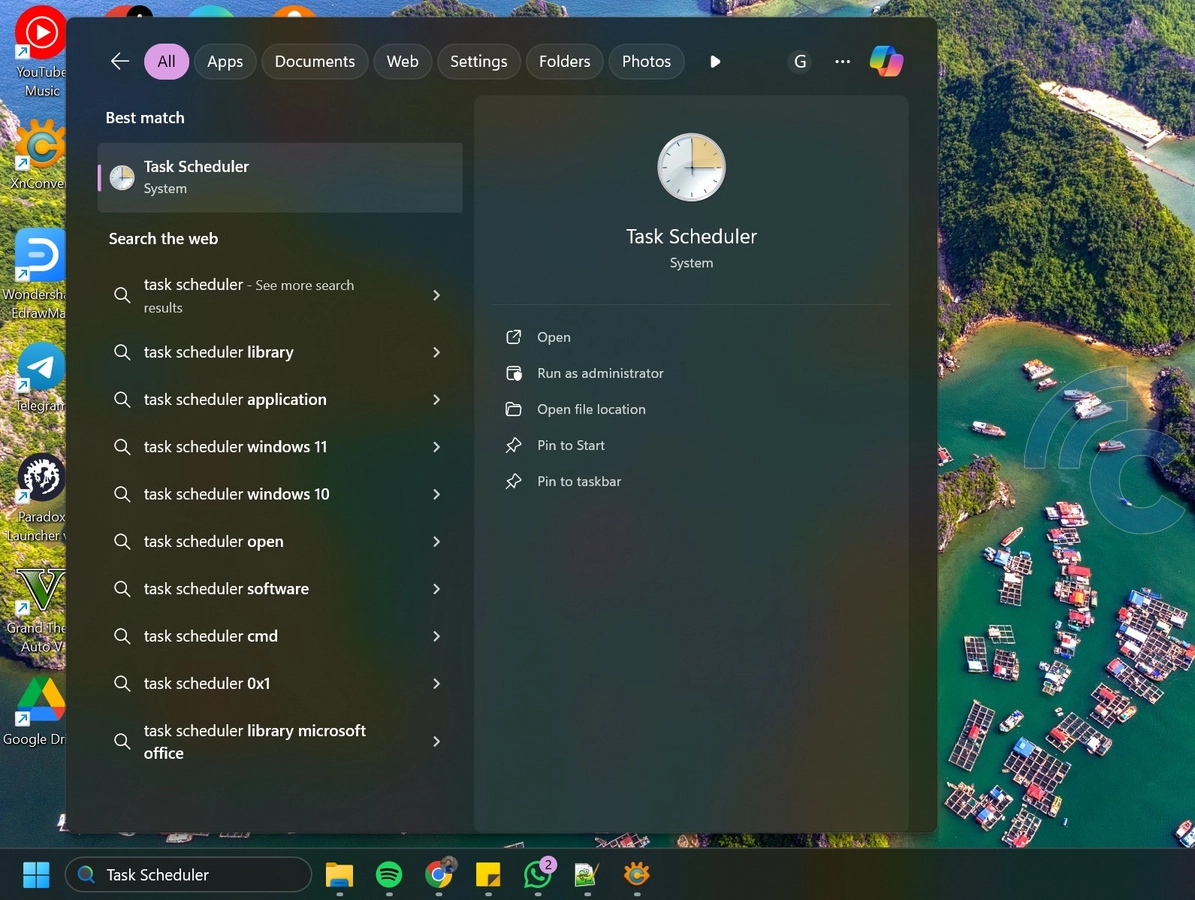
First, type "Task Scheduler" in the Windows search bar, then select the app from the search results.
2. Create a New Task
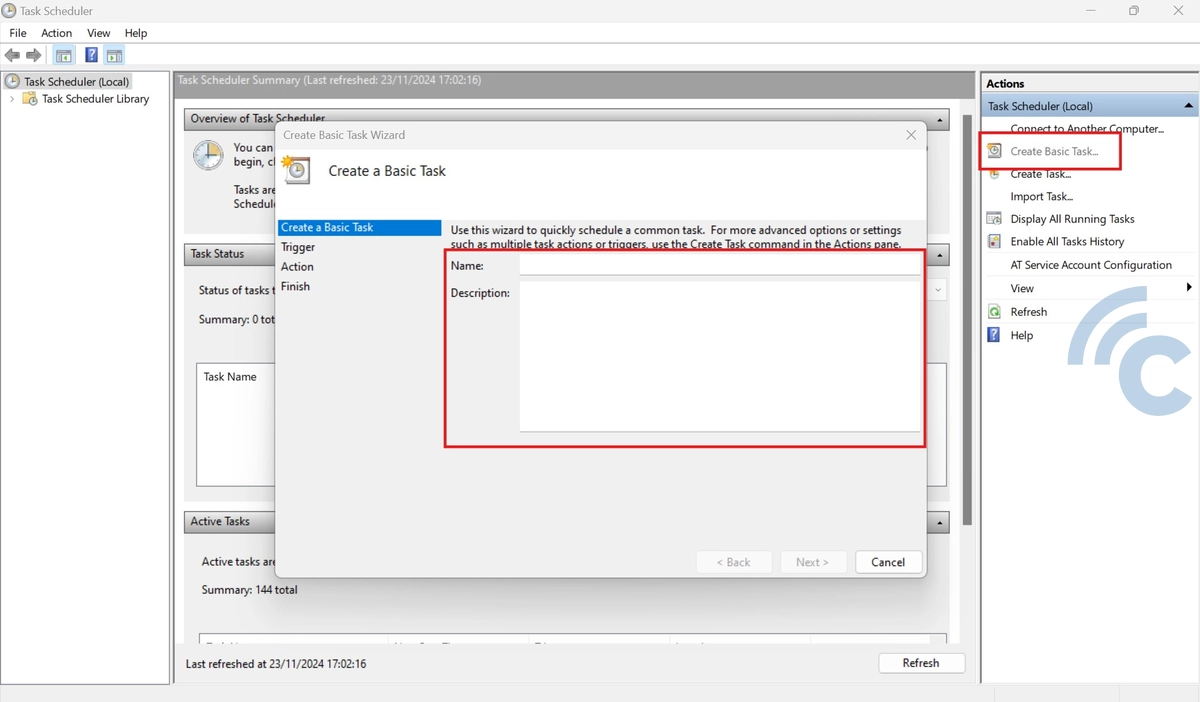
Once Task Scheduler opens, click "Create Basic Task" on the right side. Give it a name that’s easy to remember, such as "Automatic Shutdown", then click Next to proceed.
3. Set Auto Shut Down Time
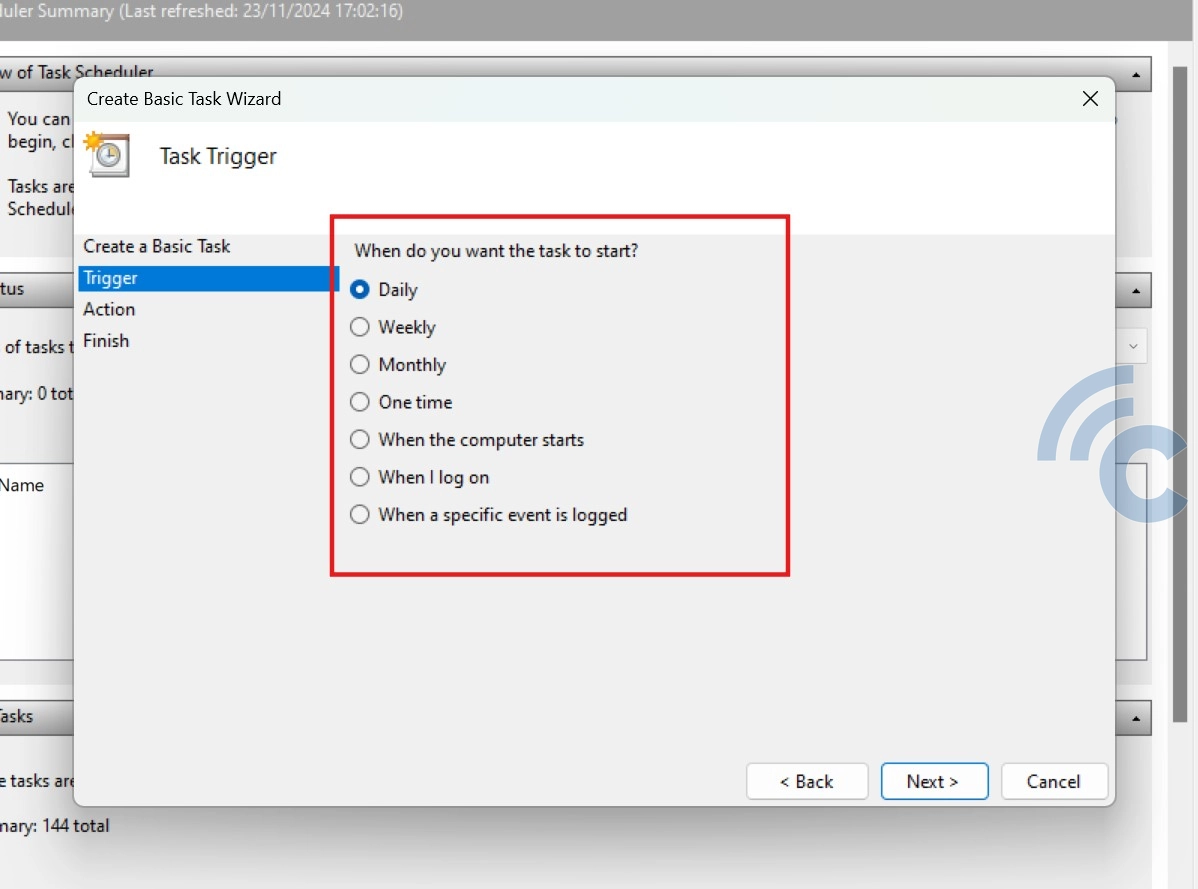
Next, choose when you want your computer to shut down. You can select Daily (every day) or One time (just once). If needed, you can also set it to repeat weekly or monthly. Once you've made your choice, click Next.
In the following step, enter the specific time for the automatic shutdown. For example, you can set it for when you finish working at night or after your computer completes a heavy task. Once done, click Next to continue.
4. Select Action
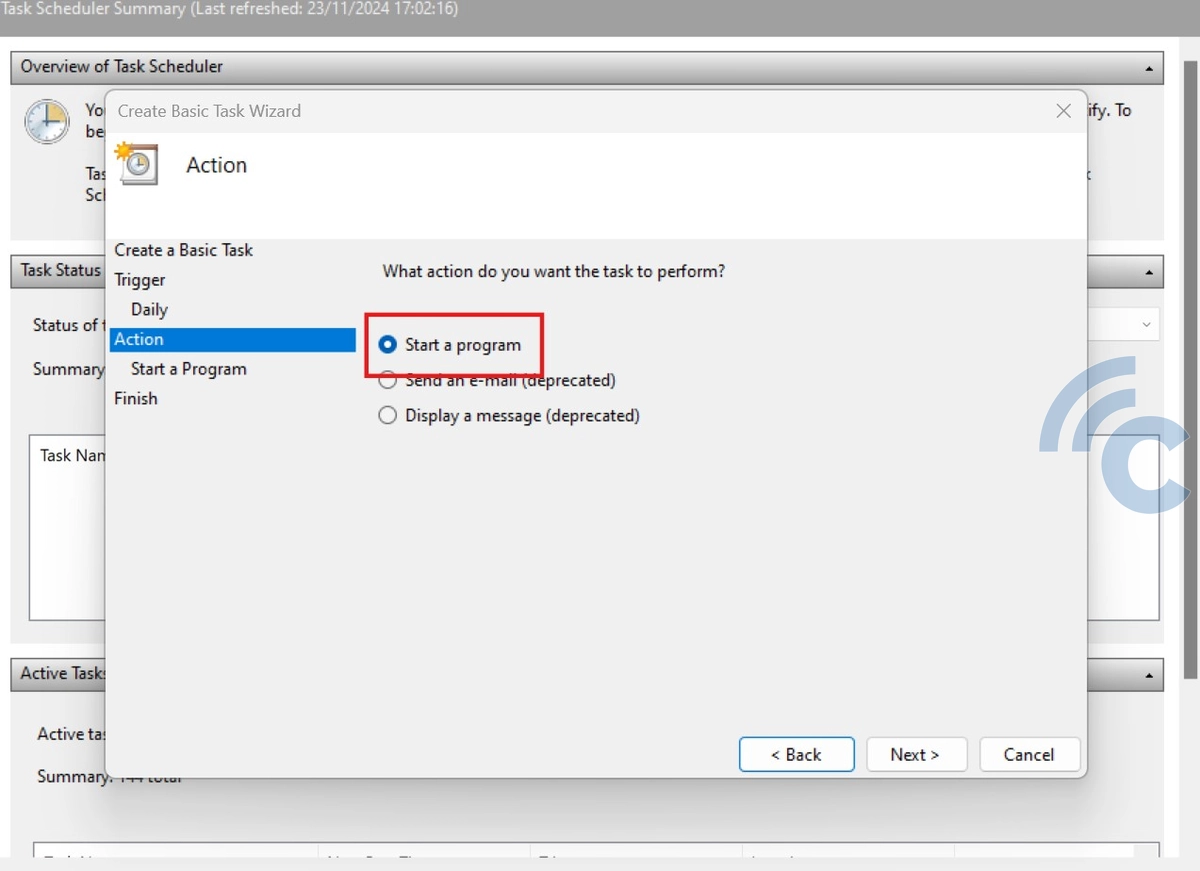
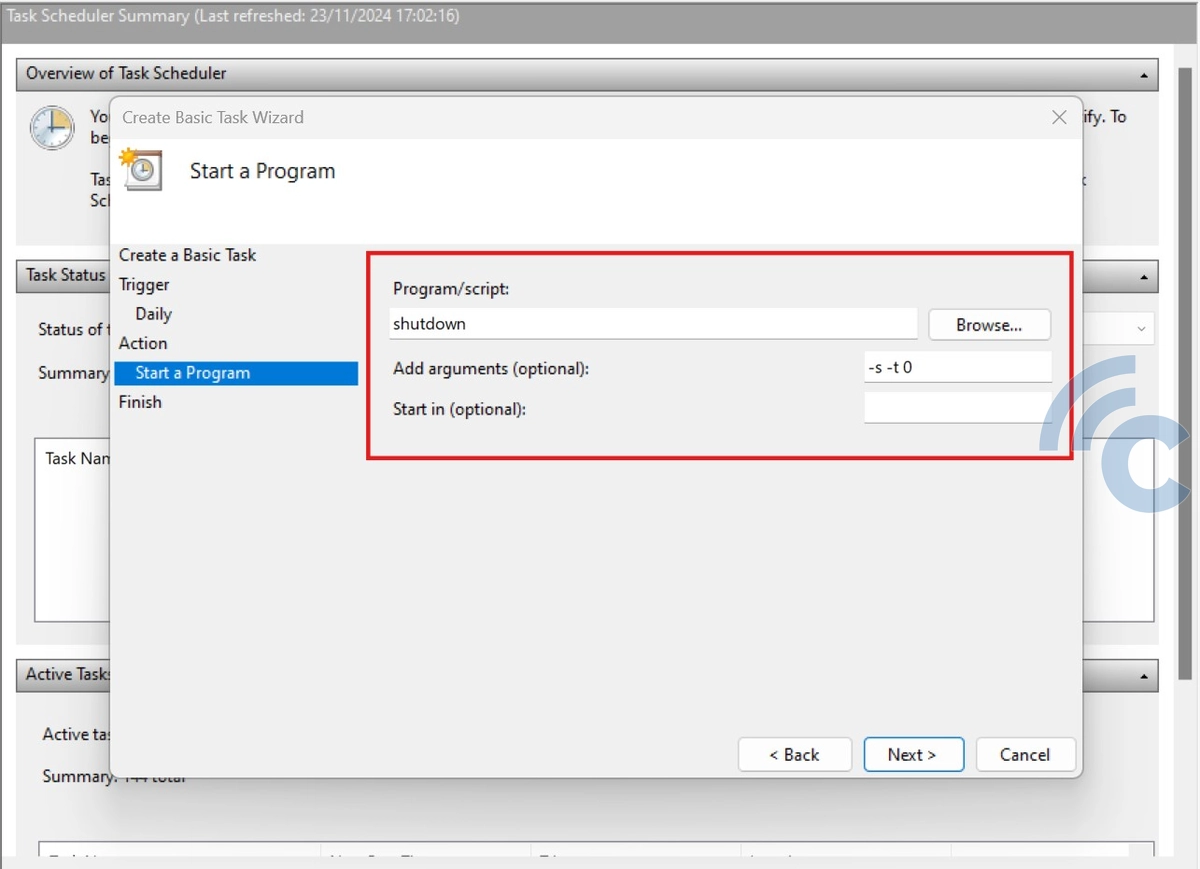
On the next page, select "Start a Program" and click Next. Then in the Program/script field, type shutdown and in the Add arguments (optional) field, type -s -t 0.
This command will shut down your computer immediately at the scheduled time. If you want to add a delay before the shutdown, you can adjust the -t value (in seconds). For example, -s -t 60 will shut down the computer after 60 seconds.
5. Finish and Save
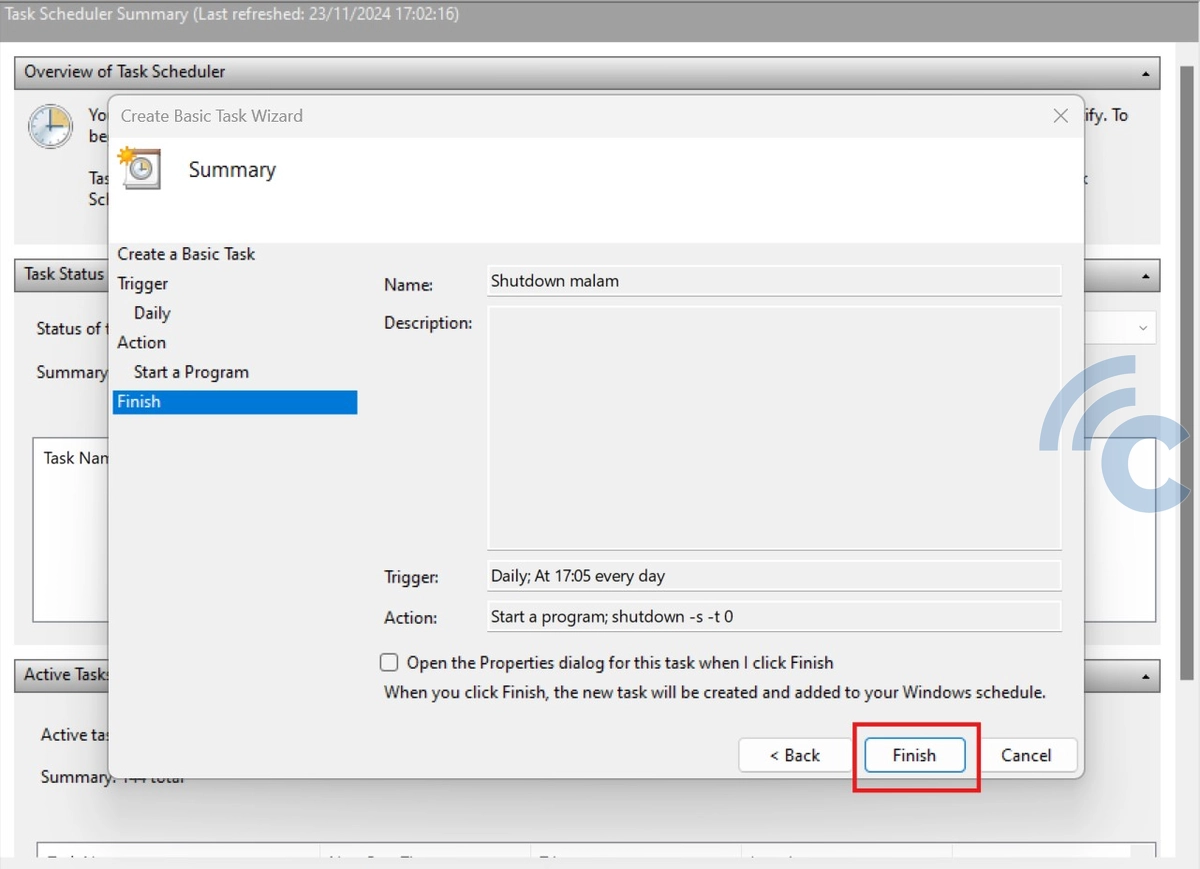
Finally, review all the settings you’ve entered to ensure everything is correct. If everything looks good, click Finish to save the task.
Your computer will now shut down automatically based on the schedule you’ve set. If you ever need to modify or adjust the schedule, you can easily edit it through Task Scheduler.
2. Through Command Prompt
You can also set your computer to shut down automatically with Command Prompt. This is a quick and handy way if you want to shut down your computer with a countdown system and without using a graphical interface. Here are the steps:
1. Go to Command Prompt
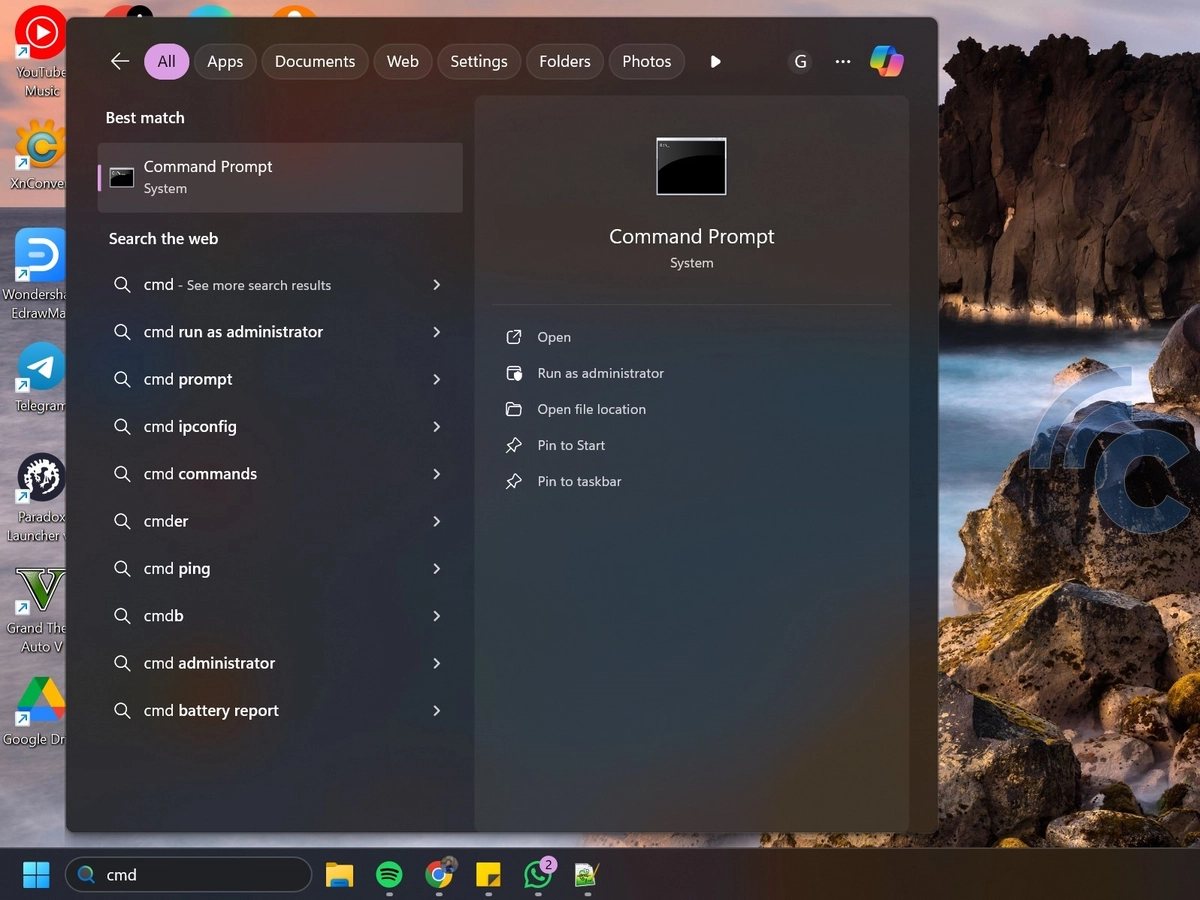
First, open the Command Prompt by pressing the Win + R keys, typing cmd, and pressing Enter. You can also search for it in the Start menu by typing “cmd” and then select it from the search results displayed.
2. Enter Shutdown Command

Next, please type the following command: shutdown -s -t 3600
The number 3600 represents the time in seconds before the computer shuts down. For example, if you want the shutdown to occur in one hour, use 3600. You can adjust this value as needed, such as 7200 for two hours or 1800 for 30 minutes.
This method ensures that your computer shuts down automatically after completing specific tasks, preventing unnecessary power consumption.
If you change your mind and want to cancel the automatic shutdown, open Command Prompt and type:
shutdown -a
This command will cancel the scheduled shutdown. It’s especially useful if you suddenly need to use your computer for longer than expected.
3. Using the PowerOff Timer App
Aside from using Windows' built-in tools, you can also use third-party applications to automatically shut down your computer. Compared to the previous methods, this approach is often easier and more practical.
One user-friendly application for this task is PowerOff Timer. To use it, simply download and install the application, then follow these steps:
1. Open the PowerOff Timer app

First, open the PowerOff Timer application. Then, click the three-line icon in the top right corner to open the menu. From the menu, select Schedule Editor.
2. Set the shutdown time
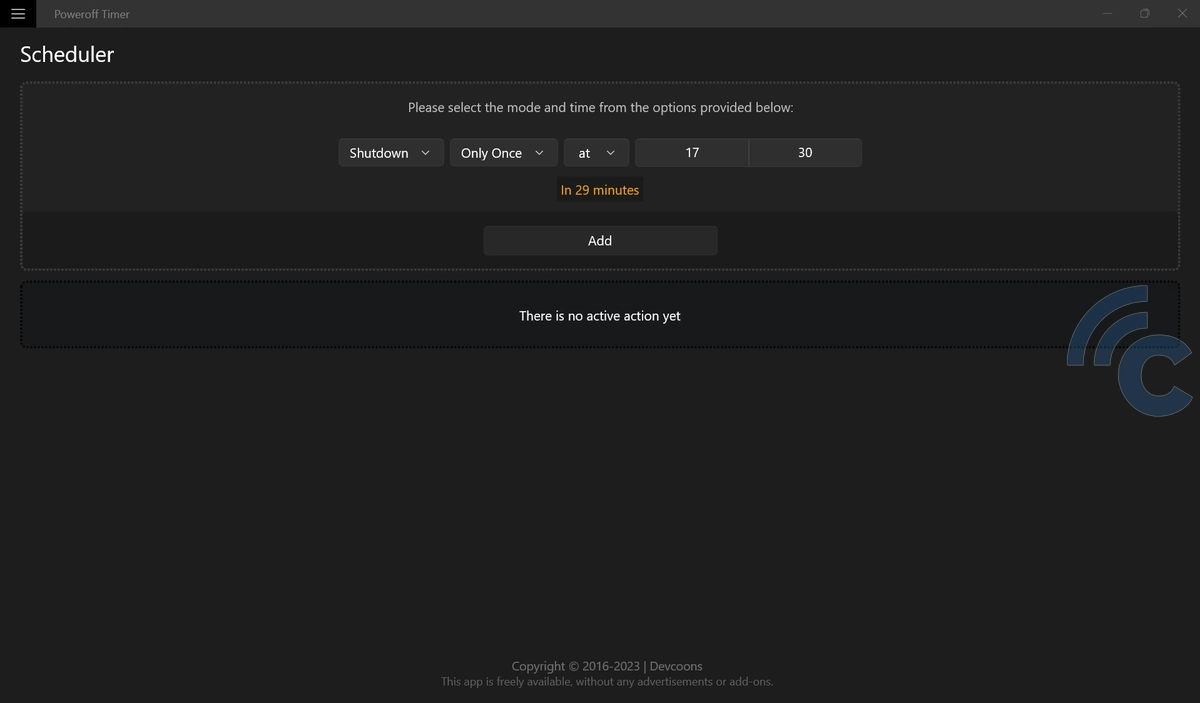
Next, in the leftmost column, select the "Shutdown" option. If needed, you can also choose other options like Restart, Sleep, or Hibernate.
After that, set when the shutdown command should run automatically, whether only once, daily, or on specific days.
Then, choose "at" if you want to schedule the shutdown at a specific time. If you prefer a countdown-based shutdown, select "in" and enter the desired countdown duration.
3. Save settings
Once you've finished configuring the settings, click the "Add" button. Now, the shutdown command has been scheduled and will run automatically at the specified time.
That concludes our discussion on how to automatically shut down a PC or laptop. By following the steps above, you can easily set your Windows computer to turn off on its own, whether using built-in features or third-party applications.
This setup not only helps improve efficiency and save energy when the computer is no longer needed but also provides added convenience, as you won’t have to shut it down manually every time.