
How to Disable Antivirus in Windows 11
Windows 11 includes an antivirus program called Windows Defender, which is also present in Windows 10. It works to protect against dangerous online threats. Windows Defender is essential for computer security, and with Windows 11, it has seen improvements, including the types of viruses it can get rid of.
It's possible to turn off Windows Defender, but this comes with risks. If you wish to learn how to deactivate it, or other third-party antivirus software, follow the steps below.
How to Fully Disable Windows Defender
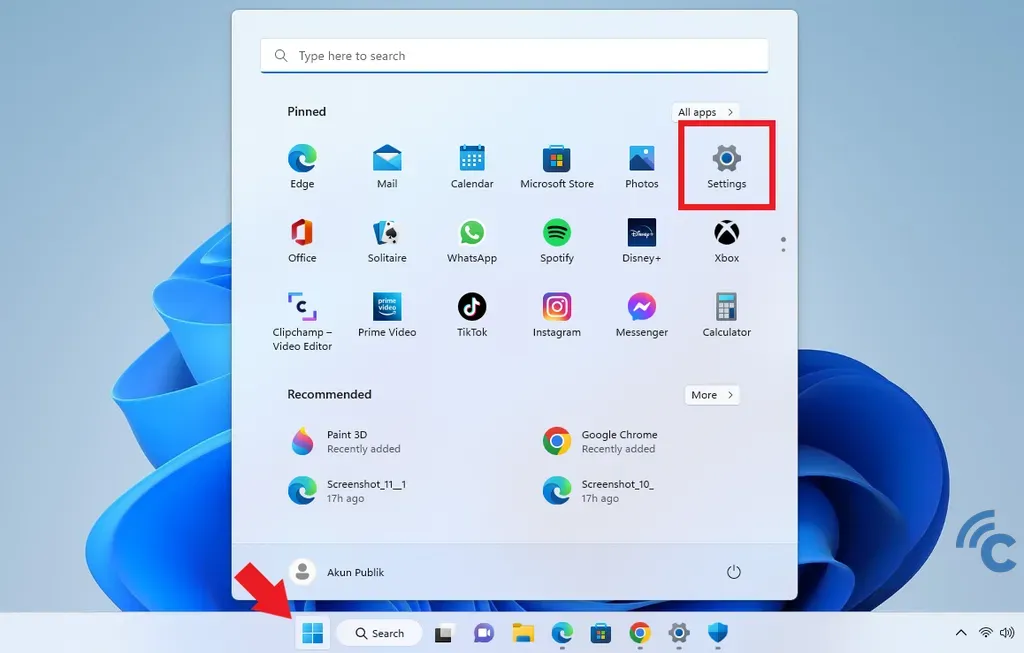
- Click the "Start/Windows" icon on the taskbar, or press the "Start/Windows" key on your keyboard.
- Choose the "Privacy and security" option at the bottom.
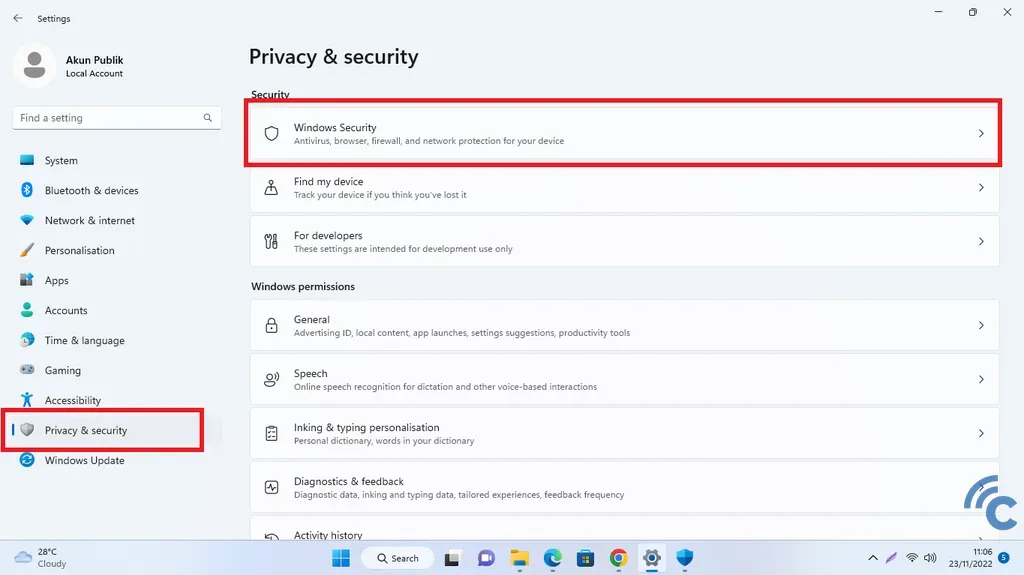
- In the "Security" section, click on the "Windows security" option at the top.
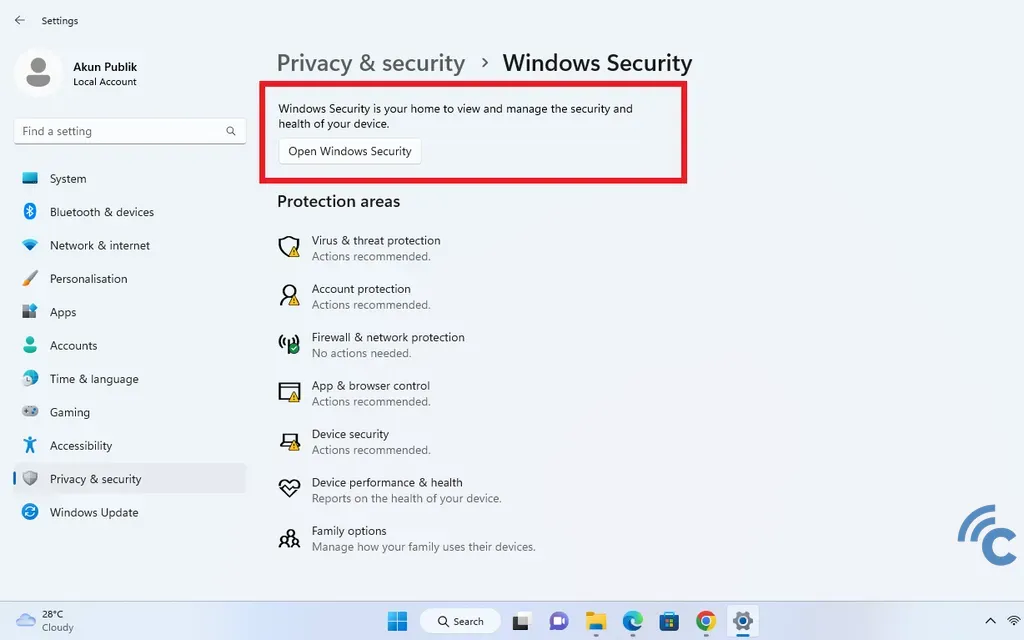
- Click "Open Windows Security" to launch the Windows Security or Windows Defender program.
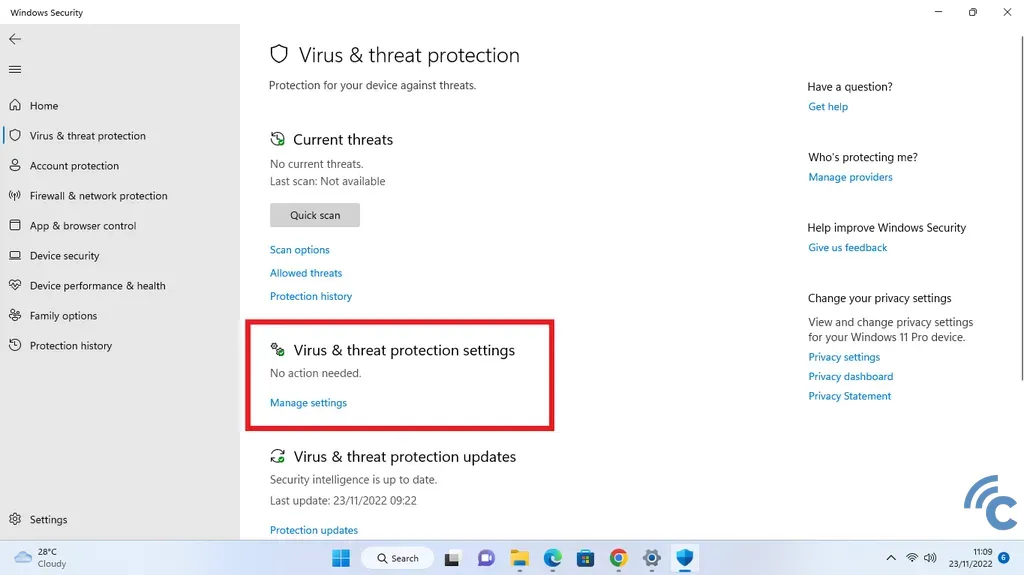
- In the new window, click on the "Virus & threat protection" option.
- Click the blue "Manage settings" option in the "Virus & threat protection settings" section.
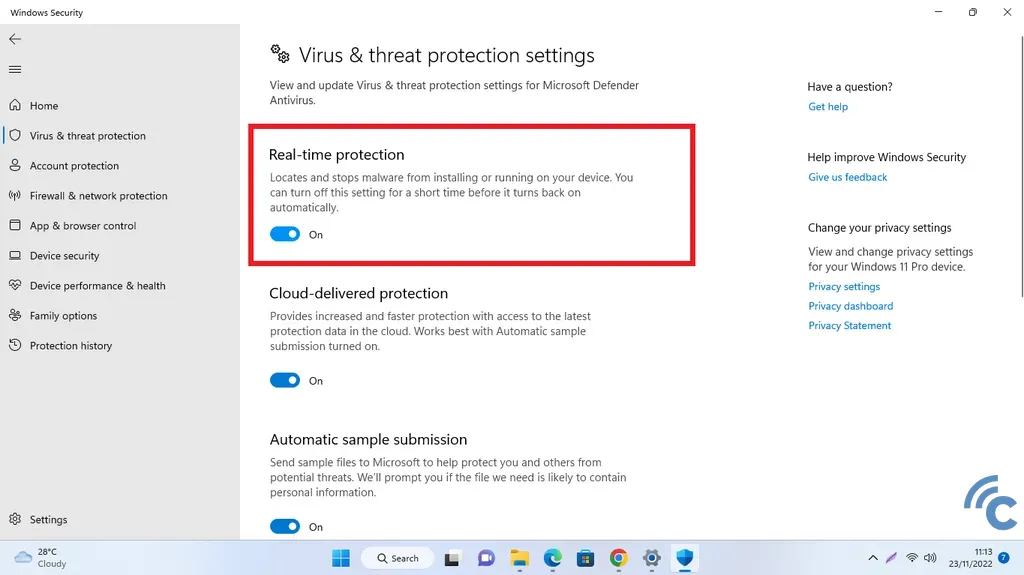
- In the "Real-time protection" section, toggle the switch at the bottom to deactivate the feature.
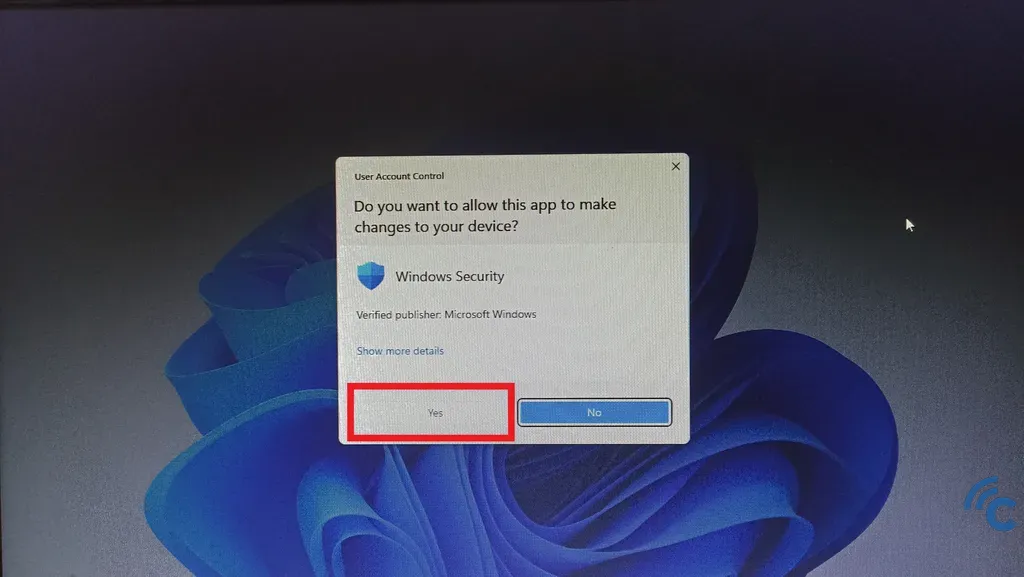
- In the warning popup, click "Yes" to confirm.
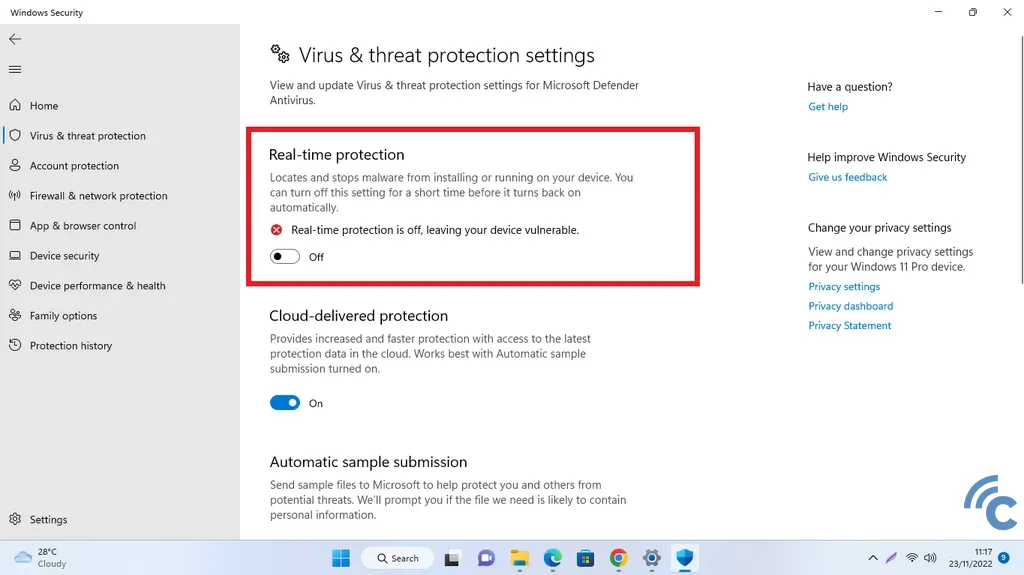
- To turn it back on, simply follow the steps again and toggle "Real-time protection" on.
Before disabling Windows Defender, be sure you genuinely want to deactivate its protection features. Also, be aware of potential risks. This software is designed to guard your computer against threats. Without it or another antivirus, your device isn't as secure.
Although you might turn off active scanning by Windows Defender in Windows 11, it will still perform background scans at scheduled intervals. So, even if items aren't scanned upon entry to your computer, periodic checks will occur.
How to Disable Windows Defender Partially
Instead of turning off Windows Defender entirely, you can choose to exclude specific files, folders, or applications. These exclusions won't be scanned or protected by Windows Defender.
However, before you exclude anything, make sure they're safe and trustworthy. Here's how to do it:
- Click on the "Start/Windows" icon on the taskbar, or press the "Start/Windows" key on your keyboard.
- Choose the "Privacy and security" option.
- In the "Security" section, click on "Windows security".
- Then, click on "Open Windows Security" to access Windows Defender.
- In the new window, select "Virus & threat protection".
- Click on the "Manage settings" link in the "Virus & threat protection settings" area.
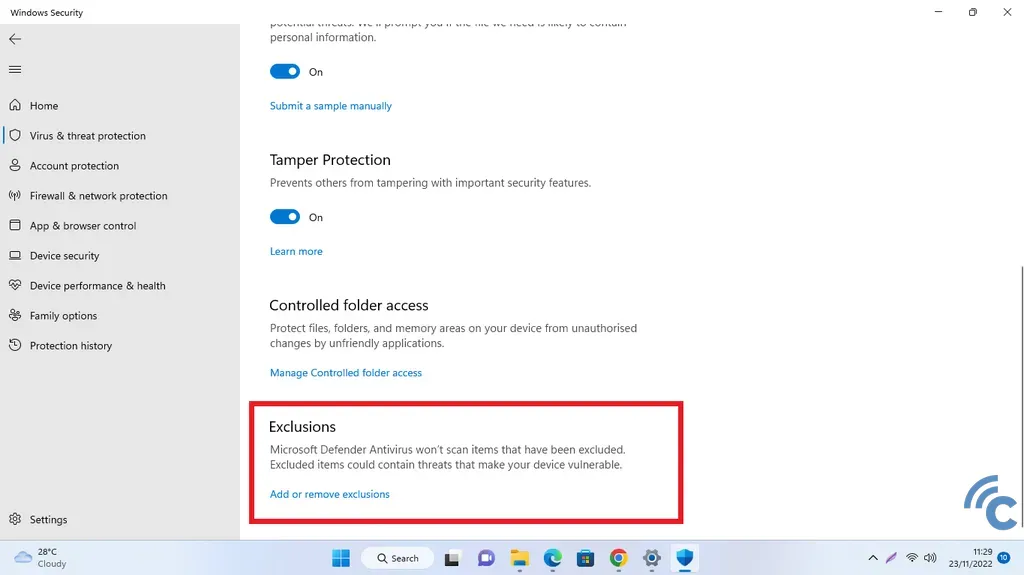
- Scroll down to find "Exclusions".
- Click on "Add or remove exclusions".
- In the warning window that appears, click "Yes" to continue.
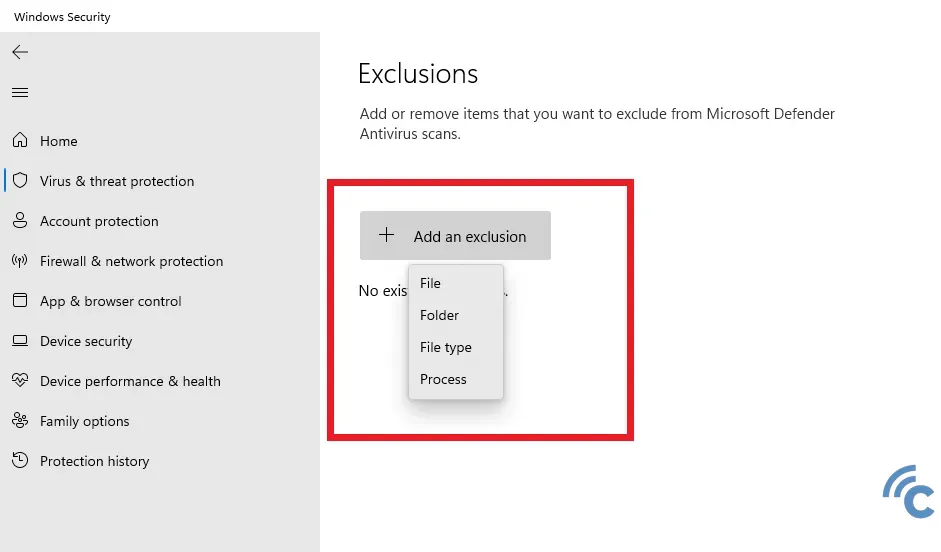
- Inside the Exclusions section, click on "+ Add an exclusion".
- Choose the items you want to exclude like File, Folder, File type, or Process.
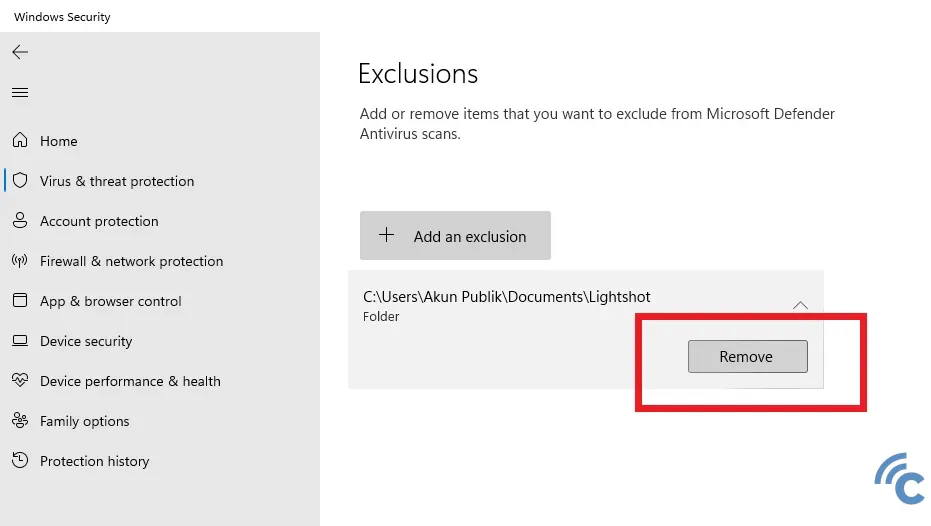
- If you wish to undo an exclusion, click on the excluded item and select "Remove".
How to Disable Third-Party Antivirus Software

If you wish to turn off a third-party antivirus program, like Avast, on your computer, follow these steps:
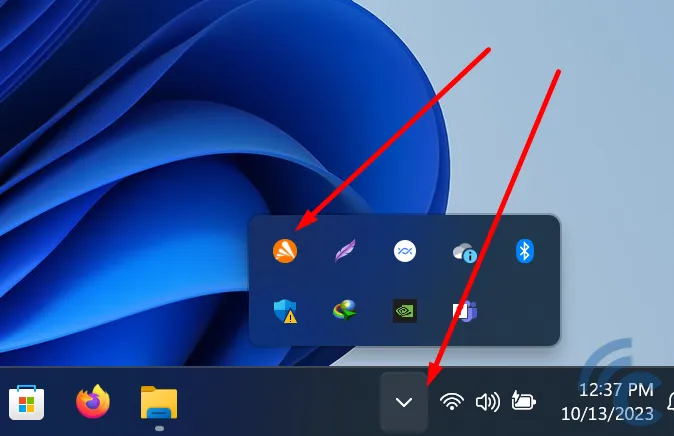
- Look at the bottom right of your screen for an arrow near the WiFi and speaker icons.
- Find and click on the Avast icon.
- Right-click the Avast icon. A menu will pop up.
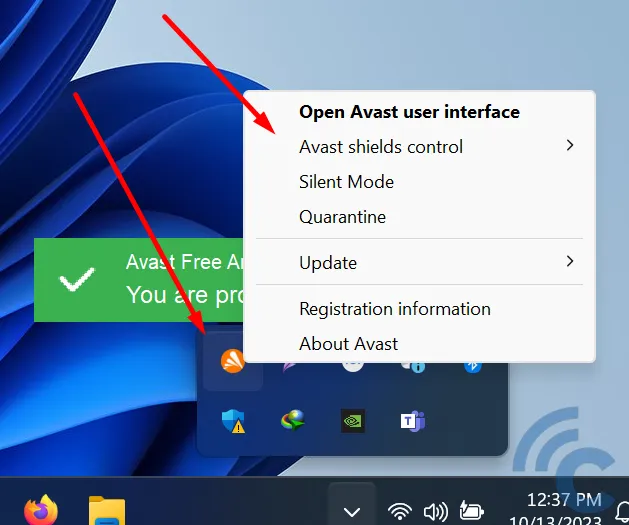
- Choose the "Avast shields control" option.
- You'll see several choices for disabling the antivirus:
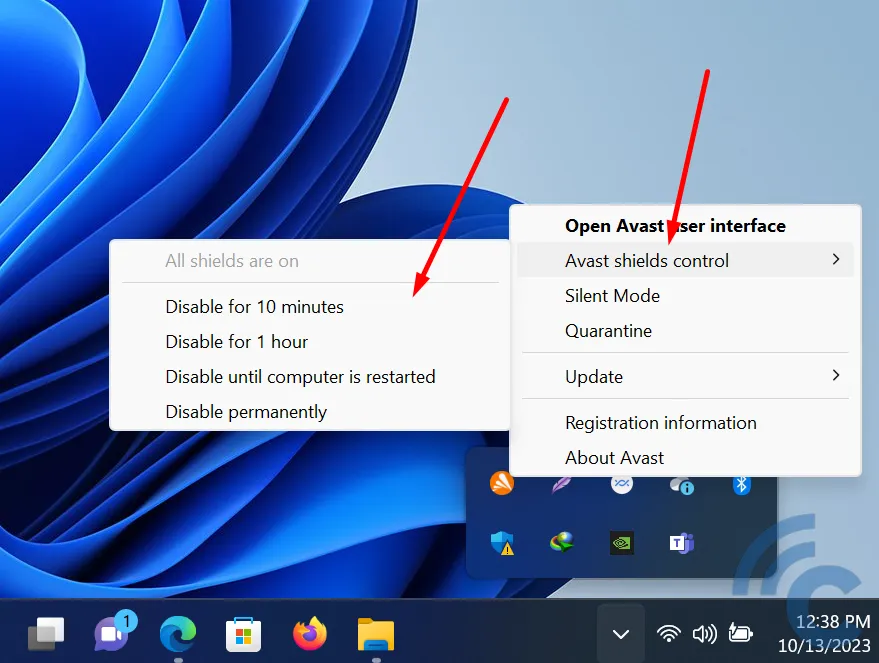
- "Disable for 10 minutes" turns it off for 10 minutes.
- "Disable for 1 hour" turns it off for an hour.
- "Disable until computer is restarted" turns it off until you restart your computer.
- "Disable permanently" turns it off until you manually turn it back on.
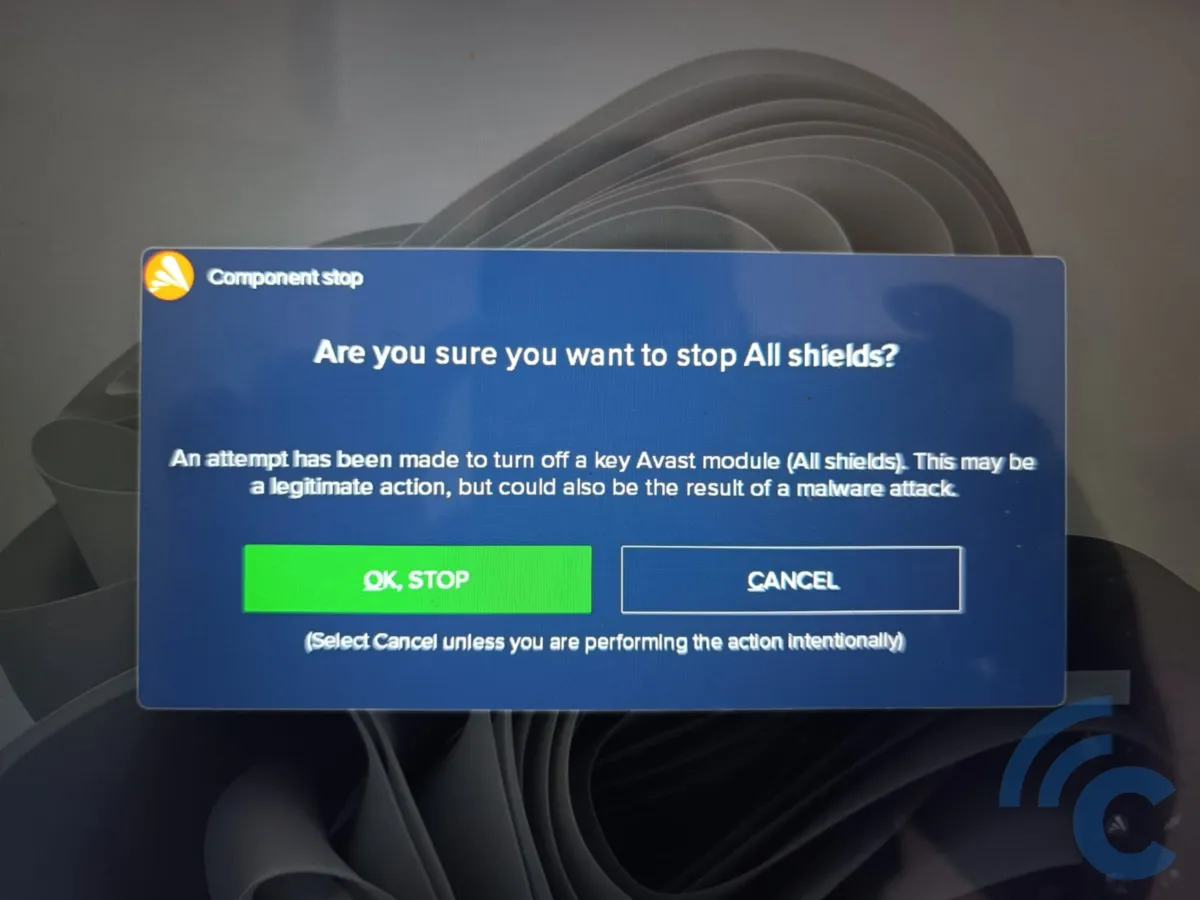
- After picking an option, click "OK, STOP" to confirm.
This process can be used for other antivirus programs like McAfee, Smadav, and more.
For Windows Defender, you can completely disable it or choose specific file types to exclude. If you ever want to reverse these changes, it's simple to do so.
Keep in mind that adjusting security settings in Windows 11 has its pros and cons. Always choose wisely to ensure your computer's safety. Best of luck!