
How to Take Screenshot on Redmi Pad
If you frequently use gadgets for work, the screenshot feature is undoubtedly essential. Screenshots offer various advantages, such as preserving records of conversations or capturing other important information.
If you're using the Redmi Pad tablet, taking screenshots is worth trying, especially since its large screen makes it convenient to capture more content or visually appealing details.
In this guide, I'll walk you through several methods for taking screenshots on the Redmi Pad tablet.
1. Pressing the Physical Keys Simultaneously
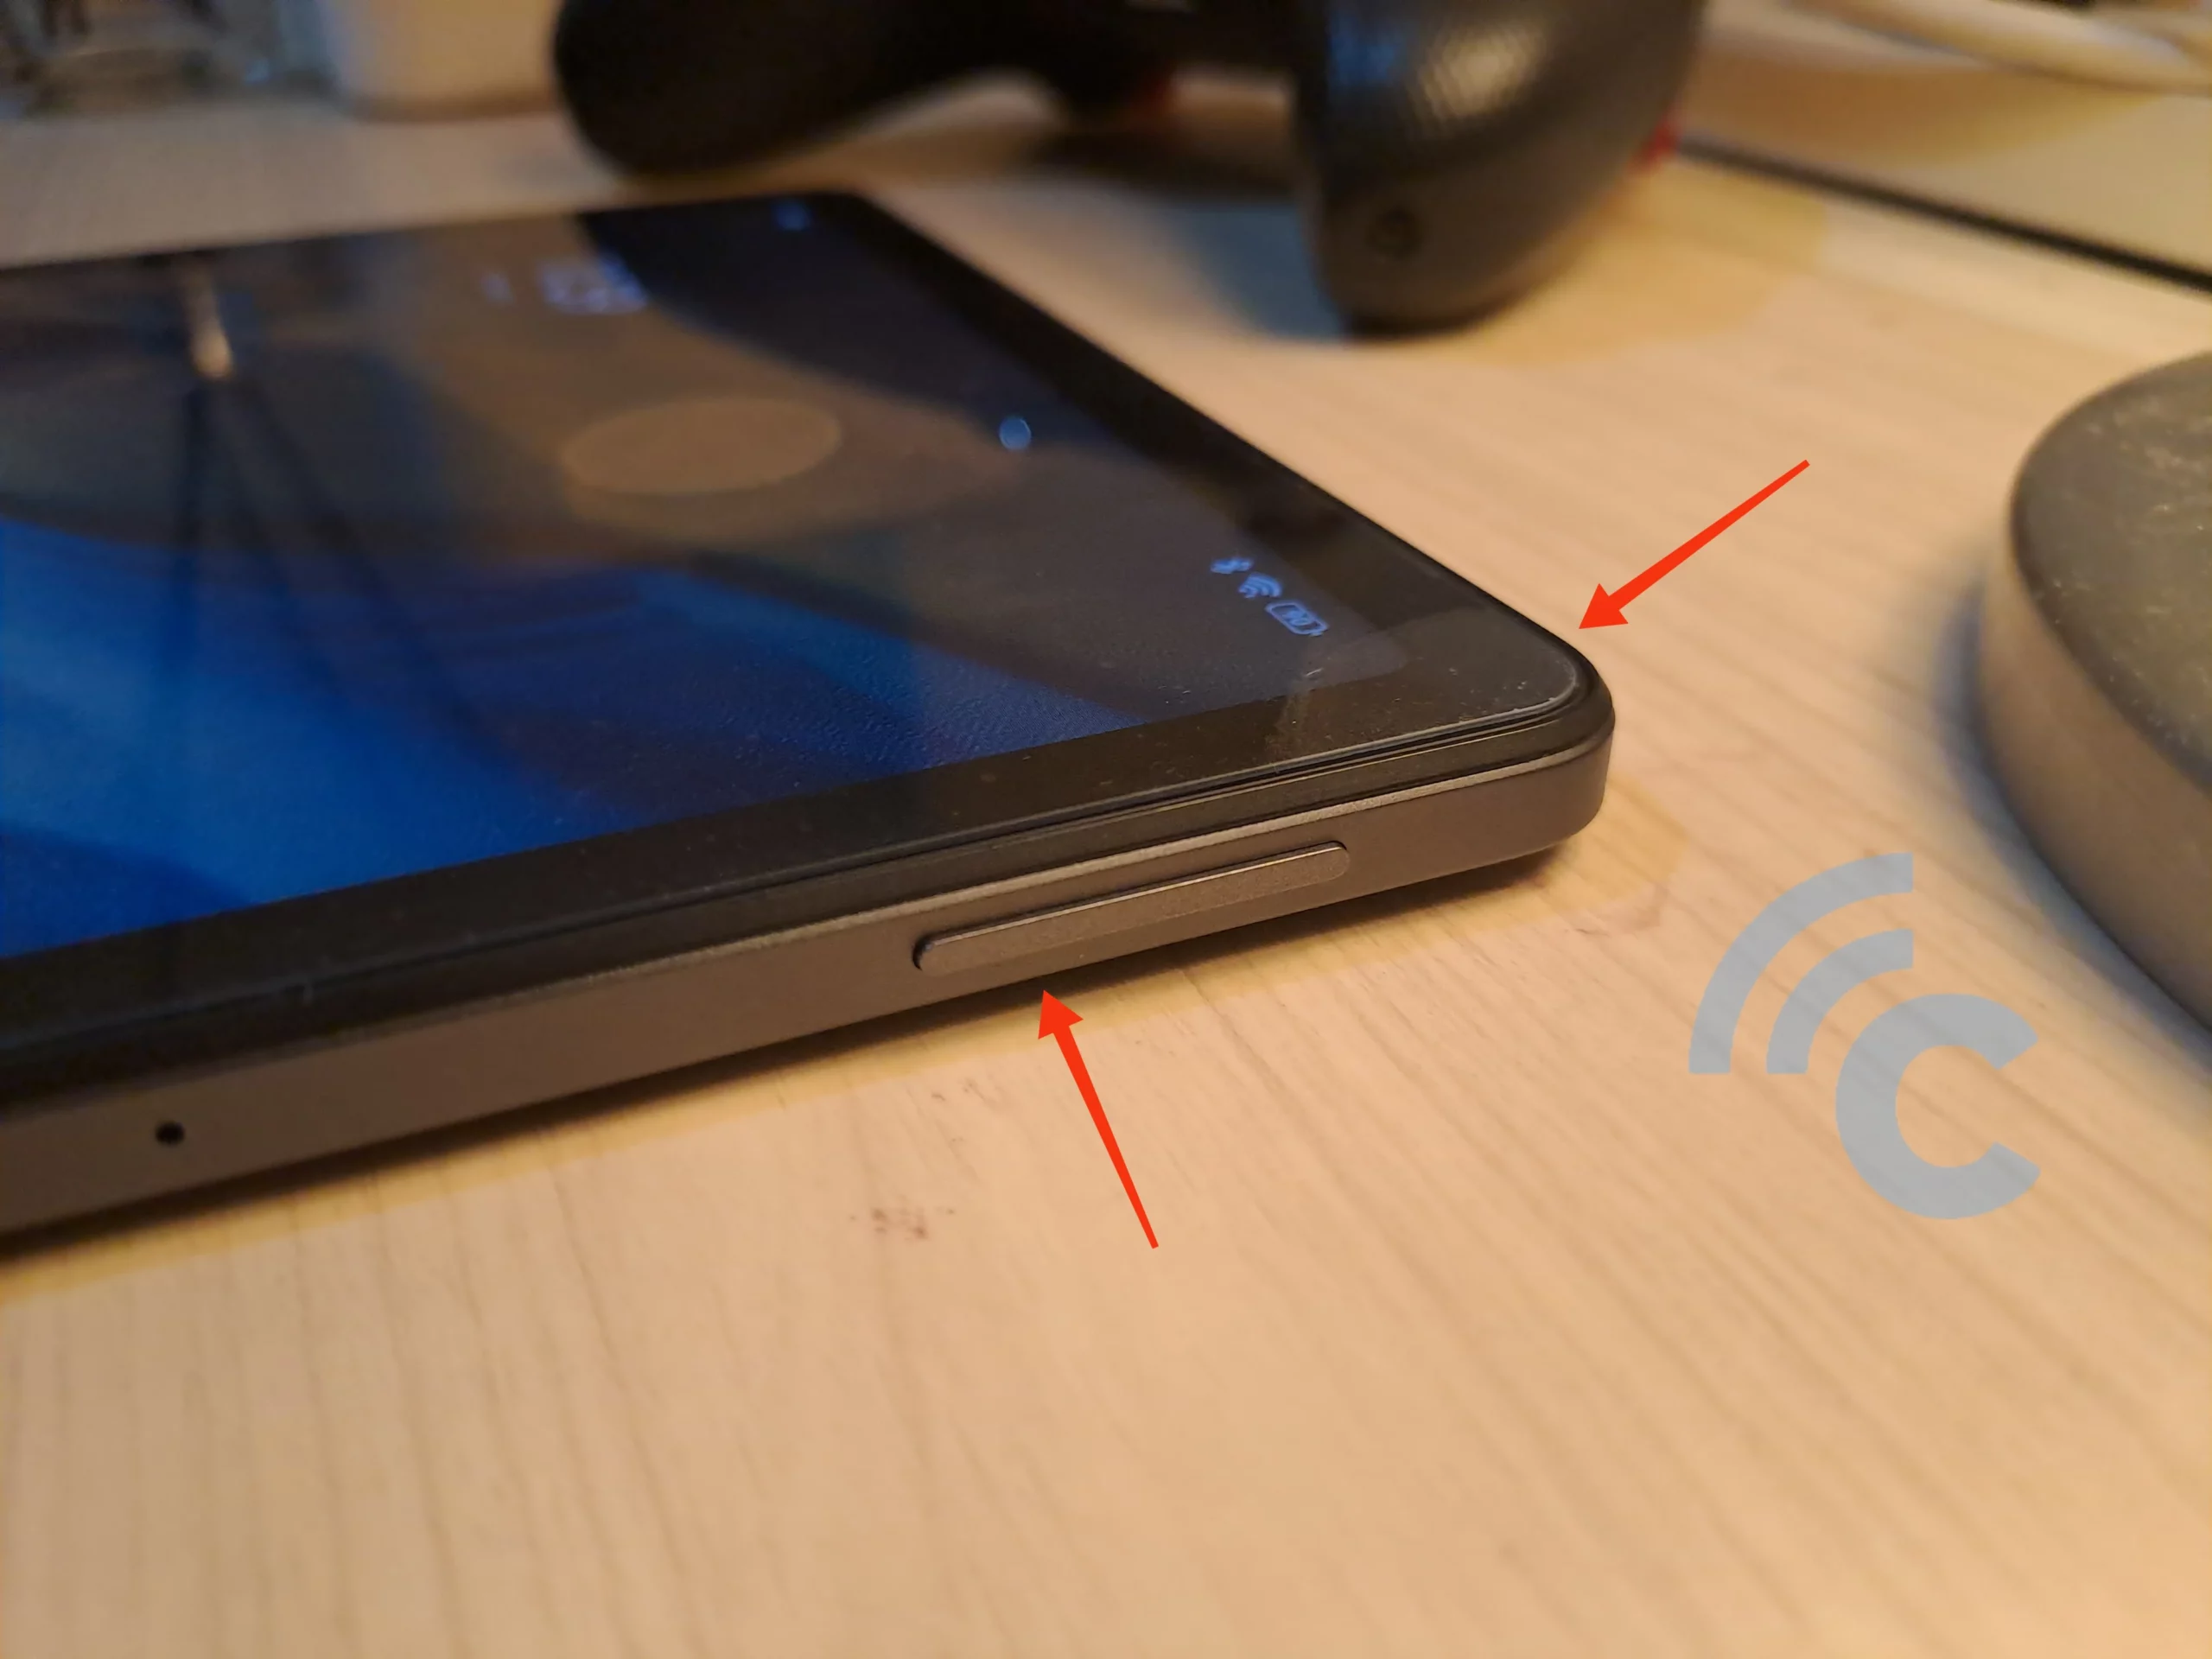
First, prepare the webpage, photo, or any content you want to capture. To take a screenshot, simply press the Power button and the Volume Down button located on the side of the tablet simultaneously.
Press and hold both buttons for a few seconds until the screen flashes, indicating that the screenshot has been successfully taken. The captured screenshot will automatically be saved in the Screenshot album in the tablet's gallery.
2. Using Icons in Control Panel
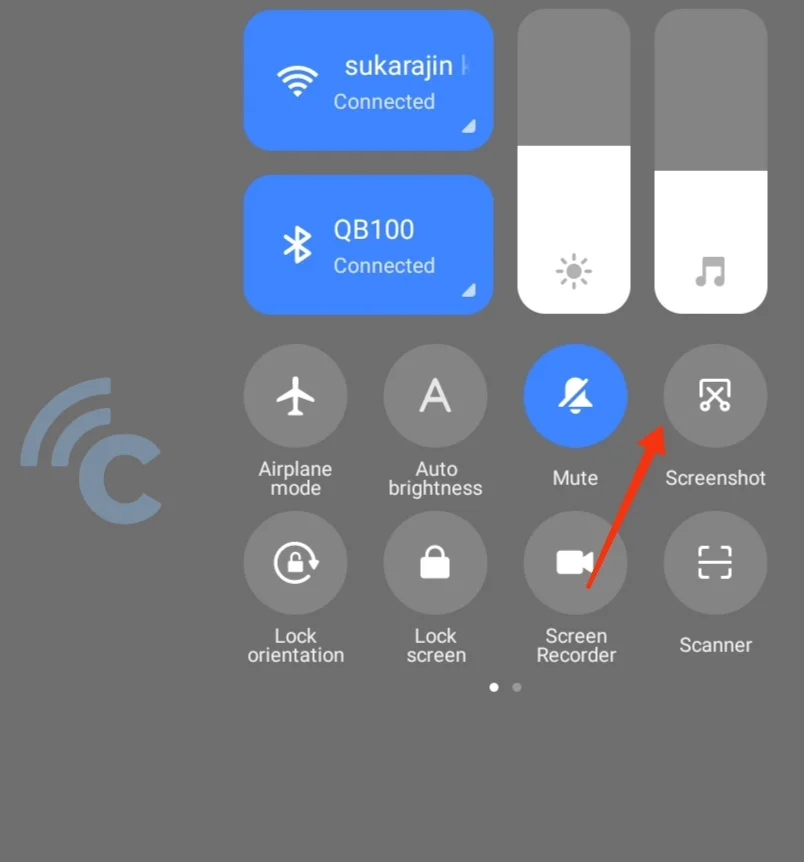
Given the tablet's large size, some users might find it inconvenient to press physical buttons. Fortunately, you can take a screenshot using the screenshot icon available in the control panel. Here's how:
- The first step is to prepare the information or image you want to capture on your Redmi tablet screen.
- Next, open the control panel by swiping down from the top of the screen.
- Locate the screenshot icon and tap it to take a screenshot.
This method is quite popular for tablets since the physical buttons are often spaced far apart, making them less convenient to use.
3. Screenshot with Three-Fingers Swipe Gesture
The Redmi Pad is a versatile device, perfect for work, gaming, or browsing. In the midst of these activities, you might come across something interesting that you’d like to save.
Another easy way to take screenshots is by using the three-finger swipe gesture. However, you’ll need to enable the Gesture feature first. Here’s how you can set it up:
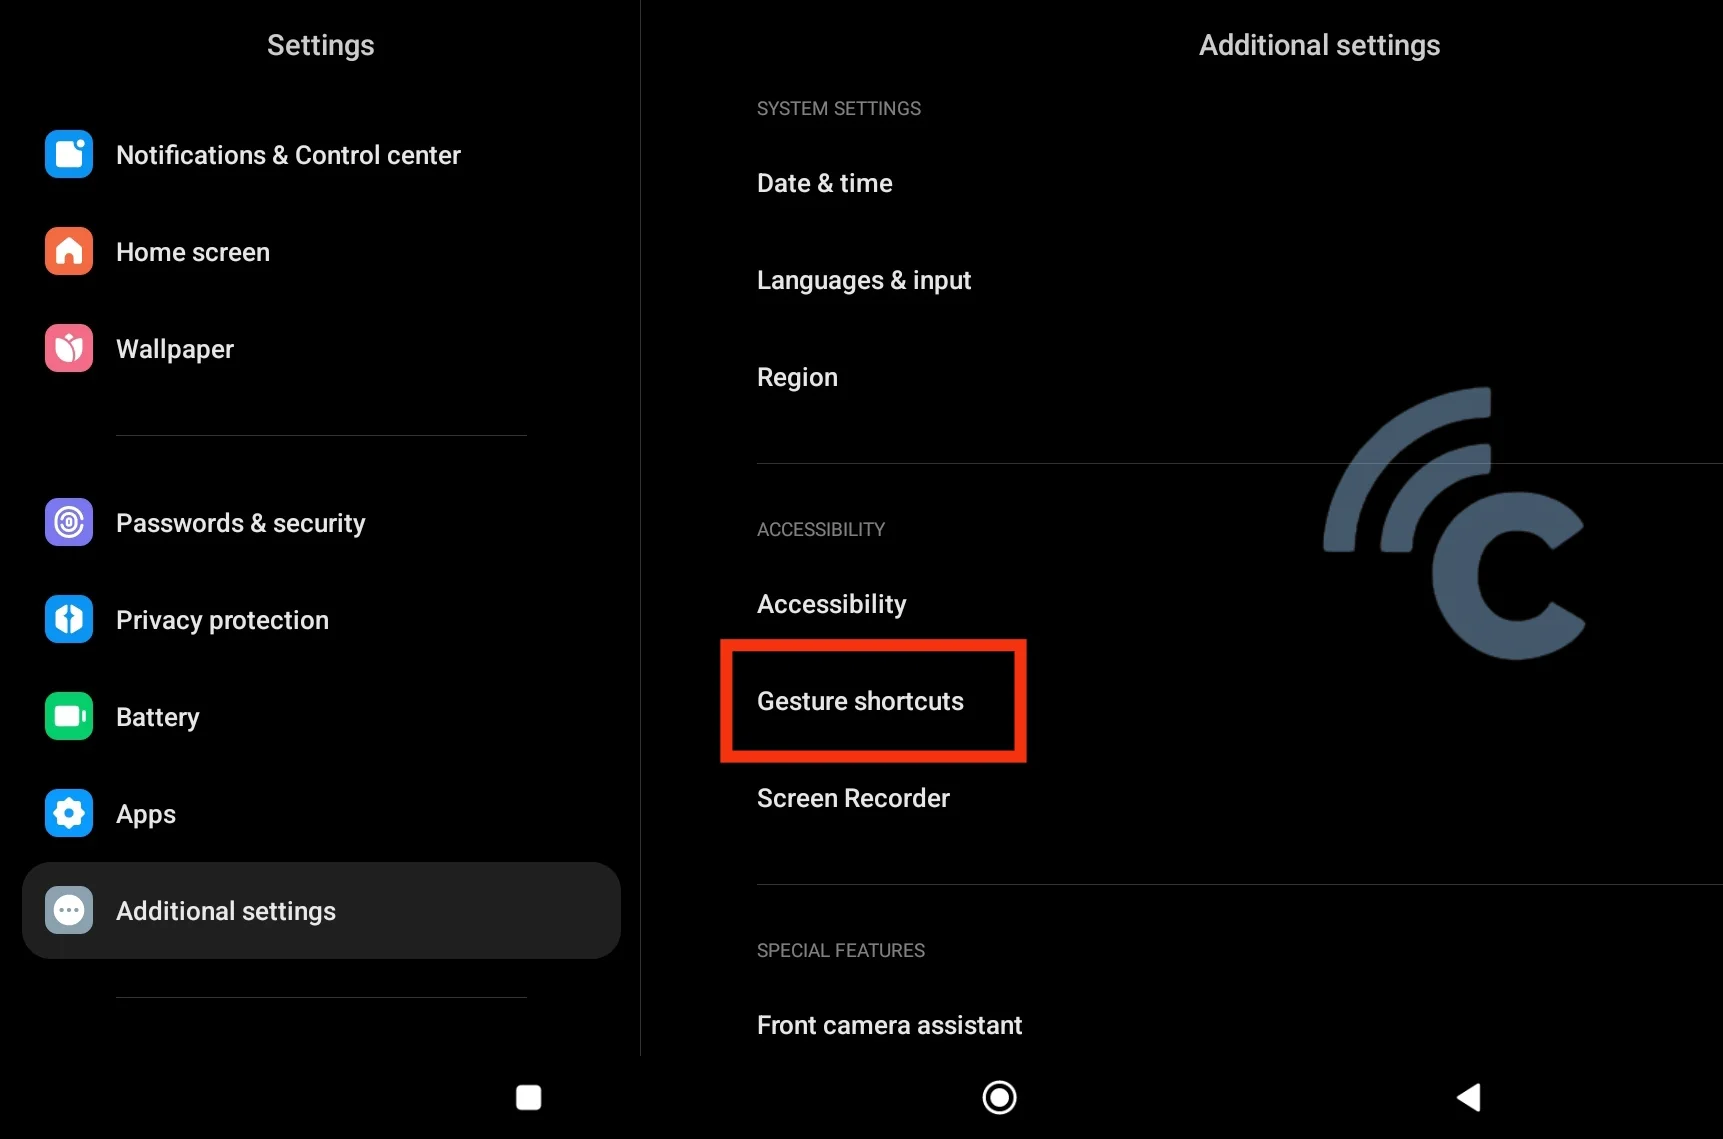
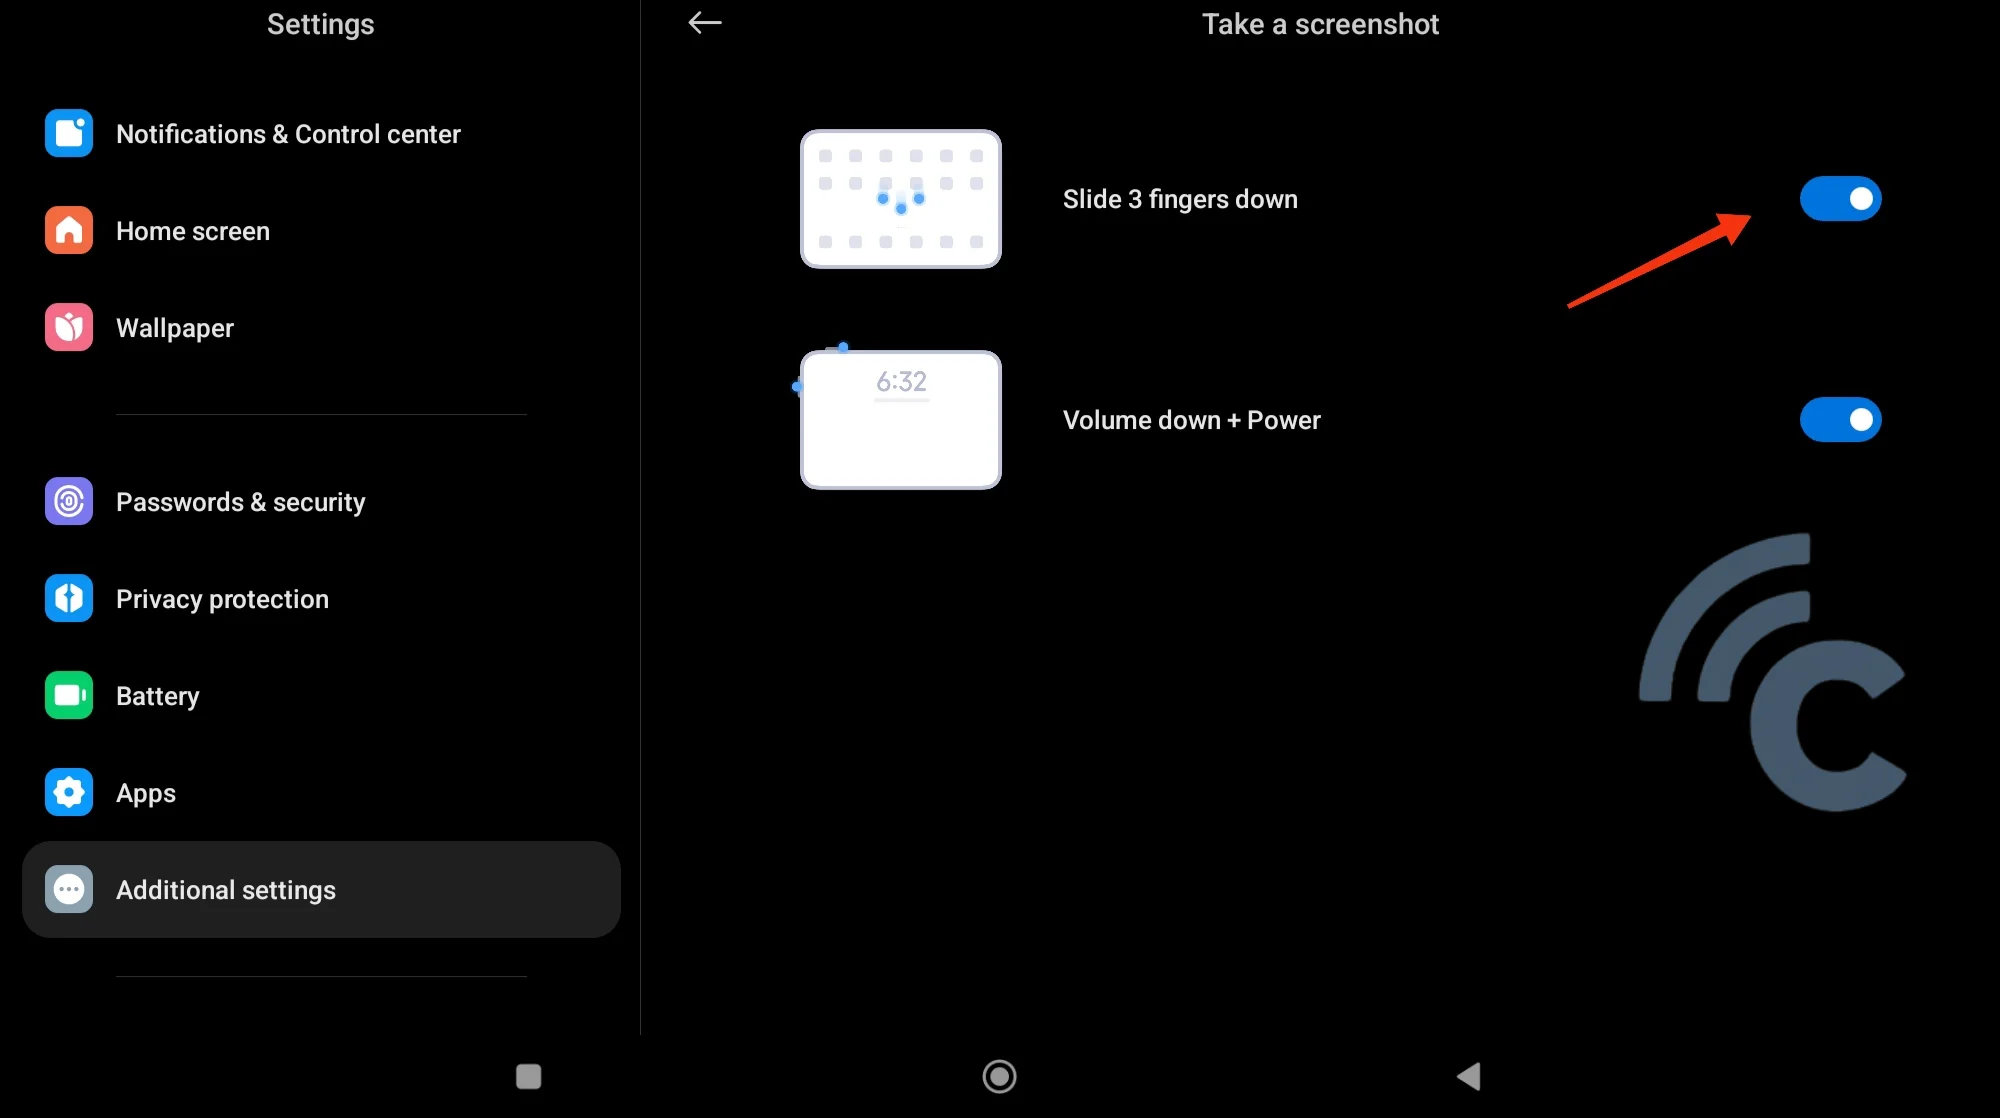
- Go to Settings on your Redmi Pad.
- Select Additional Settings.
- Tap on Gesture Shortcuts.
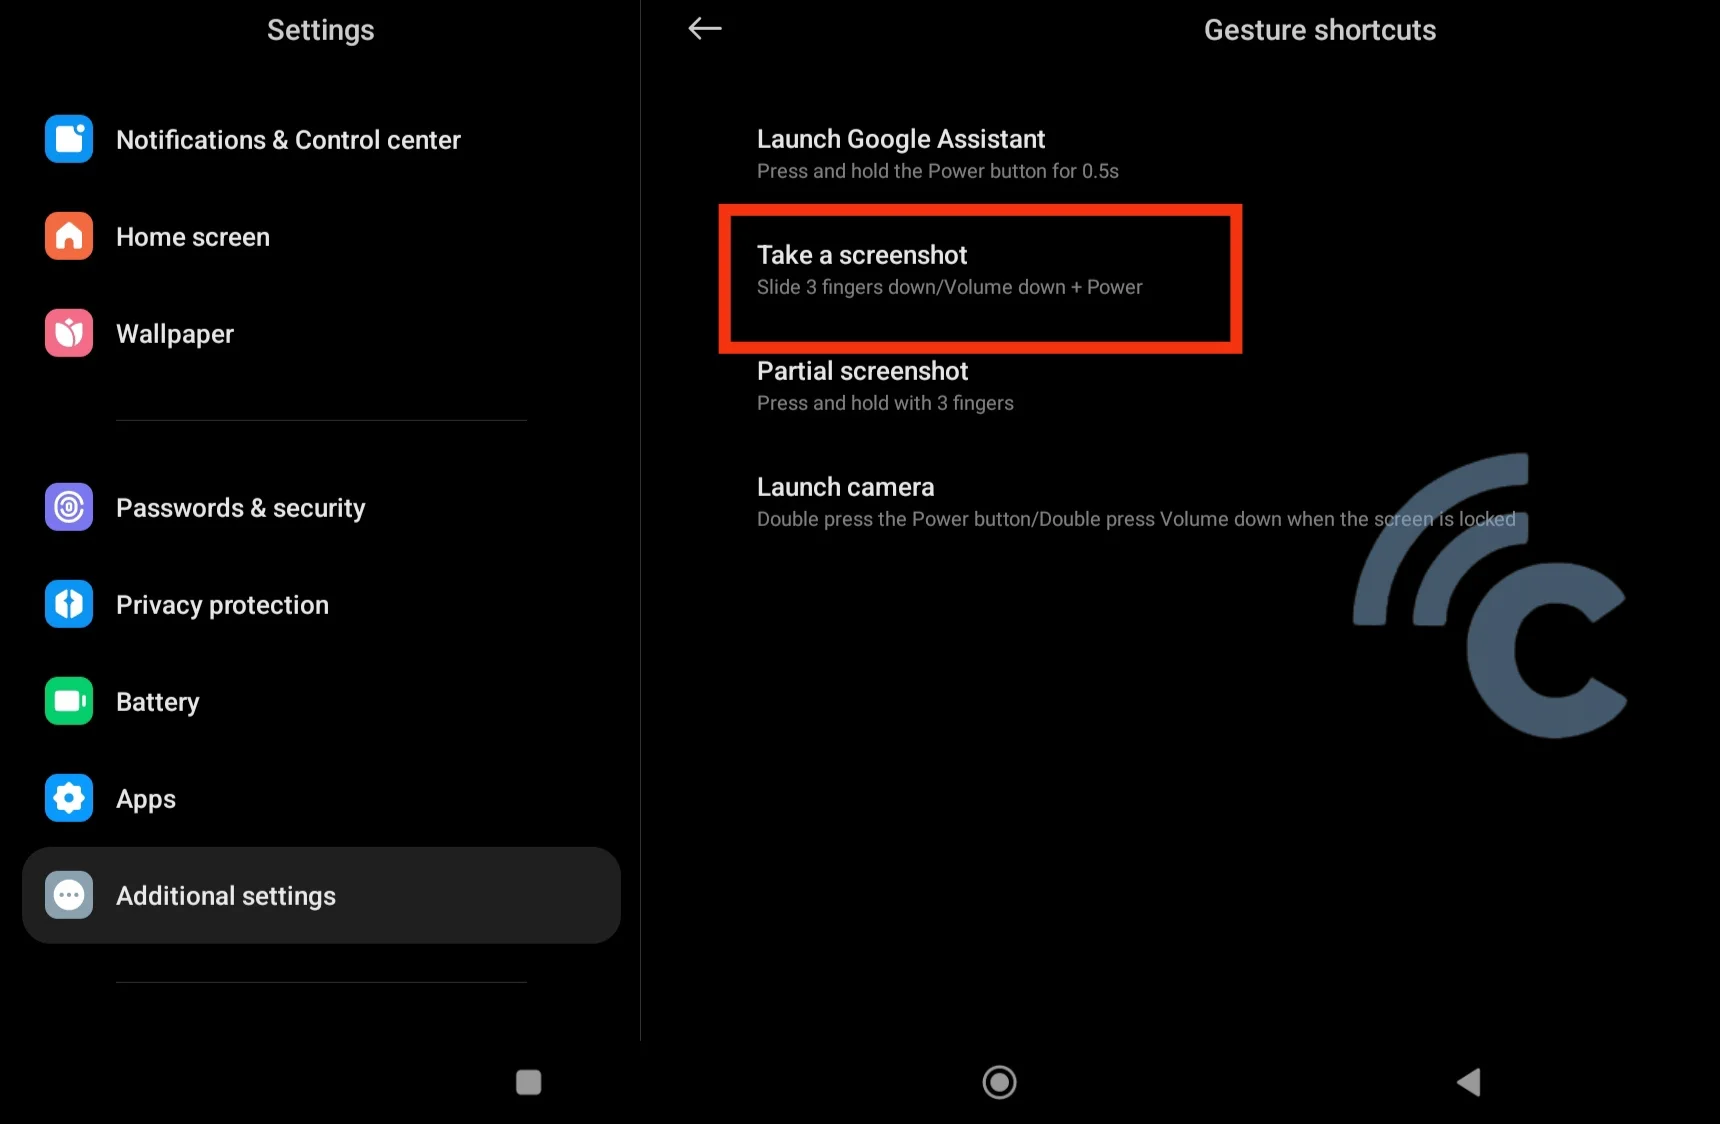
- Choose the Take a Screenshot option.
- Enable the Slide 3 fingers down feature.
Once activated, taking a screenshot is simple. Just swipe down with three fingers on the tablet's screen, mimicking a downward scratching motion.
If the screenshot is successful, the tablet will vibrate or the screen will flash briefly. A preview of the screenshot will appear in the corner of the screen, or you can check it directly in the Screenshot album in your gallery.
4. Partially Screenshot
On the Redmi Pad tablet, you’re not limited to taking full-screen screenshots. You can also capture a specific portion of the screen. This method also uses the three-finger gesture, similar to the previous approach. Follow the steps below to enable this feature:
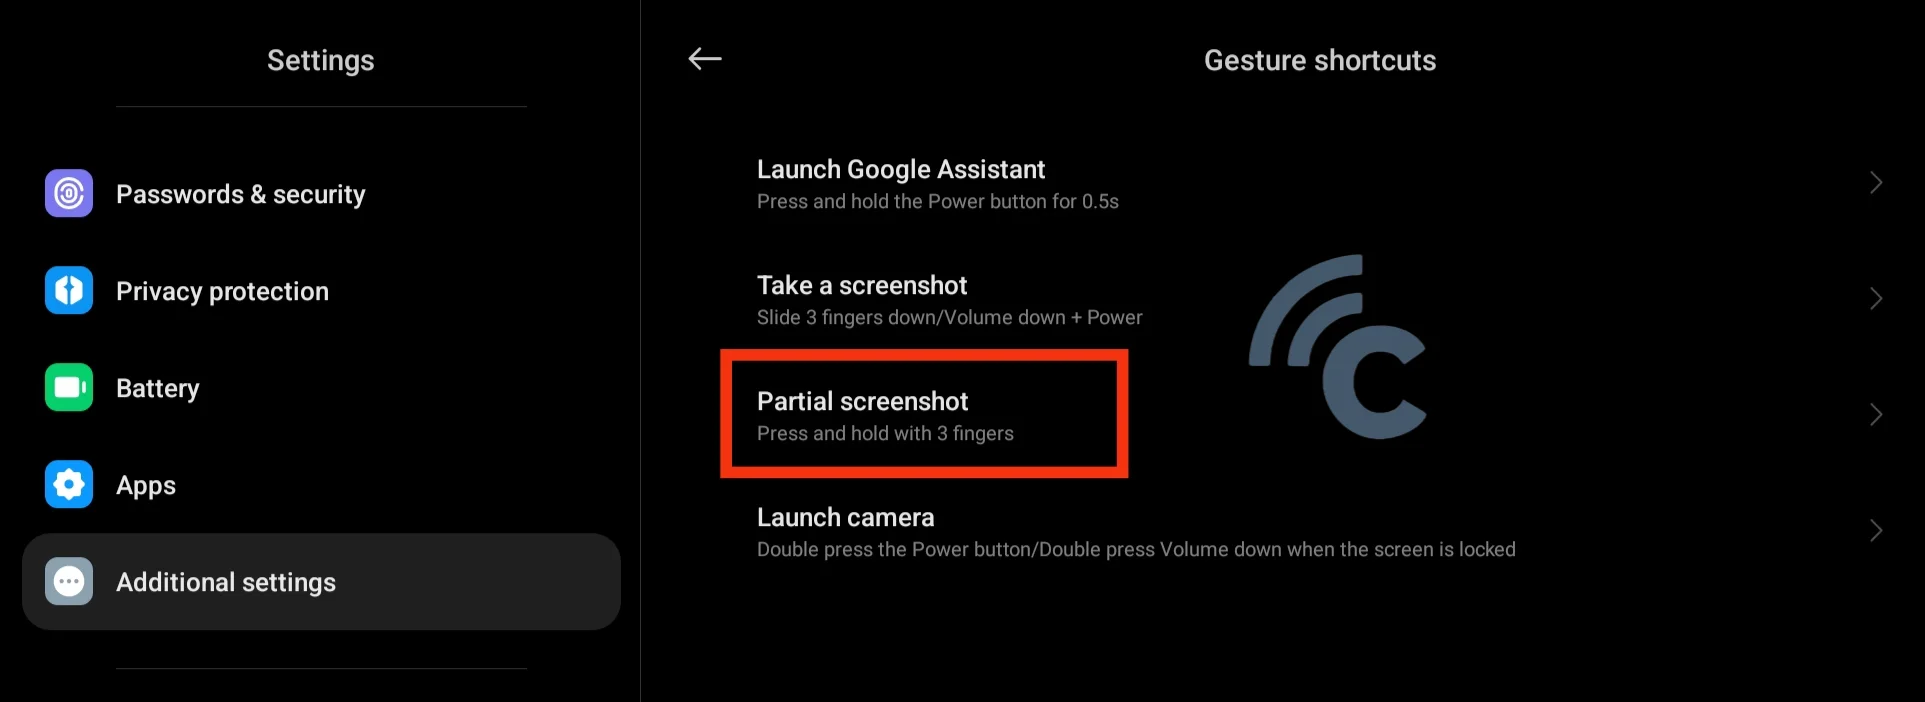
- Open Settings on your Redmi Pad, and go to Additional Settings.
- Select Gesture Shortcuts.
- Tap on Partial Screenshot to enable it.
To capture a partial screenshot, you just need to press and hold the desired area on the screen with three fingers. A selection box will appear, allowing you to adjust and choose the specific area to capture.
Once you're satisfied with the selection, the screenshot will be taken and saved in the Screenshot album in your gallery.
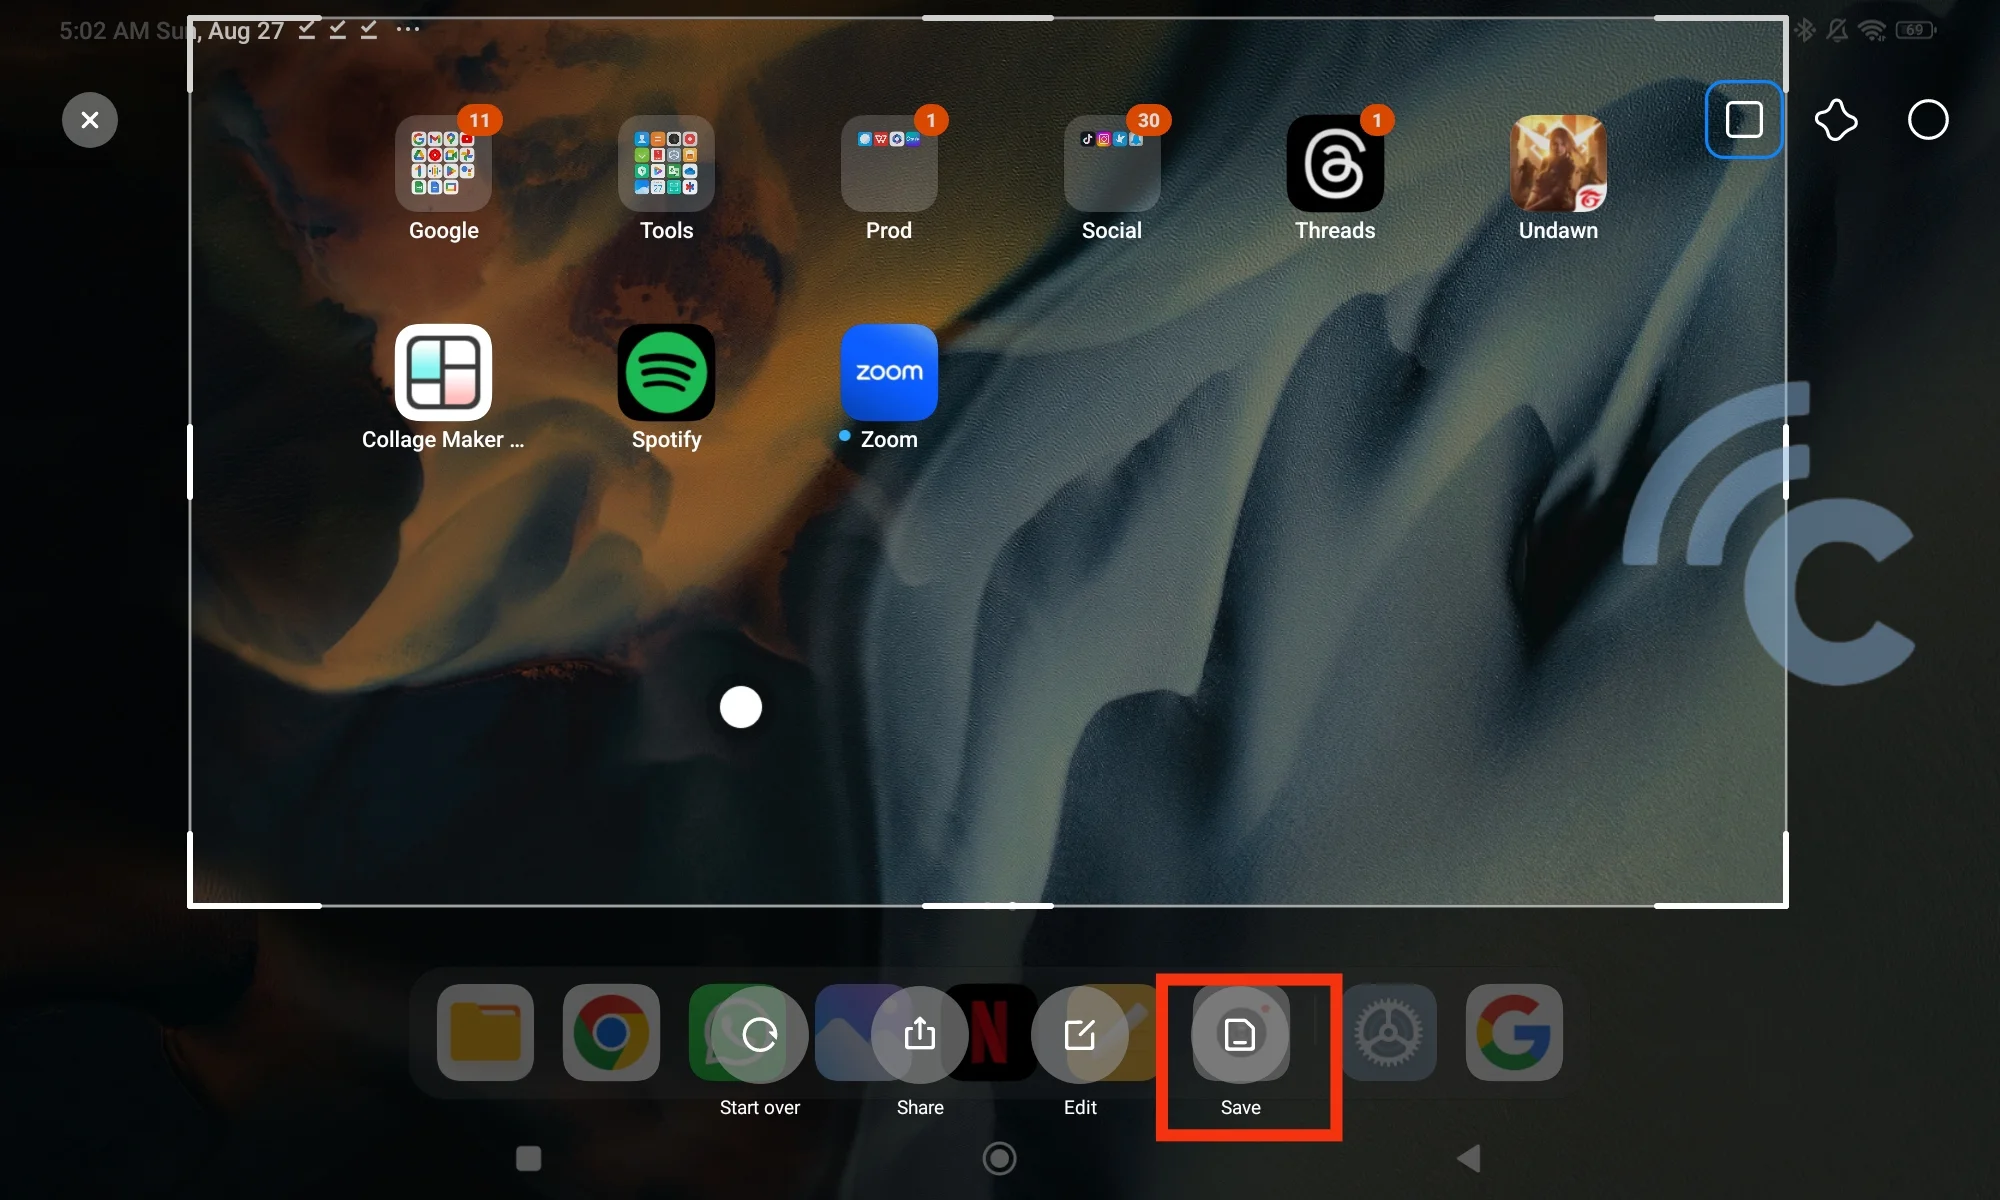
What's interesting is that you can customize the shape of your screenshot, whether it's circular, square, or even an abstract form. Once you're happy with the shape, simply click the Save button, and the screenshot will be saved directly to your gallery.
5. Taking a Long Screenshot
When dealing with long pages, you might find yourself taking multiple screenshots to capture the entire content, which results in several images. Instead of doing that, you can actually capture the entire page in one single long screenshot.
After taking a screenshot using any of the methods we've covered, a notification will typically appear in the top corner of the tablet screen. At the bottom of this notification, you’ll find an option to take a long screenshot.
Before proceeding, make sure the content you want to capture is scrollable. Then, follow these steps:
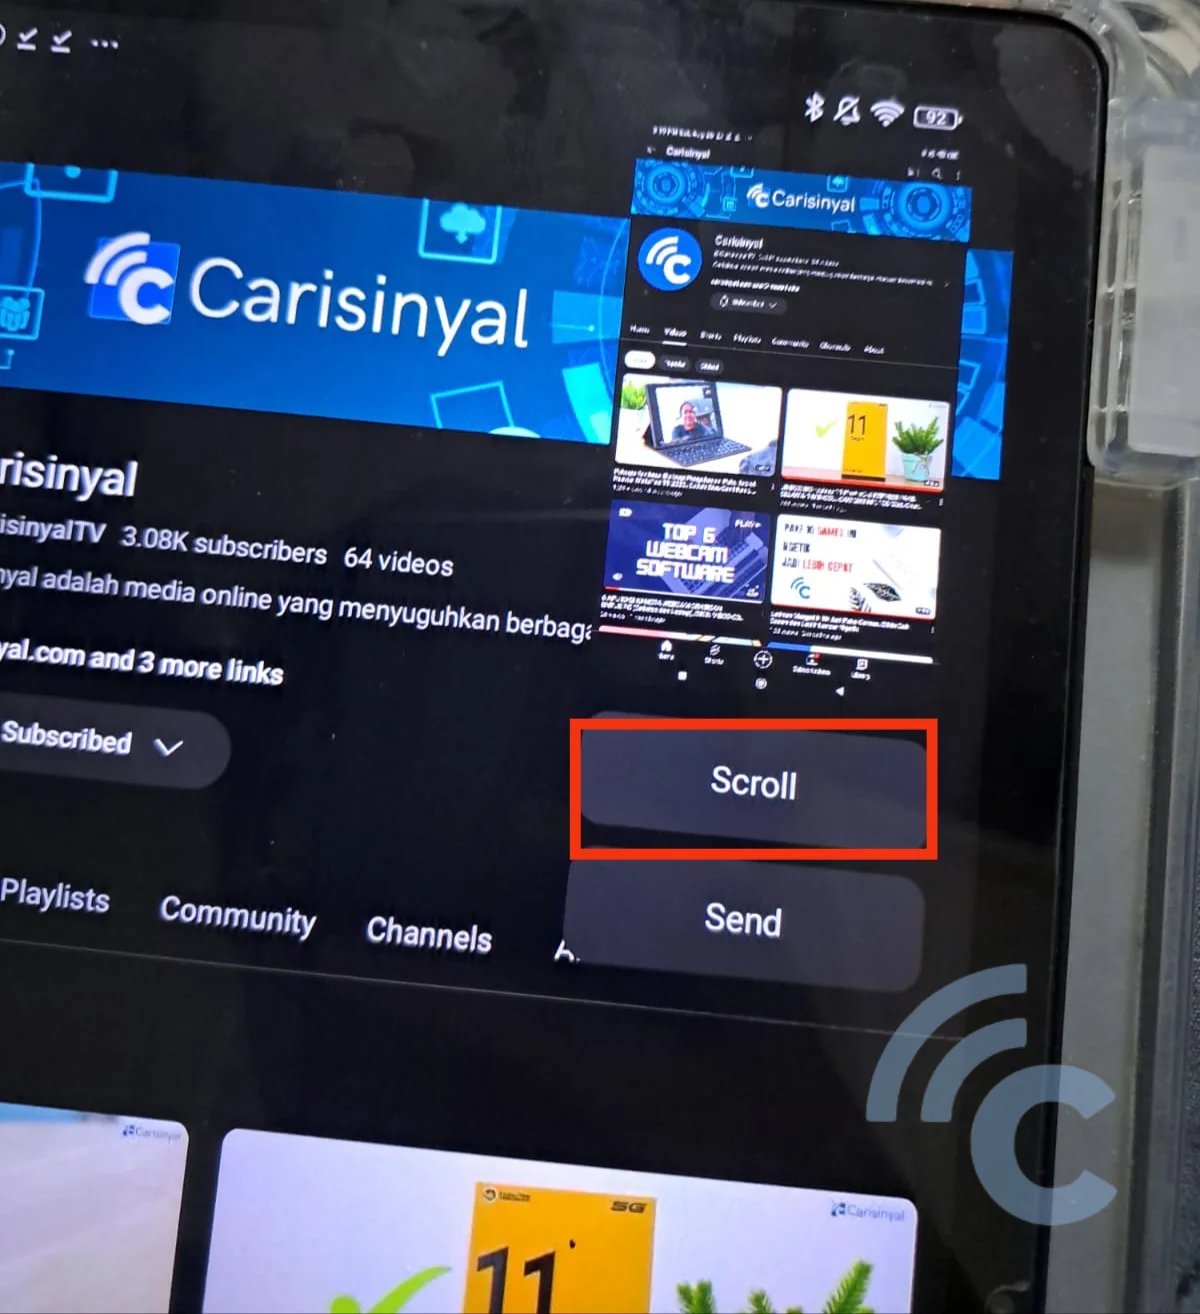
- Take a screenshot as usual.
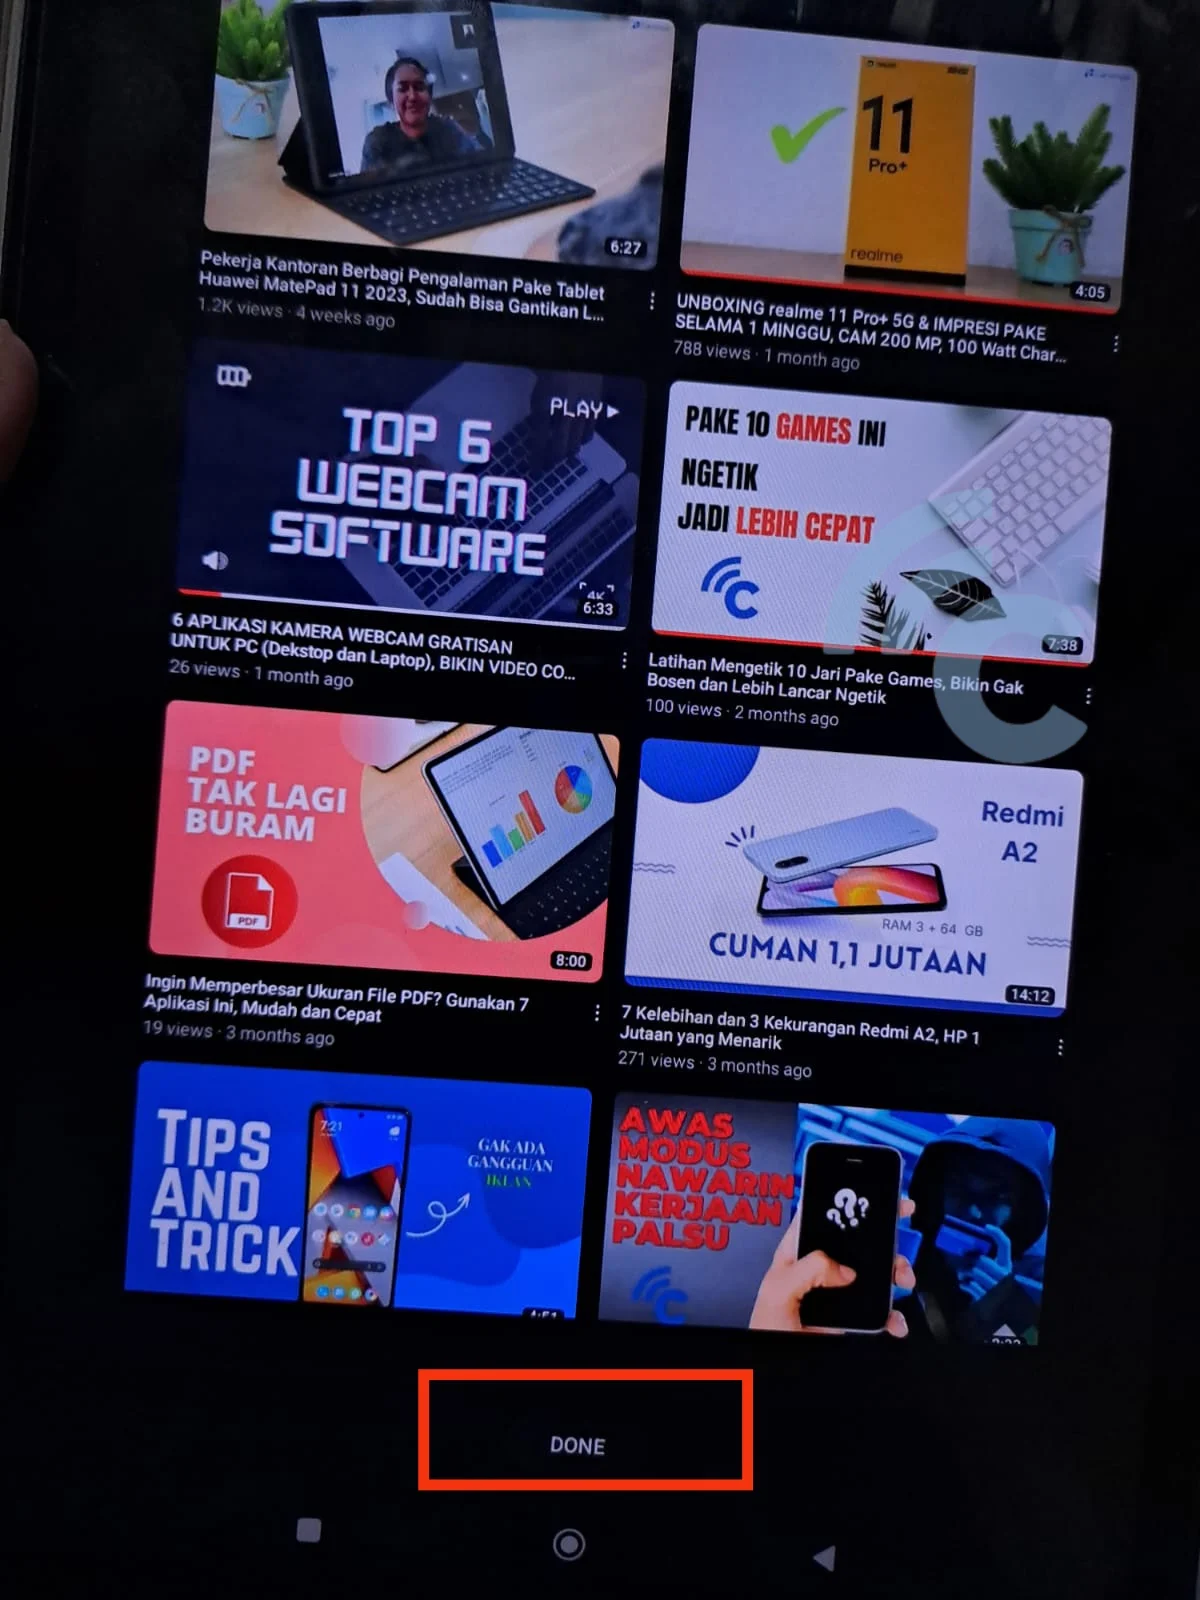
- When the screenshot notification appears, tap the Scroll button.
- Scroll down the screen until you reach the final part you want to capture.
- Once you’re satisfied, tap Done.
You’ll also find basic editing options, such as cropping the image to focus on what you want to highlight. Additionally, you can add text or apply effects to your screenshot.
That’s how you can take and edit screenshots on your Redmi Pad tablet. Give it a try!