
How to Stop Windows 11 Update
Windows 11 frequently updates its system, and the timing can be unpredictable. If these unexpected updates bother you, you can disable the auto-update feature in Windows 11. But be warned: turning off this feature means your computer won't get the latest features, system repairs, security improvements, etc. If you're okay with these risks and want to stop updates, here's how you can do it:
How to Disable Windows Update in Windows 11
There are several methods to stop Windows from auto-updating. This article presents four of them.
1. Using the Pause Update Option
A simple way to halt updates is by using the Pause Update feature. This won't stop updates forever but will pause them for a set duration. Please follow these steps:
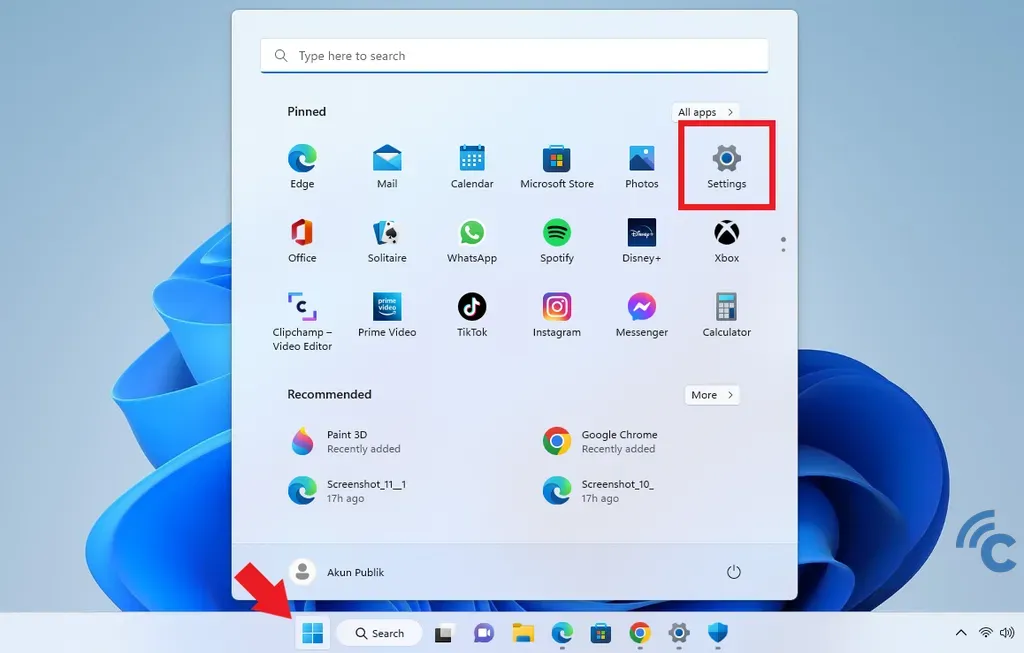
- Open "Settings" from the "Start/Windows" menu or use the search bar.
- Choose the "Windows Update" option at the bottom.
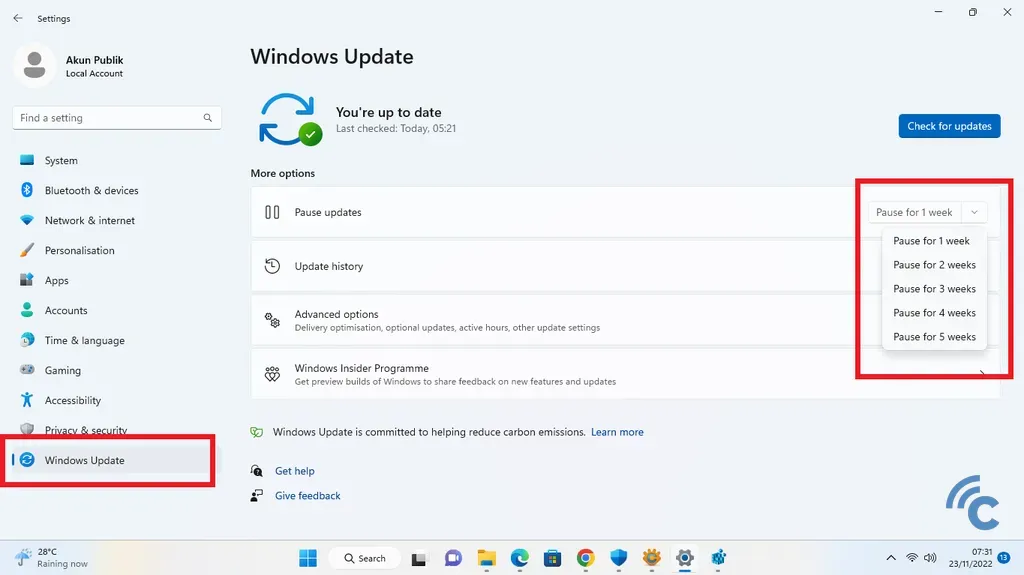
- On the right, under "Pause update," you'll see options to pause updates from 1-5 weeks.
- Once set, updates will pause for your chosen time. You can restart them whenever you choose.
2. Using Metered Connection
Another method to stop automatic updates is through the Metered Connection option. This can be found in the Settings menu. Here's a step-by-step guide:
- Begin by opening "Settings" from the "Start/Windows" menu.
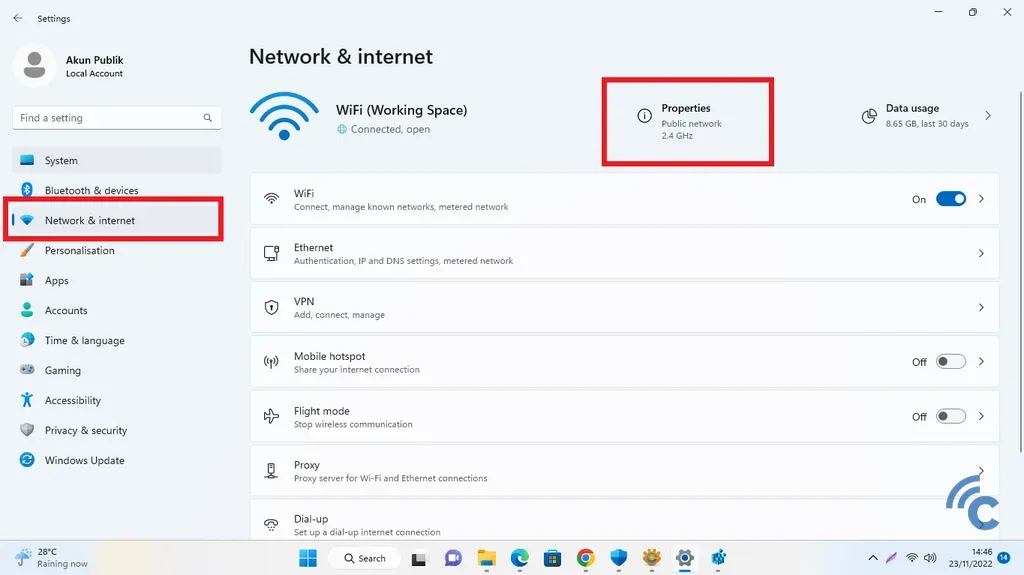
- Next, choose the "Network & Internet" option.
- Within "Network & Internet", click on "Properties".
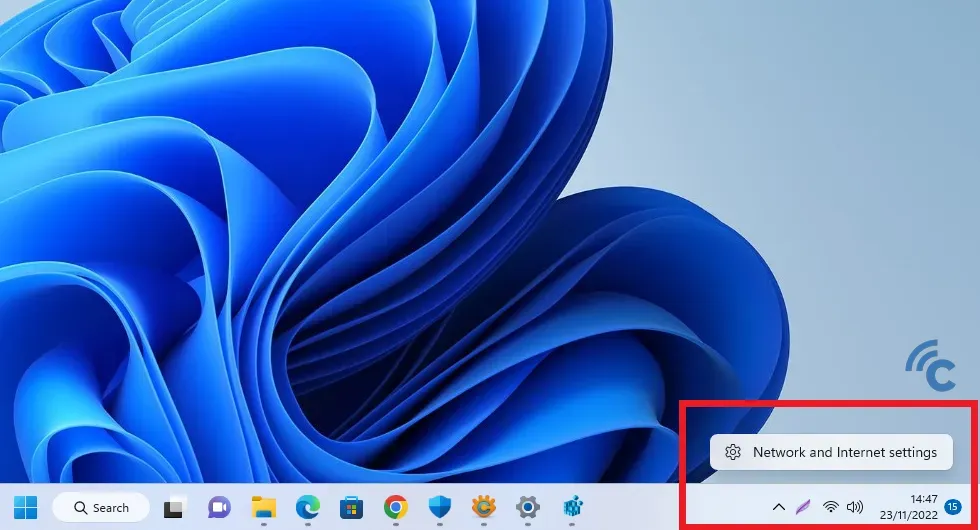
- Alternatively, you can quickly access "Network & Internet" settings by right-clicking on your internet connection icon in the taskbar and selecting "Network & Internet settings".
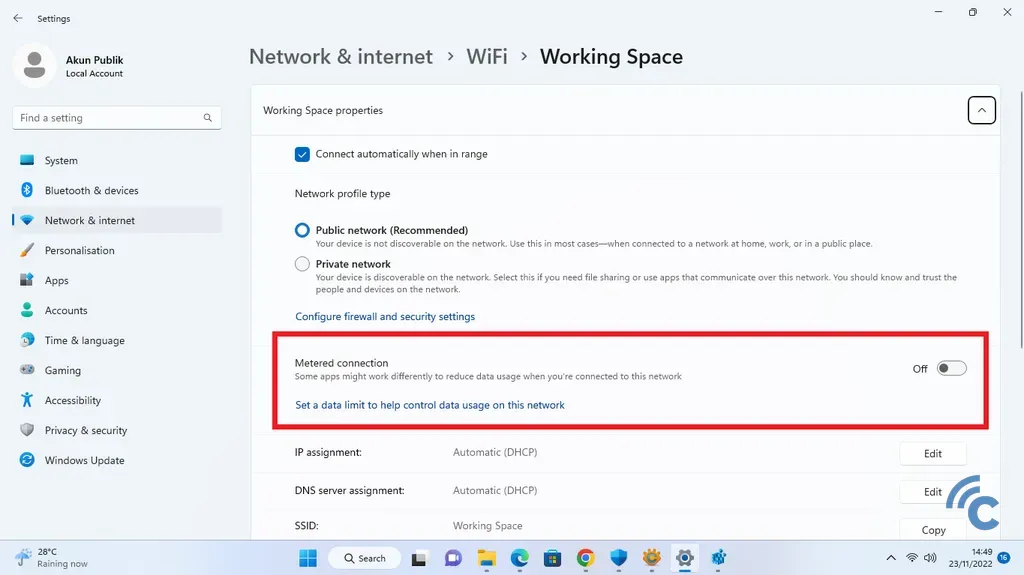
- In the settings, find the "Metered connection" section and switch the toggle on the right side to the blue position to activate it.
Once done, your Windows 11 system won't automatically download updates. If you wish to reverse this, simply switch the toggle back to the Off position.
3. Using Regedit
You can also halt Windows 11 updates by using the Registry Editor (Regedit). This method essentially forces the updates off. Here are the detailed steps:

- Start by searching for "Regedit" or "Registry Editor" in the search bar.
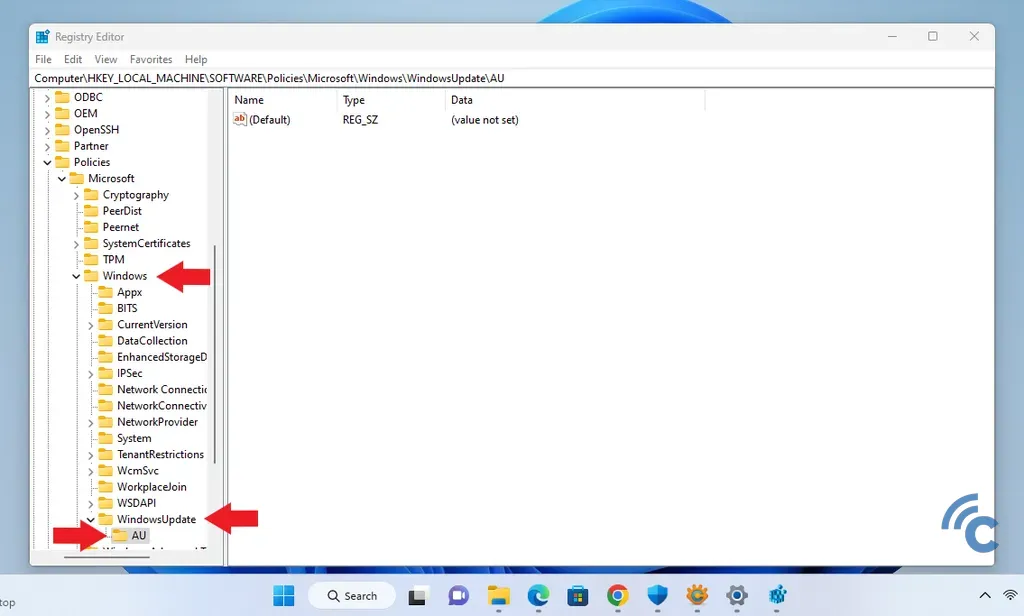
- Once Regedit is open, navigate to HKEY_LOCAL_MACHINE > SOFTWARE > Policies > Microsoft > Windows.
- In the Windows directory, right-click, choose "New" > "Key", and name it "WindowsUpdate".
- Repeat for the WindowsUpdate directory: right-click, select "New" > "Key", and label it "AU".
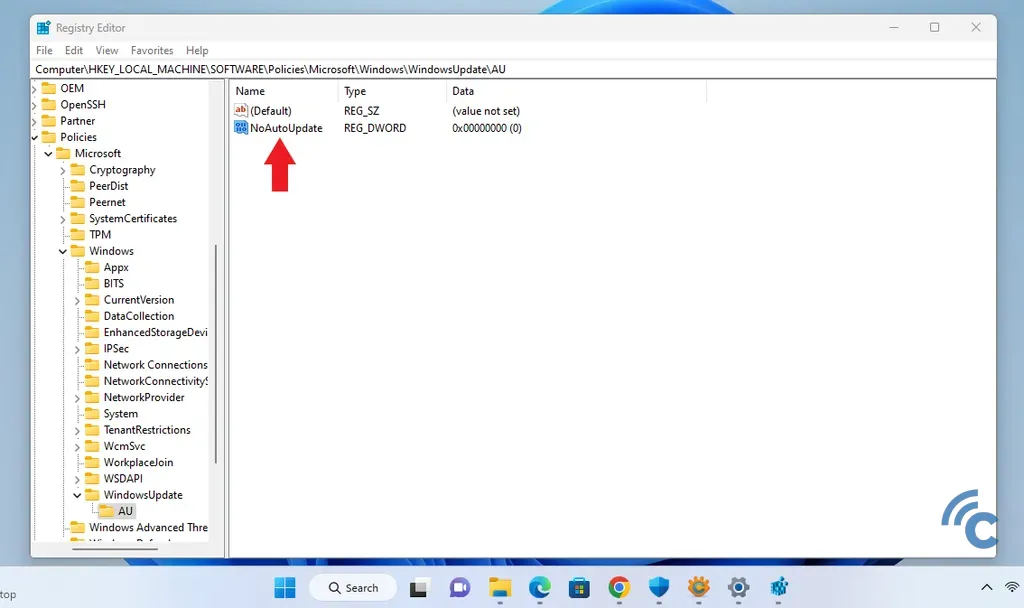
- Within the AU directory, right-click, choose "New" > "DWORD (32-bit) value", and name it "NoAutoUpdate".
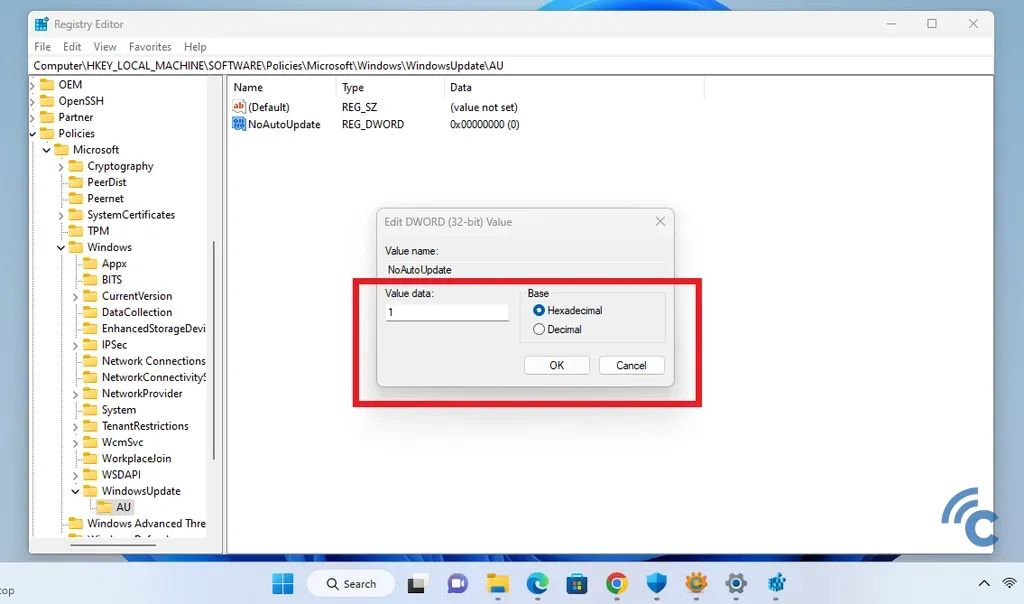
- Next, right-click on the "NoAutoUpdate" file, pick "Modify", and set the value to "1" using the "Hexadecimal" option.
Once done, restart your computer. Afterwards, Windows 11 will no longer auto-update.
4. Using Command Prompt (CMD)
You can also stop Windows 11 updates using the Command Prompt (CMD). While CMD in Windows 11 functions similarly to its predecessors, it comes with enhanced features. Follow these steps for clarity:
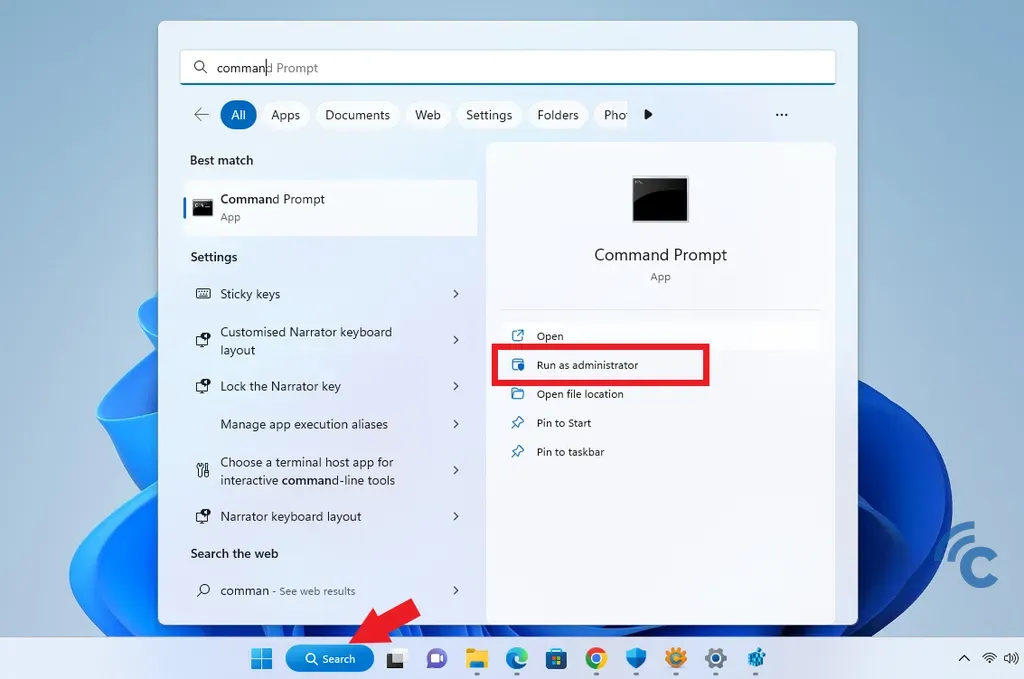
- First, open the Command Prompt by typing "Command Prompt" in the search bar and choosing "Run as administrator".
- Once open, sequentially type in "net stop wuauserv", "net stop bits", and "net stop dosvc", pressing Enter after each command.
- If done correctly, you'll receive a "Successfully stopped" message for each command.
This will stop Windows 11 from auto-updating. If you wish to turn the updates back on later, repeat the process but replace "stop" with "start" in the commands.
In conclusion, those are some techniques to disable the auto-update function in Windows 11. Before doing so, ensure you're aware of the potential risks and consequences as mentioned earlier. Best of luck!