
How to Delete and Merge Hard Disk Partitions
When you buy a new laptop or PC, technicians at the store often help set things up by installing essential software and adjusting a few system settings.
One common setup they perform is splitting the hard disk into three partitions: drive C for the system, drive D for data, and drive E for entertainment. These partitions are intended to help users organize their files more efficiently.
However, not everyone feels the need for three separate partitions. Some users prefer to keep things simple with just two: one for the system and programs, and another for storing personal files. As a result, they might want to delete one of the existing partitions.
Reducing the number of partitions isn’t only about personal preference, it can actually improve performance.
Each time you create a partition, the system reserves space for that division, which slightly reduces the total usable capacity of your hard drive. This reserved space acts as a boundary between partitions, and while it may seem small, it can add up.
Another issue that often comes up with hard drives is fragmentation. The more you use your drive and the more files you store on it, the more likely it is to become fragmented, which can slow down performance.
While defragmenting your drive regularly can help, having multiple partitions means you’ll need to run the defragmentation process separately for each one.
More partitions also mean data can be scattered across distant memory blocks, making it take longer for your hard disk to locate and open files.
So, now you know why having fewer partitions can be beneficial. Let’s move on to how you can delete an existing partition and merge the unused space into another one. Don’t worry, this process is safe, and it won’t delete any files from the partitions you keep.
Essentially, what you’ll be doing is removing one of the partitions, which will free up some unallocated space. You can then merge this space with another partition of your choice.
The good news is, you don’t need any third-party apps to do this. You can use the built-in Disk Management feature on Windows. Just make sure to back up any important data from the partition you want to delete, preferably to an external hard drive or other storage device.
Here’s how to do it:
1. Open Disk Management

The quickest way to access Disk Management is by pressing Windows + X on your keyboard. A menu will pop up, select Disk Management from the list.
Alternatively, you can use the search bar in the Start menu. Just type Disk Management, then press Enter.
2. Delete the Partition You Want to Merge
Before moving forward, make sure you’ve backed up or transferred all the data from the partition you plan to delete. This step is important to avoid losing important files permanently.
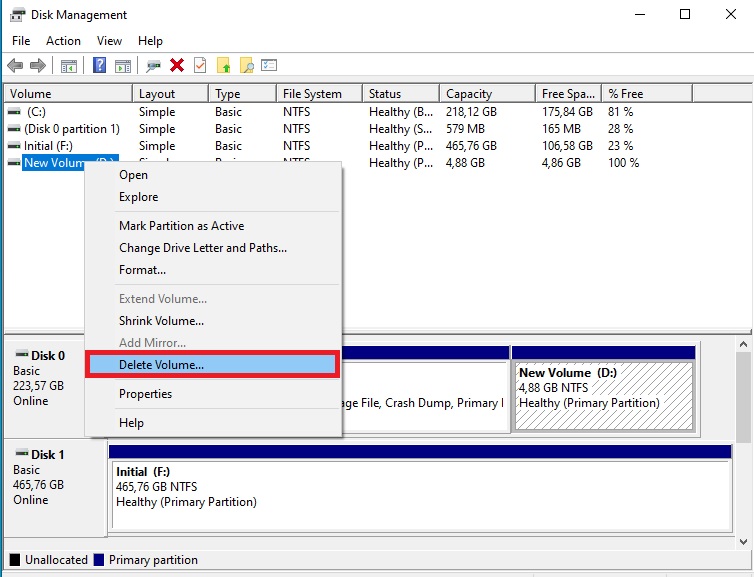
Once your data is safely stored elsewhere, go to the Disk Management window and locate the partition you want to remove. Right-click on it, then select ‘Delete Volume’ from the menu.
A warning message will pop up, reminding you that this action will erase all data on the selected partition. If you're sure, confirm by clicking ‘Yes’ to proceed.
3. Merge the Partitions
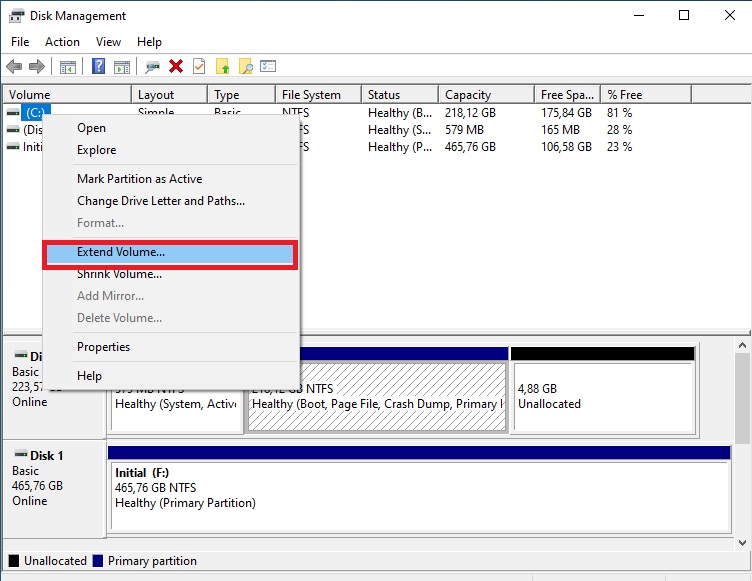
After deleting the partition, you’ll see an empty area labeled ‘Unallocated Space’. This is the space you can now merge with one of your remaining partitions.
To do this, right-click on the partition you want to expand, usually your main data or system partition, and choose ‘Extend Volume’ from the menu.
This will launch the Extend Volume Wizard, which will guide you through the process. Click ‘Next’ to continue.
4. Specify the Space to Add
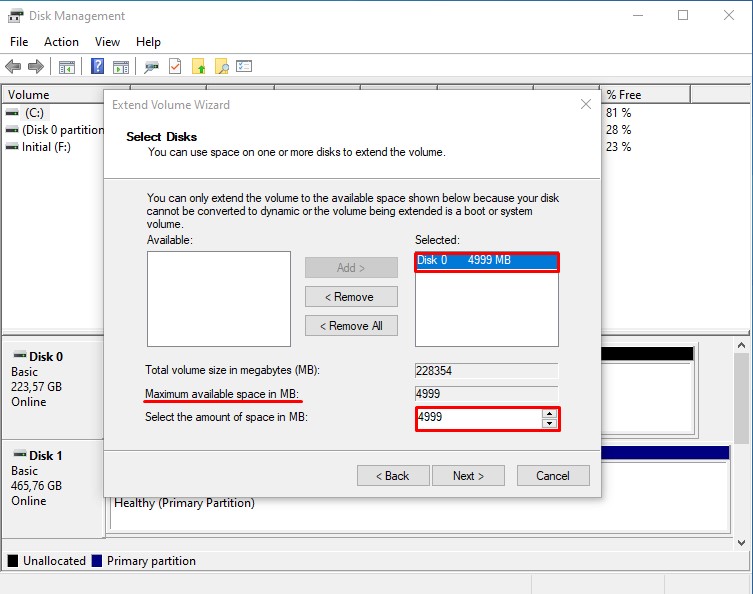
On the next screen, you’ll be able to choose how much of the unallocated space you want to add to your selected partition.
Windows typically selects the entire available unallocated space by default. If that works for you, simply click ‘Next’ to continue.
Finally, a summary of the changes will appear. Review the details to ensure everything looks correct, then click ‘Finish’ to complete the process.
5. Verify the Merging Results
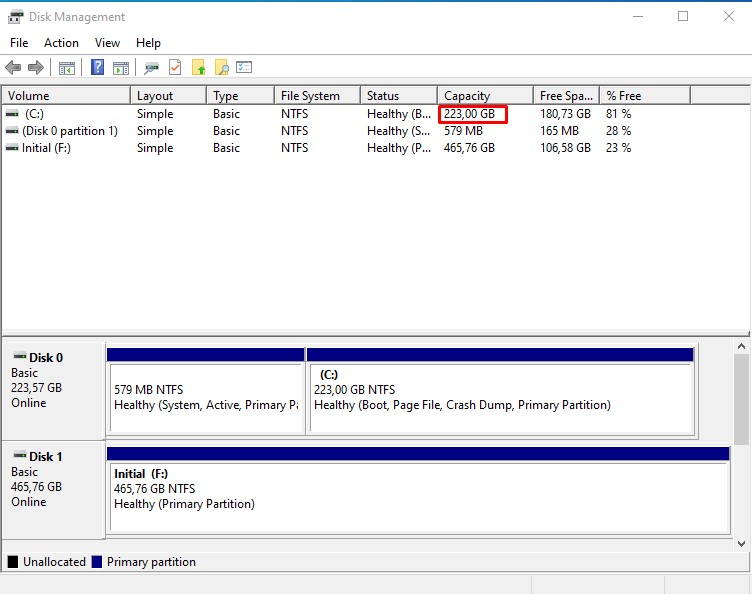
Once you click the ‘Finish’ button, Disk Management will begin the merging process. This typically takes just a few moments. When it’s done, you should see that the previously separate partitions have combined into a single, larger one.
To double-check, open File Explorer and look for the updated partition. You should notice that its storage capacity has increased, confirming that the merge was successful.
And that’s it, those are the steps to merge two hard disk partitions into one larger, more efficient partition on a Windows computer.
With the partitions merged, managing your files becomes simpler. You'll have more usable space and a smoother experience, without the hassle of switching between multiple drives.