
3 Ways to Fix a "Write-Protected" Errors on Flash Drive
Flash drives are important for many people, whether for backing up data or transferring files between laptops.
However, using a flash drive isn’t always smooth. Sometimes, it may not be recognized, or worse, it becomes write-protected, preventing you from adding or deleting files.
If you're facing a write-protection issue, don’t assume your flash drive is damaged. There are simple ways to fix it. Here’s how:
1. Using CMD
One of the easiest solutions is formatting the flash drive using CMD (Command Prompt). You don’t need any technical expertise to do this—just follow these steps:
1. Open CMD
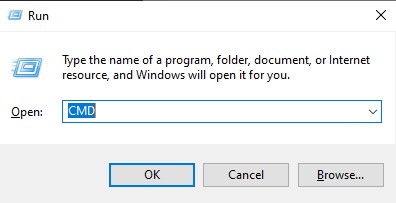
First, plug your flash drive into a USB port on your laptop or PC. Then, press Windows + R to open the Run dialog box. Type “CMD” and press Enter to launch the Command Prompt.
2. Run the Diskpart Command
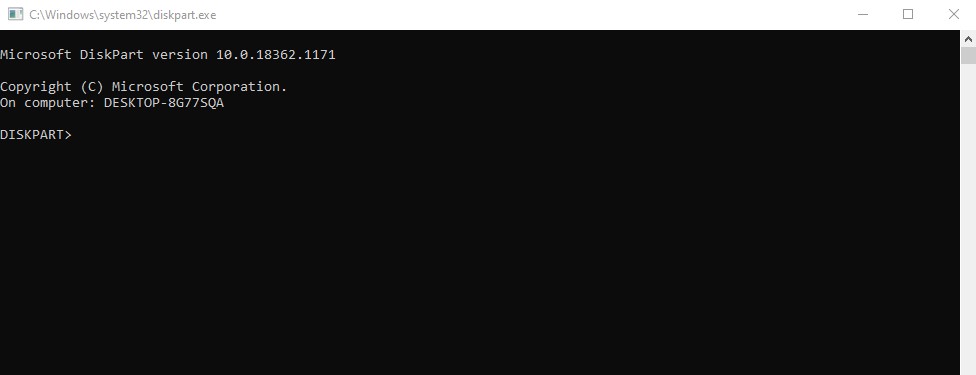
In the CMD window, type diskpart and press Enter. A notification will appear asking for permission—click Yes to continue.
3. Select the Flash Drive to Be Formatted
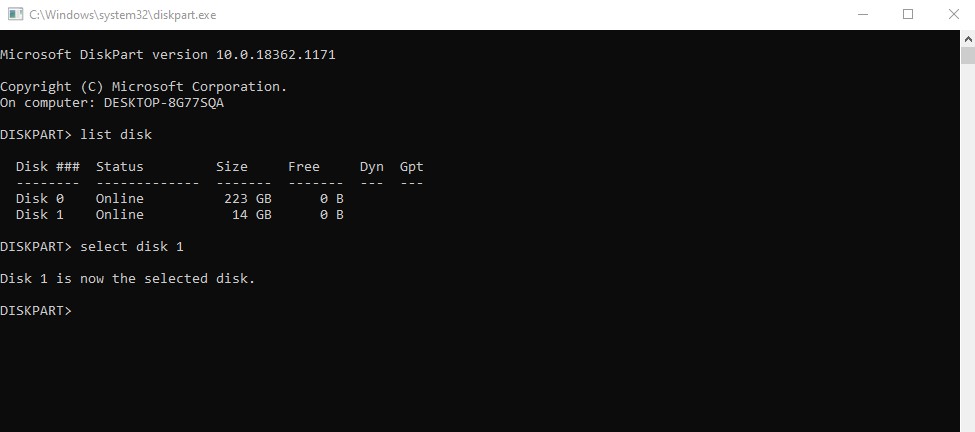
Once Diskpart opens, type list disk and hit Enter. This will display all the storage devices connected to your computer.
Find your flash drive from the list. If it appears as Disk 1, type select disk 1 and press Enter. If your flash drive has a different number, replace 1 with the correct number.
4. Remove the Read-Only Attribute
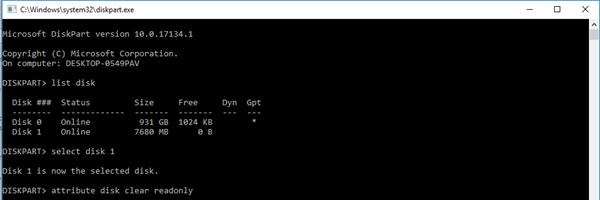
Now that the flash drive is selected, type attributes disk clear readonly and press Enter. This command removes the write protection, allowing you to store files again.
5. Erase All Data
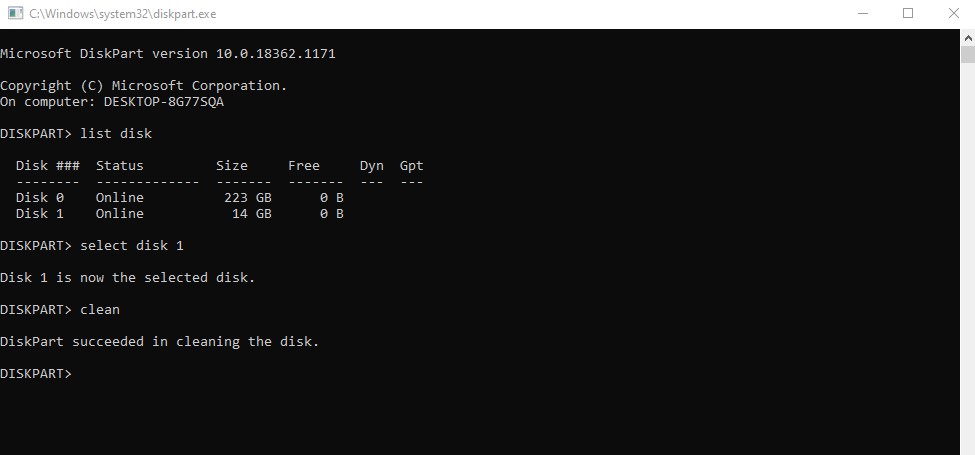
Next, type clean and press Enter. This will erase all data on the flash drive
6. Format the Flash Drive
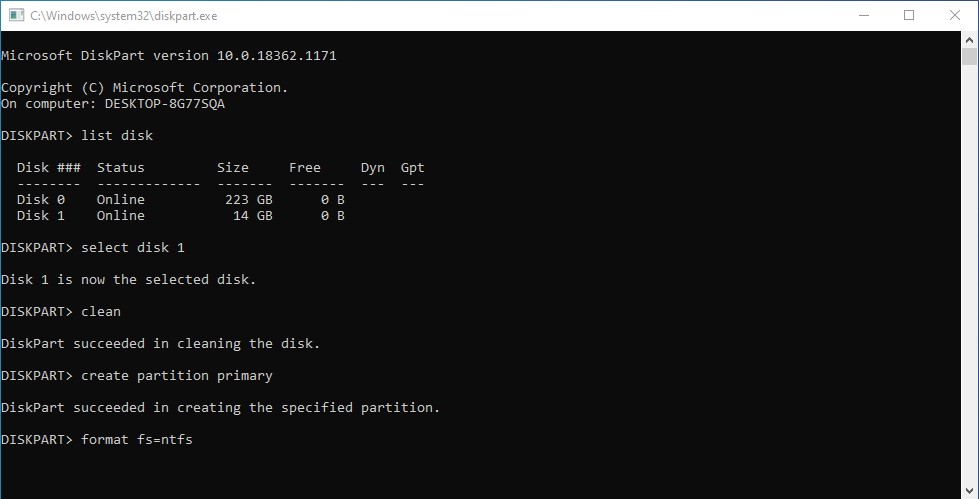
After cleaning the drive, type create partition primary and press Enter. Then, to format it, type format fs=fat32 and hit Enter once more.
That’s it! Your flash drive should now work normally without any write-protection issues. You can close CMD by clicking the “X” in the top-right corner. Pretty simple, right?
2. Using Registry Editor
If the first method using CMD doesn’t work or has no effect, you can try fixing the issue through Registry Editor. Follow these steps:
- Open the Registry Editor by pressing Windows + R on your keyboard.
- In the Run dialog box, type regedit and click OK, or simply press Enter.
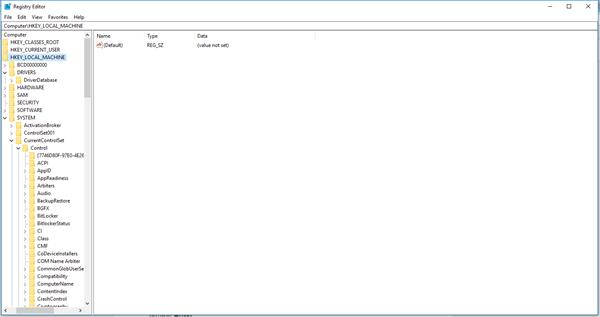
- Once the Registry Editor window opens, navigate to HKEY_LOCAL_MACHINE and click on it.
- Then, find and open the System folder.
- Inside the System section, locate and click on Control, then go to StorageDevicePolicies.
- Look for the WriteProtect option.
- Right-click on WriteProtect and select Modify.
- Change its value to 0, then click OK to save the changes.
- Finally, unplug your flash drive from the USB port, then plug it back in. Now, format the flash drive, and it should work normally again without any write protection issues.
3. Using an Application
In addition to the two methods mentioned earlier, another simple way to remove write protection is by using an application. However, you’ll need to install the software first.
Using an application is easier and requires fewer steps than the previous methods, but you’ll need to download it, and some applications may also require payment. Here are some good applications to fix write-protected flash drives:
1. Fat32
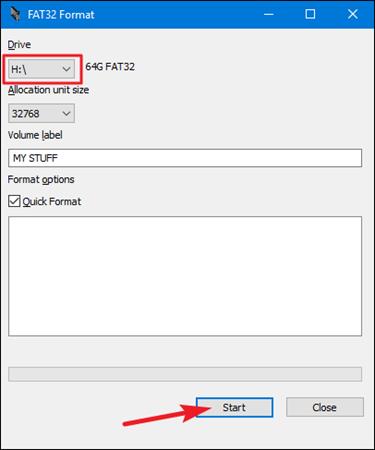
This application only works on PCs or laptops running the Windows operating system, so Mac and Linux users won’t be able to use it. Fixing a write-protected flash drive with Fat32 is very simple.
First, make sure you already have the application installed. If not, you can download it online. Once installed, open the application, select the problematic flash drive, and click Start. Fat32 will automatically remove the write protection and restore the flash drive to normal. Pretty convenient, right?
2. USB Write Protected
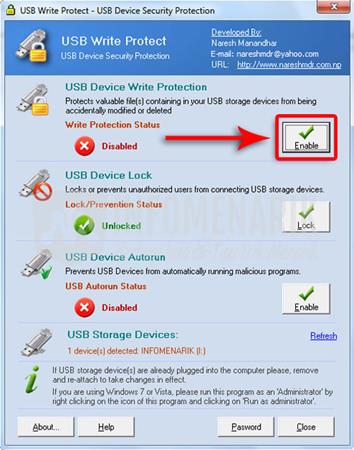
Another useful application for fixing write-protected flash drives is USB Write Protected. Just like Fat32, this tool requires only a few clicks to get your flash drive working again.
First, install the application. Then, right-click on the USB Write Protected icon and select Run as administrator.
Once the application opens, several options will appear. Select USB Device Write Protection, then click Disable in the USB Device Write Protection section. Done! Your flash drive has now been successfully repaired.
3. HP USB Disk Storage Format Tool
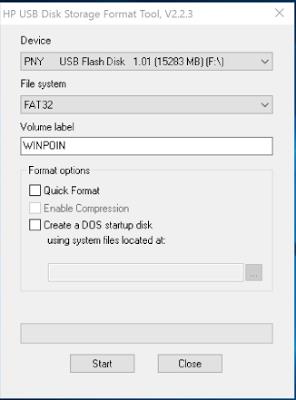
Another recommended application for fixing write-protected flash drives is the HP USB Disk Storage Format Tool. It works similarly to USB Write Protected and is easy to use, even for those unfamiliar with flash drive troubleshooting.
To use this application, right-click on it and choose Run as administrator. Then, select the flash drive and click Start.
Before proceeding, don’t forget to check the Quick Format option or select Create a DOS startup disk using system files located at (if needed).
Now, just wait for the application to complete the repair process. Easy, right? If you’re interested in using this tool, you can download it online and install it on a Windows laptop or PC.
These are some simple and effective ways to fix a write-protected flash drive. This issue is usually caused by several factors, such as removing the flash drive improperly or a virus infection. To prevent this, always be careful when plugging and unplugging a flash drive, especially on someone else’s computer. Hope this helps!