
How to Disable Sleep Mode on Laptops and PCs
Laptops are convenient work devices that offer numerous features, and one commonly used feature is sleep mode.
Sleep mode is typically designed to save power when the laptop hasn’t been used for a specific period. Besides conserving energy, this feature also helps prolong the durability of the laptop’s components.
However, not everyone finds this feature helpful. Many users find it frustrating when the laptop automatically enters sleep mode at inconvenient times—like during file downloads, while streaming videos, or other tasks.
What’s even more annoying is when the laptop goes into sleep mode before you’ve had a chance to save your work.
So, how can you prevent your laptop from sleeping while it’s in use? In this article, Carisinyal will explore several ways to disable the sleep feature. Check out the full guide below!
1. Through Windows Settings
You can easily adjust your computer's sleep settings directly through the Windows Settings feature. This allows you to specify when your computer enters sleep mode when it's not in use. Follow these steps:
- Click the Windows icon.
- Select the Settings button (gear-shaped icon).
- Go to the System menu.
- Choose the Power & Battery option.
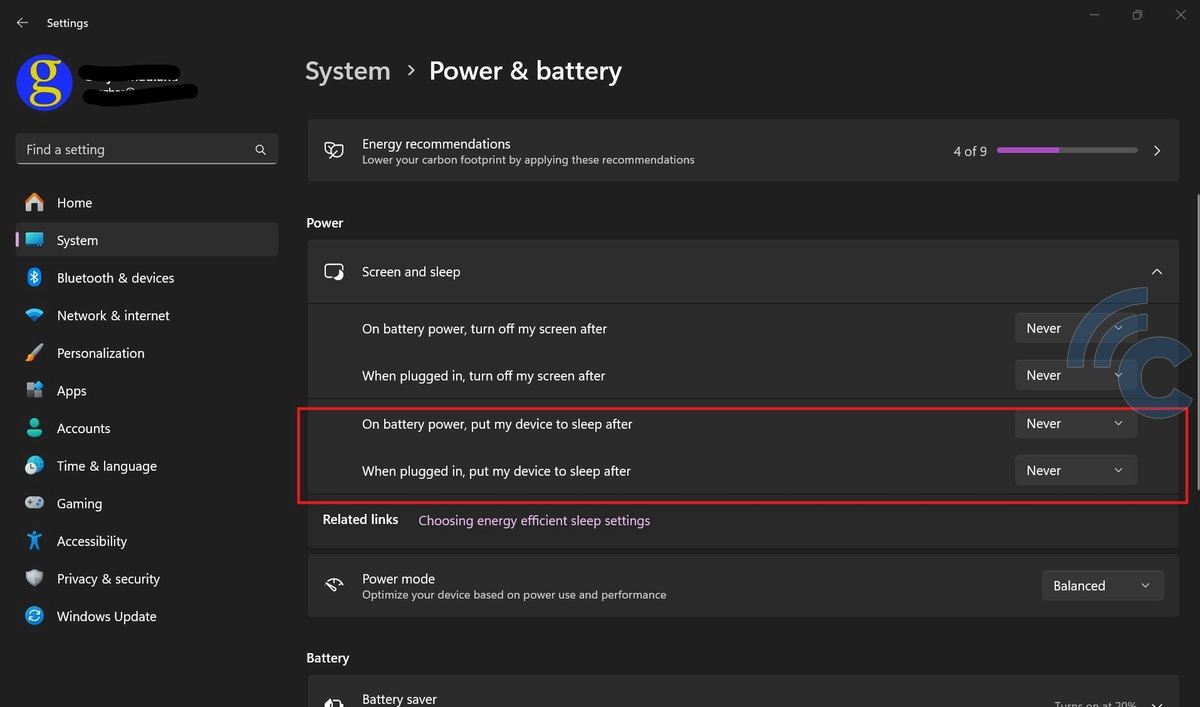
- Adjust the sleep settings in the Screen and Sleep section.
If you want your computer to stay on while using battery power, select Never in the "On battery power, put my device to sleep after" section.
To keep your computer on when plugged in, select Never under "When plugged in, put my device to sleep after."
Alternatively, if you simply want to delay or extend the time before the computer goes into sleep mode, choose your preferred time duration for each option.
2. Through Control Panel
Another way to adjust your sleep settings is by using the Windows Control Panel. This method is similar to the previous one but uses the classic Windows interface. Here are the steps:
- Open the Control Panel and go to Hardware and Sound > Power Options.
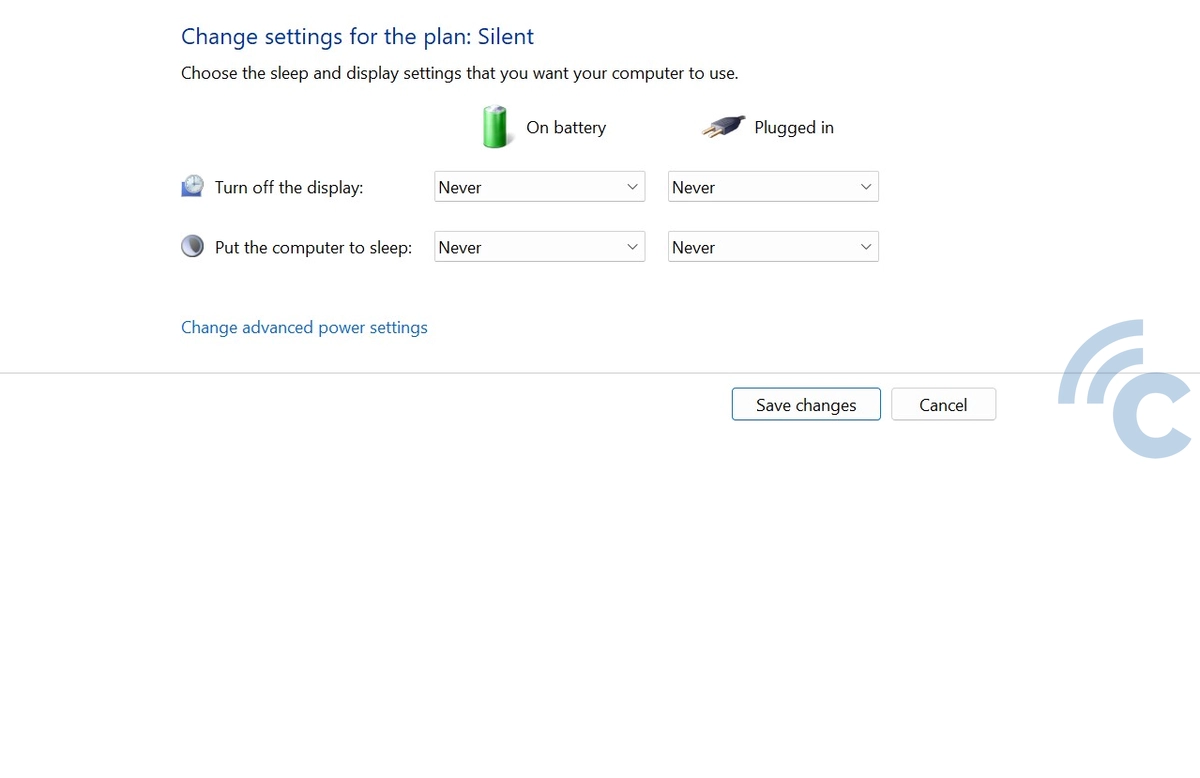
- Click on the Change when the computer sleeps menu.
- Under the Put the computer to sleep option, set the time duration to Never.
- Click Save changes to apply your settings.
For information, the “Put the computer to sleep” setting serves to set how long it takes to make the laptop switch to sleep mode. Selecting Never ensures that your laptop remains on and does not switch to sleep mode, even after extended periods of inactivity.
3. Using the Caffeine App
 Source: makeuseof.com
Apart from using the method above, there are several applications available to prevent your laptop or PC from automatically entering sleep mode. One recommended app is Caffeine, which works on both Windows and Mac operating systems.
Once you install the app, a coffee cup icon will appear in the system tray. You can activate or deactivate the app by simply double-clicking the icon.
If the coffee cup icon is full, it means Caffeine is active, and your laptop will not enter sleep mode automatically. The app also allows you to set how long it remains active.
By using these methods, you can keep your laptop from going into sleep mode. However, keep in mind that disabling sleep mode can lead to quicker battery drain and may cause your laptop's components to overheat or wear out more quickly due to continuous operation.