
5 Easy Ways to Fix Blurry Videos on Instagram
Instagram is a popular platform for sharing images and videos. To boost engagement, many users rely on video content. However, poor-quality videos can ruin the experience, making all your hard work in creating content seem wasted.
Even if you upload a high-quality video, it can sometimes appear blurry or pixelated. So, how can you ensure your videos stay clear when uploaded to Instagram?
To prevent your video editing efforts from going to waste, try these tips to maintain video quality when uploading. Let's get started!
1. Enable High Quality Upload Mode in Settings
The first step is to enable the highest quality media upload mode. With this mode activated, Instagram will upload photos and videos in their best quality without compressing them beforehand.
Keep in mind that enabling this mode will make the video upload process take longer, especially for larger file sizes. However, this isn’t an issue if you’re aiming for clear, high-quality videos.
On the same settings page, you can also disable the Data Saver feature. While this feature is designed to reduce data usage by lowering the quality of photos and videos displayed, it doesn’t affect the videos you upload. Disabling it ensures you can view all videos on Instagram in the best quality.
Here’s how to enable both modes:

- Open the Instagram app and tap your profile picture.
- Click the three stacked lines icon in the top right corner.
- Select "Data Usage and Media Quality."
- Toggle off the Data Saver option until it appears grayed out.
- Enable the "Upload at Highest Quality" option.
And that’s it! You’ve successfully turned off the Data Saver feature and enabled the highest quality media upload mode. Simple, right? To save data while uploading videos, it’s best to use an unlimited Wi-Fi network whenever possible.
2. Enable High Quality Upload Mode in Reels
In addition to adjusting the settings, you can also activate the high-quality upload mode specifically when uploading Reels. Enabling this feature ensures that Instagram prioritizes video quality during uploads, though it may take slightly longer.
If this feature is not enabled, the video quality will automatically adjust based on your current internet connection. Here’s how to enable it:

- Open the Instagram app.
- Tap the "+" button at the bottom to add a new Reel.
- Select the video you want to upload and tap Next.
- Edit your Reel as desired and tap Next again.
- Scroll down and select More Options.
- Enable the Upload at Highest Quality option.
Once this feature is activated, you can upload your Reel without worrying about Instagram reducing its quality during the upload process.
3. Use Video with 1080p Resolution
Instagram recommends uploading videos with a resolution of at least 720p and a frame rate of at least 30 fps to ensure clarity and avoid blurriness.
For the best results, aim for videos with a resolution of 1080p (Full HD) and a frame rate of 60 fps. This is the maximum resolution and frame rate that Instagram will use, making it the ideal choice for maintaining quality.
While you can upload videos with higher resolutions like 2K, 4K, or even 8K, Instagram will compress them down to 1080p, so recording in higher resolutions is unnecessary unless you plan to use the footage elsewhere.
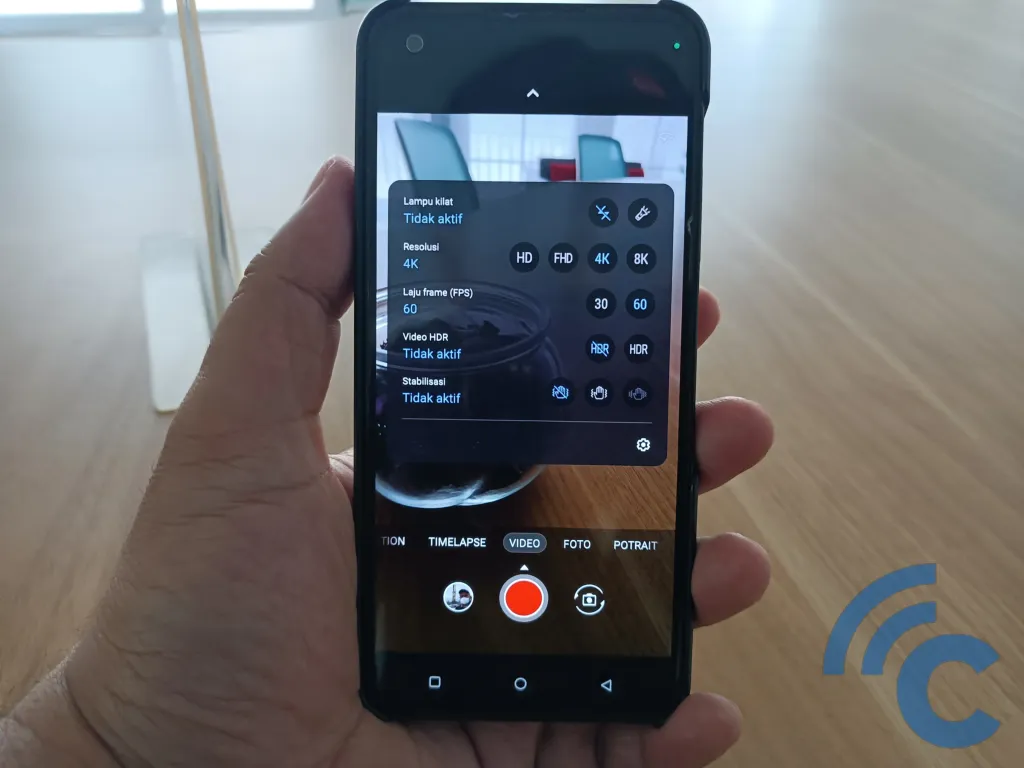
You can adjust the recording resolution and frame rate through your phone's camera settings. The steps may vary depending on your phone model, but typically, you can find these options in the camera settings menu, where you can choose the desired resolution and frame rate.
Once you’ve adjusted the settings, simply record your videos as usual and upload them to Instagram. Don’t hesitate to experiment with different camera settings to achieve the best video quality, as options may vary between devices.
4. Follow Instagram’s Video Format Requirements

Here’s something important to keep in mind: Instagram has specific requirements for the video format uploaded to their platform. If your video doesn’t meet these requirements, Instagram will automatically convert it to fit their standards.
This conversion process can sometimes reduce the quality of your video. To avoid this, it’s highly recommended to adhere to Instagram’s video format guidelines. By doing so, you can ensure your videos stay clear and maintain their quality when posted.
In addition to the minimum 720p resolution and 30 fps frame rate mentioned earlier, here are the other format requirements for videos uploaded to Reels:
- Aspect ratio: Between 1.91:1 and 9:16 (vertical is ideal for Reels).
- Video codec:
- Progressive scan (no interlacing)
- High profile
- 2 consecutive B frames
- Closed GOP (Group of Pictures) with a GOP of half the frame rate
- CABAC (Context-adaptive binary arithmetic coding)
- Chroma subsampling: 4:2:0
- Audio codec:
- Channels: Stereo or stereo + 5.1
- Sample rate: 96 kHz or 48 kHz
To meet these requirements, you can use a video editing or converter app to adjust and optimize your video. Once done, simply upload it to Instagram for the best results!
5. Update the App

Sometimes, poor video quality can be the result of using an outdated app. To ensure the best video quality, make sure your Instagram app is updated to the latest version. Updated apps often include bug fixes, and the poor quality of your video could be due to a bug in the older version of the app.
Updating Instagram is simple. Just open the Google Play Store (or App Store on iOS), search for Instagram, and if an update is available, you’ll usually see an Update button. Tap it and wait for the update to finish. Once done, open the app and try uploading your video again.
By following these steps, you can help maintain the quality of your videos when uploading to Instagram. This platform offers great opportunities for businesses and brands, as it helps increase reach and build brand awareness.
Presenting a low-quality video can harm your brand’s reputation and lead to audience disengagement. So, have you tried these methods? Or do you have other tips and tricks for maintaining video quality that you’ve found helpful?