
3 Easy Ways to Take Screenshot on HP Laptop
Taking a screenshot is an incredibly useful feature for capturing what's displayed on your computer or smartphone screen. Personally, when I'm working on articles, the screenshot feature is invaluable and thankfully, incredibly easy to use.
Screenshots allow us to save images of content from websites, documents, presentations, and applications we're using. They serve a multitude of purposes, from creating helpful tutorials and detailed reports to providing visual evidence.
The laptop I currently use is an HP, specifically the Hewlett-Packard 245 G7 model, equipped with an AMD Ryzen 3 3300U CPU and running Windows 11. On this setup, I find it remarkably straightforward to take screenshots without needing to install any extra software.
If you're also an HP laptop user and are curious about how to capture screenshots, you've come to the right place. In this article, I'll explain several straightforward and hassle-free ways to take screenshots on your HP laptop. Let's dive in and explore these methods!
1. Utilizing the PrtSc Button (via Snipping Tool)
This method is the easiest and most universally applicable way to screenshot on virtually any laptop, including those from HP. Furthermore, it's a feature supported by almost every version of Windows.
In some older versions of Windows, pressing the PrtSc button would copy the screenshot to the clipboard, requiring you to then paste it into an image editing application like Paint or Photoshop. This was the standard behavior in Windows 8 and 10.
However, in the latest iterations of Windows, this process has been significantly streamlined. Now, you can capture and edit screenshots directly, without needing to manually paste into separate image editing software. Simply follow these steps:
1. Press the PrtSc Button
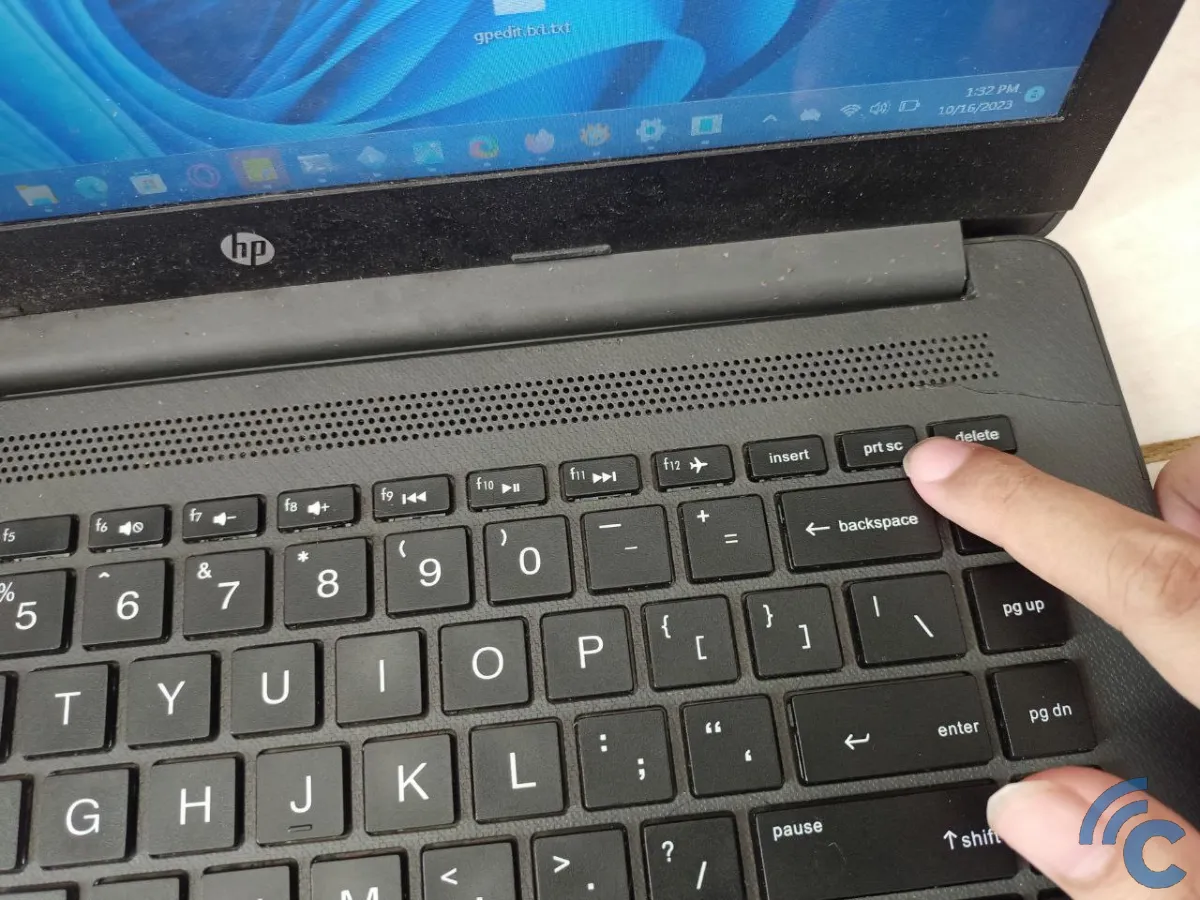
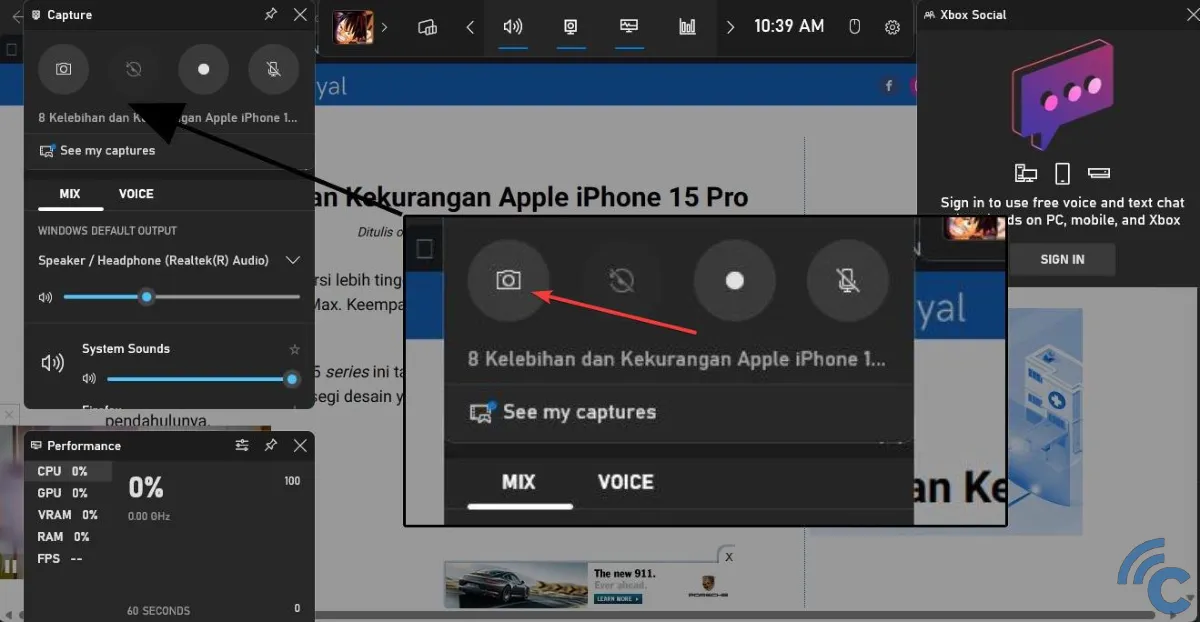
First, navigate to the screen you wish to capture. Then, simply press the PrtSc button on your HP laptop's keyboard.
You'll notice the screen brightness will subtly dim, and a small menu will briefly appear at the top of your display. Within this menu, you can select your desired "Snipping Mode" from the dropdown icon. The available options are: Rectangle, Window, Full Screen, and Free-form.
Rectangle: allows you to capture a rectangular portion of your screen.
Window: As the name suggests, this captures a specific window you choose, capturing the entire window content without manual selection.
Full Screen: Similar to Window Snip, but instead of being limited to a single window, this option captures the entire content visible on your screen.
Free Form: Offers the most creative flexibility. Like Rectangle Snip, it's used for partial screenshots, but instead of being restricted to a rectangular shape, you can draw any shape to define your capture area.
2. Select the Screenshot Area
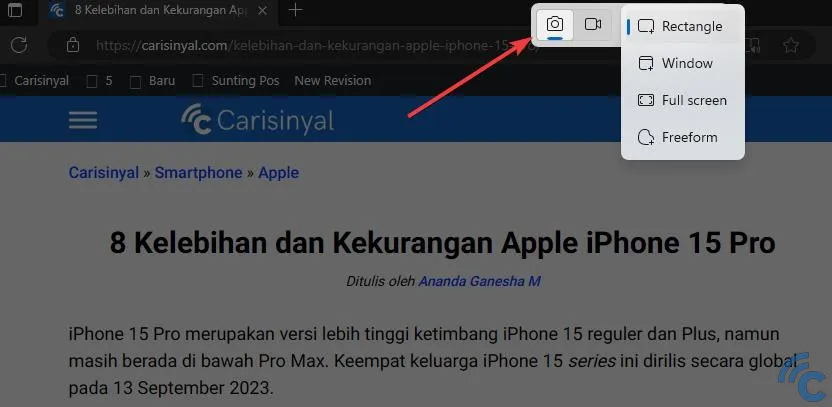
For this example, let's assume we're using the Rectangle mode. To proceed, simply drag your mouse (click and hold the left mouse button) over the area you want to screenshot. Adjust the selection by moving your cursor until the outlined area encompasses all the desired information, and then release the left mouse button.
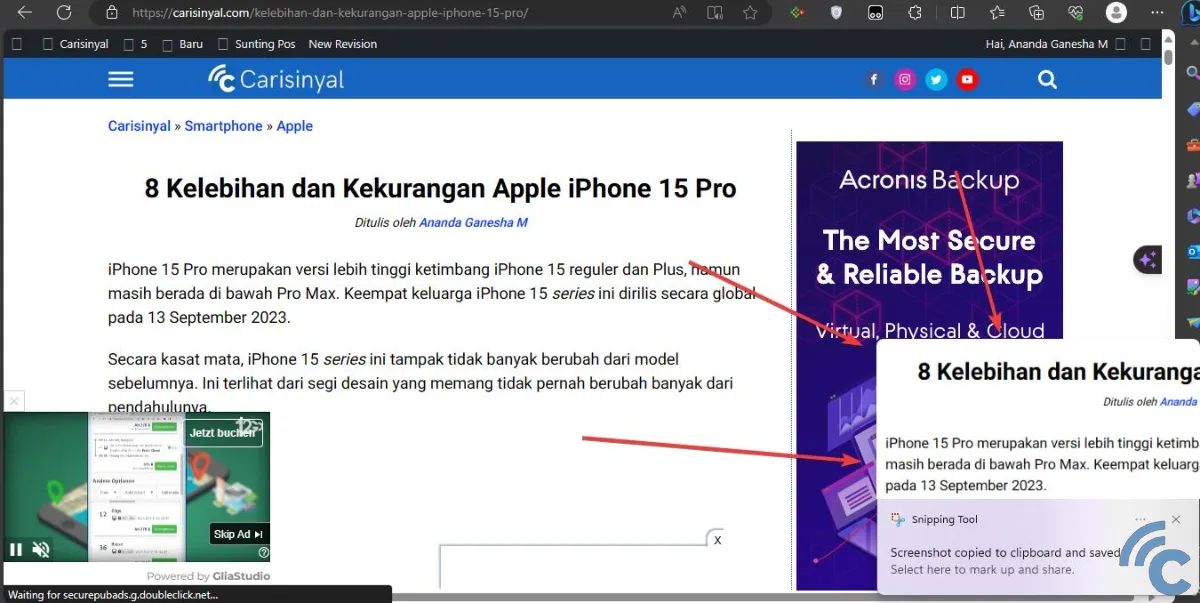
A preview of your screenshot will then pop up in the lower right corner of your screen, as illustrated in the image above. Click on this preview to open the screenshot directly.
3. Save Your Screenshot

The Snipping Tool application will then launch, displaying the screenshot you just captured.
Within this application, you have a range of editing options. You can add annotations using a pen or highlighter, use a ruler and protractor for precision, undo or redo actions, crop the image, or even transfer it to the Paint application for further editing. Once you've finished making any desired edits, simply click the "Save" icon.
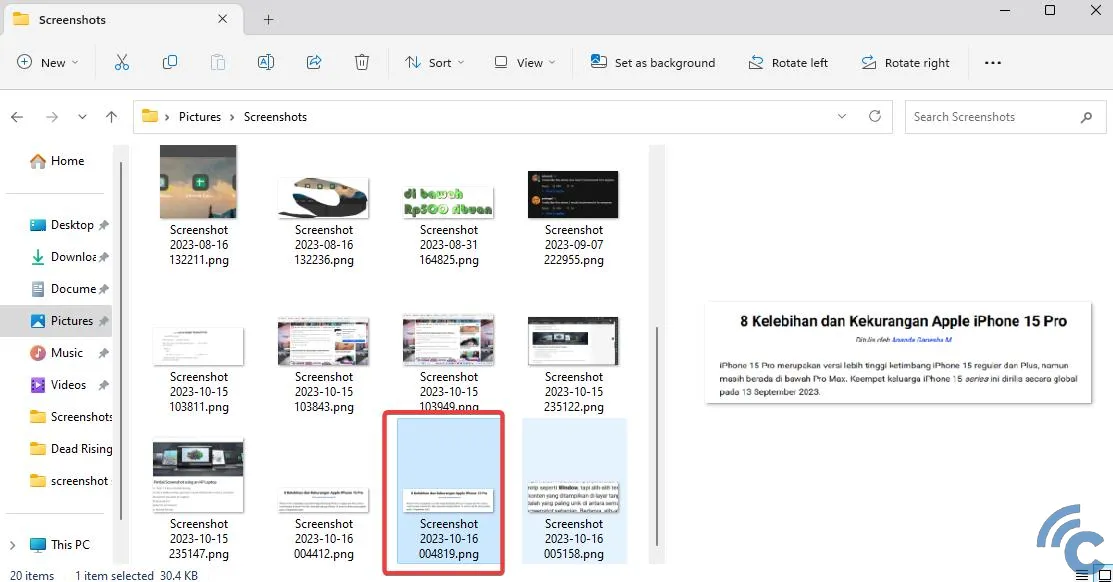
You can then locate your saved screenshot in the Pictures\Screenshots folder on your laptop.
This method offers an exceptionally easy way to take screenshots without needing any additional applications. A single press of a keyboard button brings up an intuitive interface, offering versatile capture options including partial screen, full screen, and window captures.
Note: If the PrtSc shortcut isn't working, you can still access the Snipping Tool application by typing "Snipping Tool" into the search bar in your Start Menu.
2. Using the Xbox Game Bar
If the previous method isn't suitable, or if your PrtSc button is unfortunately out of order, the Xbox Game Bar offers a second straightforward way to take screenshots. This method also relies on built-in Windows features, so you don't need for any third-party applications.
While primarily designed for capturing gameplay footage and recordings, the Xbox Game Bar's screenshot functionality can be effectively used outside of games as well. Here’s how:
1. Press the Windows Key + G
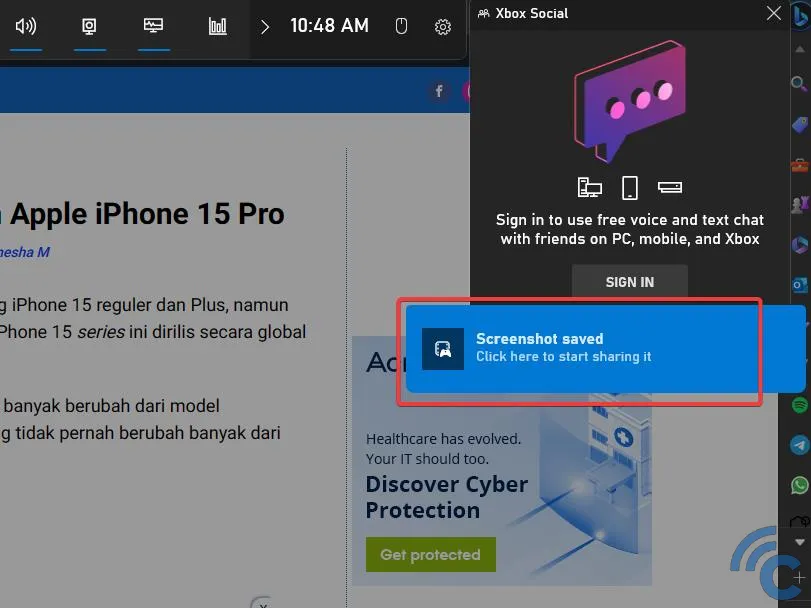
Navigate to the screen you wish to capture, then press the Windows key and the G key simultaneously on your keyboard. This will bring up the Xbox Game Bar interface. Click on the camera icon, usually located in the upper left corner of the Game Bar, as shown in the image above.
When the confirmation message "Screenshot saved" appears, you've successfully taken a screenshot. Click on this message.
2. Accessing Your Screenshot
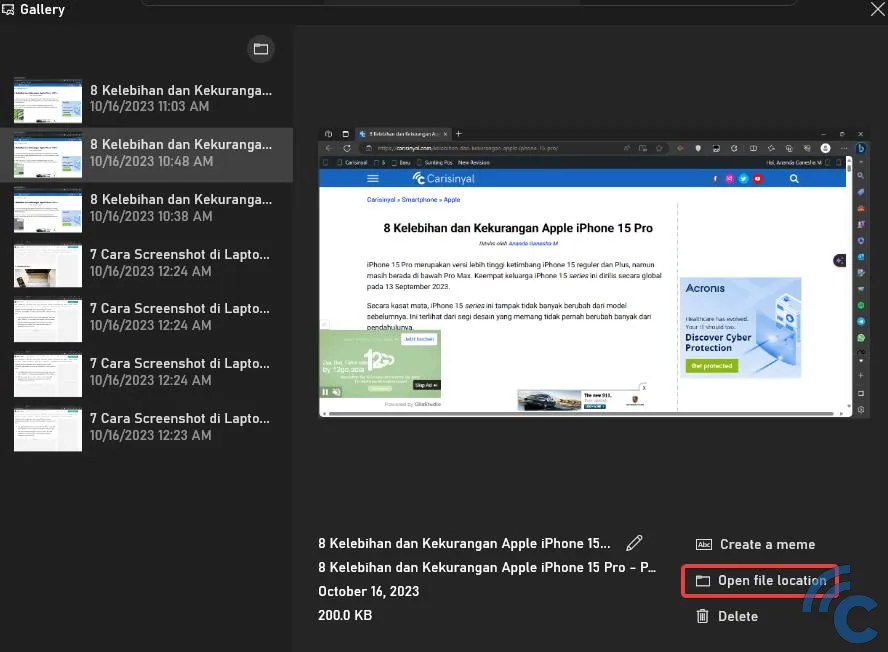
A gallery window will then appear, displaying your recently captured screenshot. To access the folder containing the image file, you can click "Open file location." Alternatively, you can manually navigate to the directory “C:\Users(your username)\Videos\Captures”.
While relatively simple, this method is less versatile than using the PrtSc button as it doesn’t offer options for capturing partial screenshots.
3. Utilizing Microsoft Edge
If the content you wish to screenshot is a webpage, Microsoft Edge, the default web browser on Windows, provides a built-in screenshot tool. This method isn't limited to HP laptops and will work on any Windows laptop with Microsoft Edge installed.
While other browsers like Mozilla Firefox also offer screenshot capabilities, using the pre-installed Edge browser avoids the need to install additional software. Here are the steps to use Edge's web capture feature:
1. Open Microsoft Edge
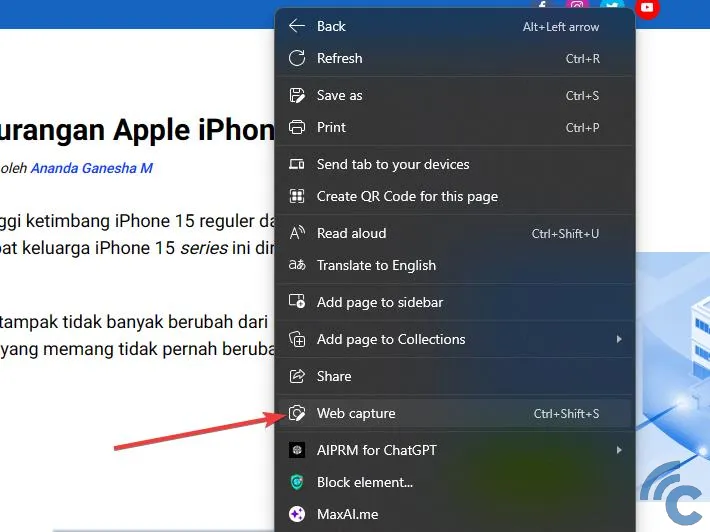
Launch Microsoft Edge and navigate to the webpage or PDF page you want to screenshot. Right-click anywhere on the page, and then select "Web capture" from the context menu.
2. Select Your Capture Mode
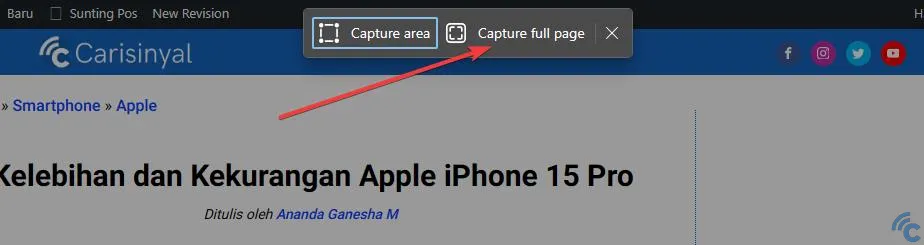
At the top of the browser window, you'll see two capture mode options: "Capture area" (for manually selecting a portion of the screen) and "Capture full page" (for taking a long screenshot of the entire webpage).
You can choose whichever option best suits your needs. For this example, let's focus on taking a long screenshot. Click "Capture full page."
3. Saving Your Screenshot
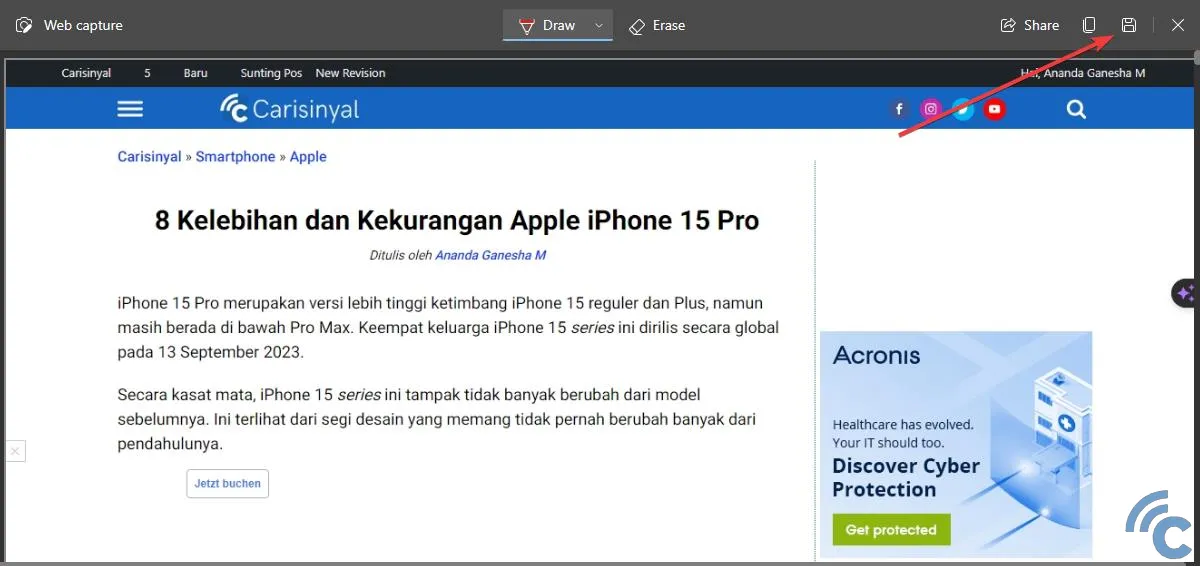
In the preview window that appears, click the "Save" icon, as indicated in the image above. The image file will then download and appear in your recent downloads. Click on the downloaded file to open your screenshot.
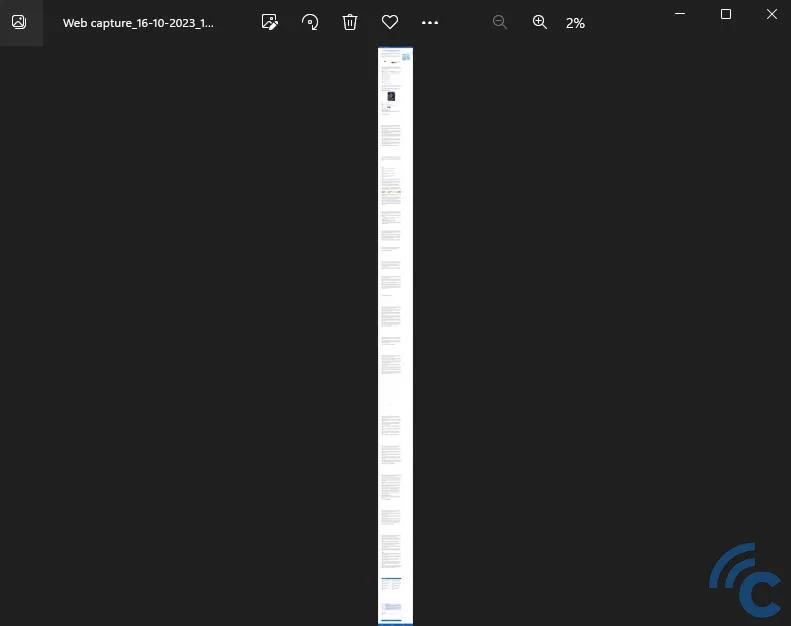
The image below shows an example of a full-page screenshot. If you zoom in, the text and content of the article remain clearly legible, just as they are when viewing the website directly.
Note: When using this method with a PDF file, the "Capture full page" option may not be available, and you may be limited to partial screenshots.
That concludes this guide on taking screenshots on an HP laptop quickly and easily. Hopefully, this article proves useful and helps you master screenshotting on your HP device. With these methods at your disposal, capturing screen content should now be a breeze!